
Touchscreen Replacement Guide for the P2S/X2D
Bambu Lab X2D • Série Avançada X2
Touchscreen Replacement Guide for the P2S/X2D
Touchscreen
🔎 Find the X2D Touchscreen in the Bambu Lab store.
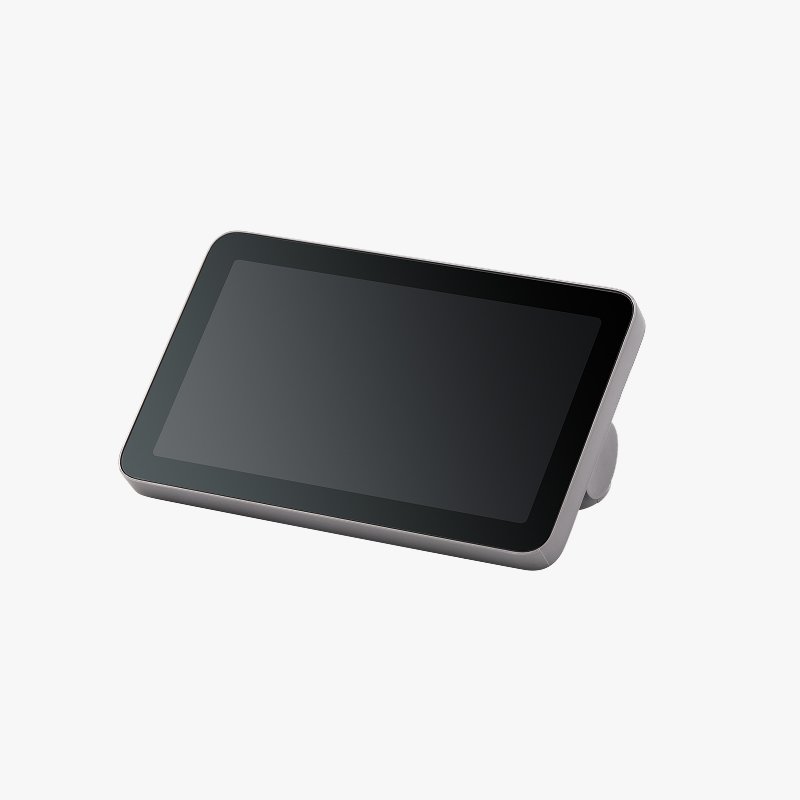
The P2S/X2D printer features a 5-inch touchscreen for controlling the printer and monitoring its status.
When to Use This Guide
- Damage to the screen glass
- The display has bright lines, flashes and other visual issues
- The screen appears solid black or white and does not display menus or other information
- The screen fails to properly register touch input
Caution:
The screens for the X2D and P2S are not interchangeable. Using the wrong screen may cause display abnormalities and printer malfunctions.
Required Tools and Materials
- One new 5-inch touch screen
Aviso de Segurança
IMPORTANT!
Always power off and disconnect power on the printer before performing maintenance work. Not doing so means there is a risk of electric shock, short circuit, and damage to the printer or surrounding area.
When a maintenance task necessitates the printer being powered on, use insulated gloves for safety and pay special care not to pinch, damage, or put pressure on any exposed wires, connectors, or circuit boards. Additionally, the nozzle can be extremely hot so never touch it with exposed skin.
If you have any questions or concerns related to the above or the steps in this guide, please open a new ticket in our Support Page for assistance.
Removing the screen
Passo 1: Unlock the Screen
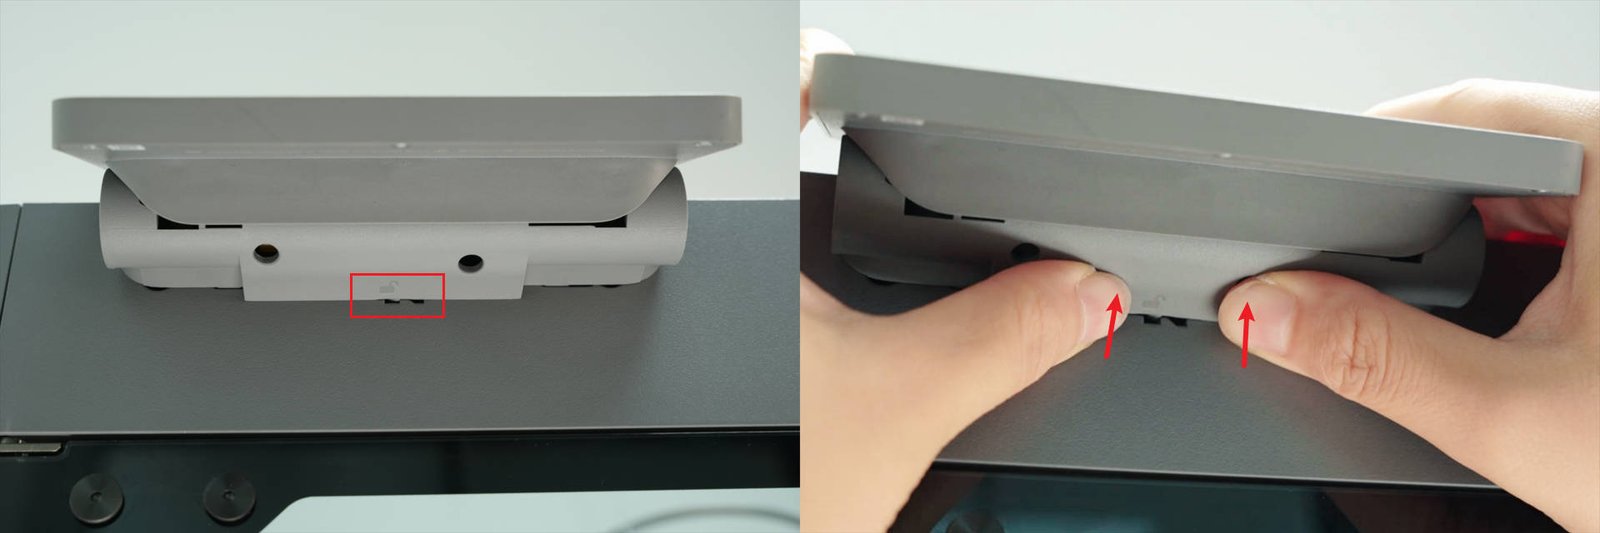
Turn off the printer’s power. Tilt the screen upwards and press on the unlock icon until the screen slides to the right and frees itself from the printer frame.
Passo 2: Disconnect the Cable
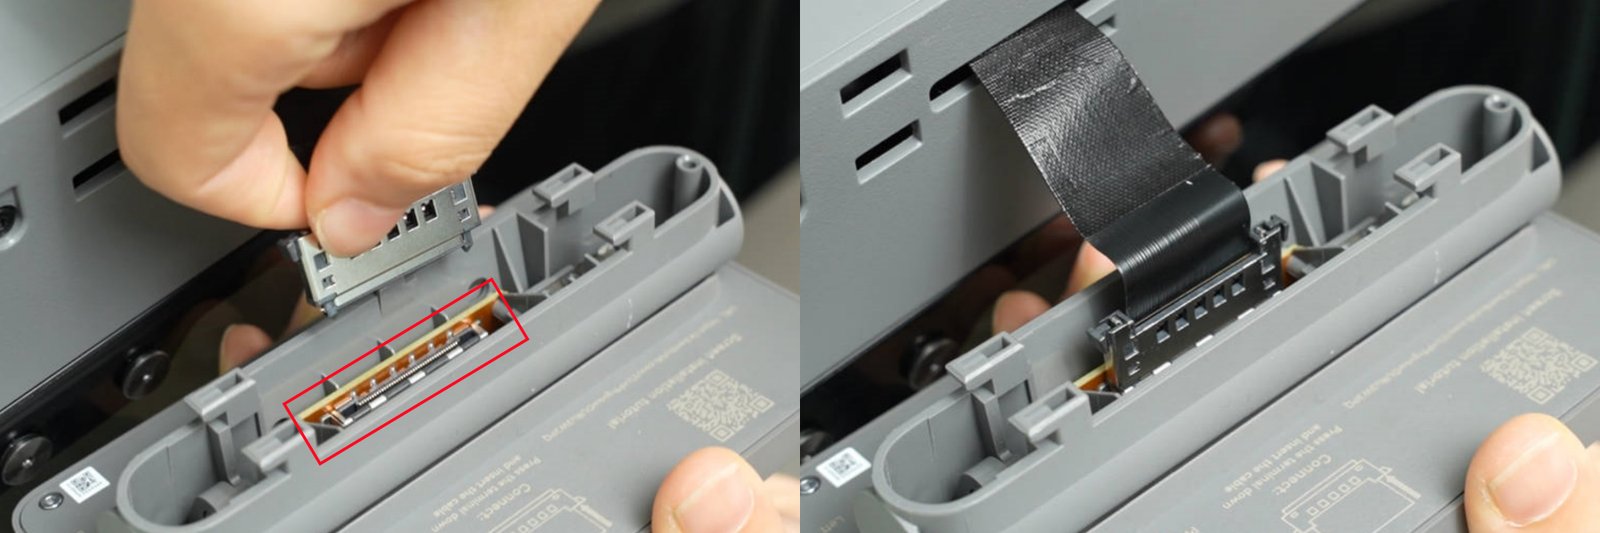
Remove the screen cable from the port behind the screen by pinching the sides to depress the buttons to release the locking mechanism.

Installing the Screen
Passo 1: Connect the Cable
Plug the screen cable into the port on the back of the new screen. Ensure the connector is fully seated and locked in place.
Passo 2: Install the Screen
Feed the excess ribbon cable into the frame through its slot and align the four locking tabs into their respective holes. Once inserted, move the screen to the left to lock it into place.

Verifying Success
Turn on the printer’s power. If the screen lights up, shows no abnormalities, and touch input is registered normally, the replacement is completed.
Notas Finais
We hope this guide has provided clear and practical support.
If the issue remains unresolved, please submit a support ticket and include your recent printer logs and additional pictures or other details. Our technical team will review your request and provide detailed assistance.
You can also visit Bambu AI, which can instantly answer common questions and provide you with operational guidance.


