
Auxiliary Part Cooling Fan – Left – Installation Guide for the P2S
Bambu Lab P2S • Série Performance P2
Auxiliary Part Cooling Fan – Left – Installation Guide for the P2S
Auxiliary Part Cooling Fan – Left
The Auxiliary Part Cooling Fan (Left) is a powerful 12W cooling fan, which is an optional accessory. Installed on the left side of the chamber, it provides better cooling conditions for high-speed printing.
When to Use this Guide
- Damaged fan blades
- Fan motor failure
- Abnormal fan noise
Required Tools and Materials
- Auxiliary Part Cooling Fan (Left)
- H2.0 Allen key
IMPORTANT!
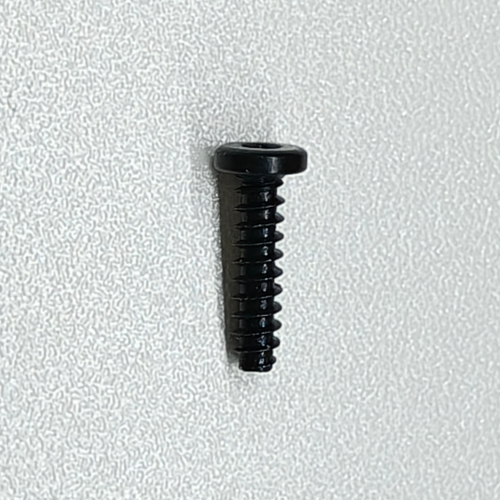
For the first batch of Auxiliary Part Cooling Fan – Left, the provided screws are slightly too long. Tightening them all the way may cause the side panel to bulge. During installation, tighten the screw until it just makes contact with the silicone. The fan itself comes with double-sided adhesive, which ensures secure fixation.
 |
 |

Aviso de Segurança
IMPORTANT!
Always power off and disconnect power on the printer before performing maintenance work. Not doing so means there is a risk of electric shock, short circuit, and damage to the printer or surrounding area.
When a maintenance task necessitates the printer being powered on, use insulated gloves for safety and pay special care not to pinch, damage, or put pressure on any exposed wires, connectors, or circuit boards. Additionally, the nozzle can be extremely hot so never touch it with exposed skin.
If you have any questions or concerns related to the above or the steps in this guide, please open a new ticket in our Support Page for assistance.
Install Additional Auxiliary Part Cooling Fan – Left
Passo 1:Lower the Heatbed
Tilt the printer, pull the Z belt to lower the heatbed, and fully expose the installation position of the auxiliary part cooling fan-left.
 |
 |
Passo 2:Remove the Rear Panel
Please refer to this wiki to remove the rear panel: Replace the P2S Rear Panel.

Passo 3:Install the Auxiliary Part Cooling Fan – Left
- Peel off the protective paper from the double-sided tape on the fan;

- Position the fan according to the stud locations and tighten three screws using an H2.0 Allen key.

Passo 4:Connect the Fan Cable
- Pass the fan cable through the gap between the side panel and the inner shelf;

- Connect the cable to the MC board.

- Manage the cable: Pull the cable from the MC board side, then attach the cable to the crossbeam.

Passo 5:Install the Rear Panel
Please refer to this wiki to install the rear panel: Replace the P2S Rear Panel.
Remove the Auxiliary Part Cooling Fan – Left
Passo 1:Lower the Heatbed
Tilt the printer, pull the Z belt to lower the heatbed, and fully expose the auxiliary part cooling fan.
Passo 2:Remove the Rear Panel
Please refer to this wiki to remove the rear panel: Replace the P2S Rear Panel.
Passo 3:Disconnect the Auxiliary Part Cooling Fan Cable
Disconnect the auxiliary part cooling fan cable from the MC board.
Passo 4:Remove the Auxiliary Part Cooling Fan Cable
- Use an H2.0 Allen key to remove the three screws that secure the fan;
- Then pull firmly to separate the fan (fixed with double-sided tape) from the side panel.

- Pull out the fan cable and remove the auxiliary part cooling fan.

Verifying Success
Connect the power cable and turn on the power. Tap the Auxiliary Part Cooling Fan icon on the screen to activate the auxiliary part cooling fan. If the auxiliary part cooling fan operates as expected, the replacement is complete.
Notas Finais
We hope this guide has provided clear and practical support.
If the issue remains unresolved, please submit a support ticket and include your recent printer logs and additional pictures or other details. Our technical team will review your request and provide detailed assistance.
You can also visit Bambu AI, which can instantly answer common questions and provide you with operational guidance.


