
Replace H2 Series Power Safety Key Unit
Bambu Lab H2D • Série Comercial H2
Replace H2 Series Power Safety Key Unit
Note: This page uses the H2D machine as an example. The replacement steps are exactly the same for the H2S and H2C.
Power Safety Key Unit

Some unit do not include a ground wire. You may skip the step of connecting the ground wire during installation or removal. Both versions of the safety key are identical in core safety functionality.
The spare parts for the power safety key unit include the following:
-
Power safety key base * 1
-
Power safety key * 1
-
Screw (used to fix the power safety key base) * 2
When to Use
- The power safety key unit is damaged.
Tools and Materials Needed
-
New power safety key unit
-
H2.0 Allen key
Specifications and quantities of screws involved in replacing the H2D power safety key unit (it is recommended to keep the removed screws properly to avoid loss):
| Specification | Image | Use | Position | Quantity | |
|---|---|---|---|---|---|
| BT3x8 | Fix the rear panel (marked by the green square) |  |
12 | ||
| Fix the purge chute |  |
1 | |||
| Fix the power socket |  |
1 | |||
| ST3x8 | Fix the rear panel (marked by the red circle) |  |
11 | ||
| Fix the power socket |  |
1 | |||
| ST3x12 | Fix the spool holder bracket (marked by the yellow square) |  |
2 | ||
| BT2.3×7 | Fix the power safety key base | 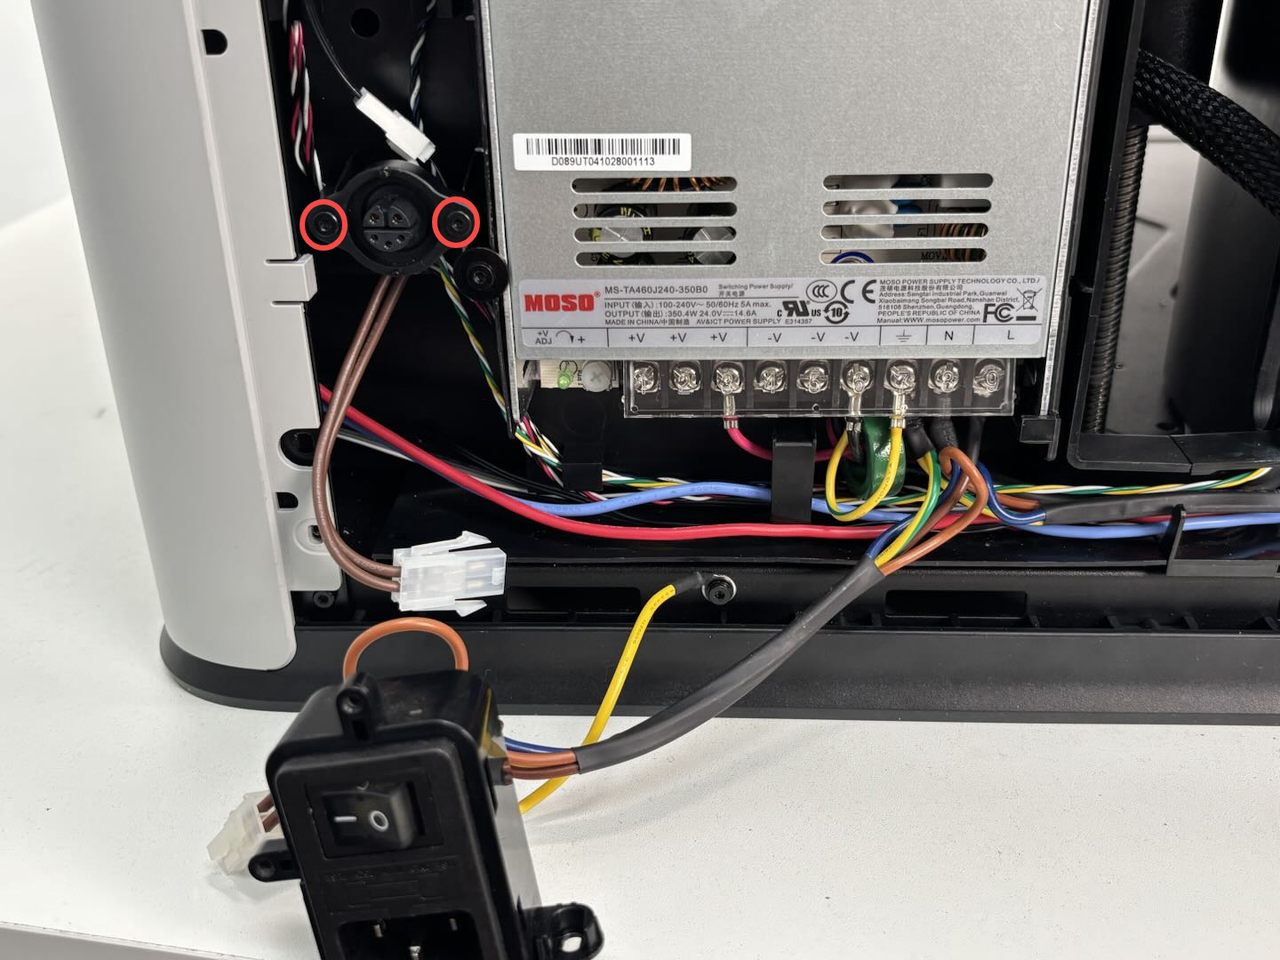 |
2 |
Aviso de Segurança
IMPORTANT!
It’s crucial to power off the printer before conducting any maintenance work, including work on the printer’s electronics and tool head wires. Performing tasks with the printer on can result in a short circuit, leading to electronic damage and safety hazards.
During maintenance or troubleshooting, you may need to disassemble parts, including the hotend. This exposes wires and electrical components that could short circuit if they contact each other, other metal, or electronic components while the printer is still on. This can result in damage to the printer’s electronics and additional issues.
Therefore, it’s crucial to turn off the printer and disconnect it from the power source before conducting any maintenance. This prevents short circuits or damage to the printer’s electronics, ensuring safe and effective maintenance. For any concerns or questions about following this guide, we recommend submitting a chamado técnico relatando o seu problema. and we will do our best to respond promptly and provide the assistance you need.
Remove the Power Safety Key Unit
Passo 1: Remove the power safety key
Unplug the power safety key from the printer.
Passo 2: Remove the rear panel and purge chute
You can refer to this Wiki for instructions on removing the rear panel and purge chute:
Passo 3:Remove the Ground Wire.
Unscrew the indicated screw to release the ground wire of the switch assembly and the ground wire of the safety key assembly.

Passo 4: Remove the power socket
Since the cable is blocked by the power socket, you only need to remove the power socket to facilitate the removal of the cable.
For easier reassembly, the power socket only needs to be removed without disconnecting its connector.
Use an H2.0 Allen key to loosen the 2 fixing screws for the power socket (red square: ST3x8; green circle: BT3x8). Tilt the power socket and pull it out of the inner lining, then press the clip to disconnect it from the power safety key base.


Passo 5: Remove the power safety key base
- Use an H2.0 Allen key to remove the 2 fixing screws, then take out the power safety key base. Peel off the tape on the side and remove the cable.


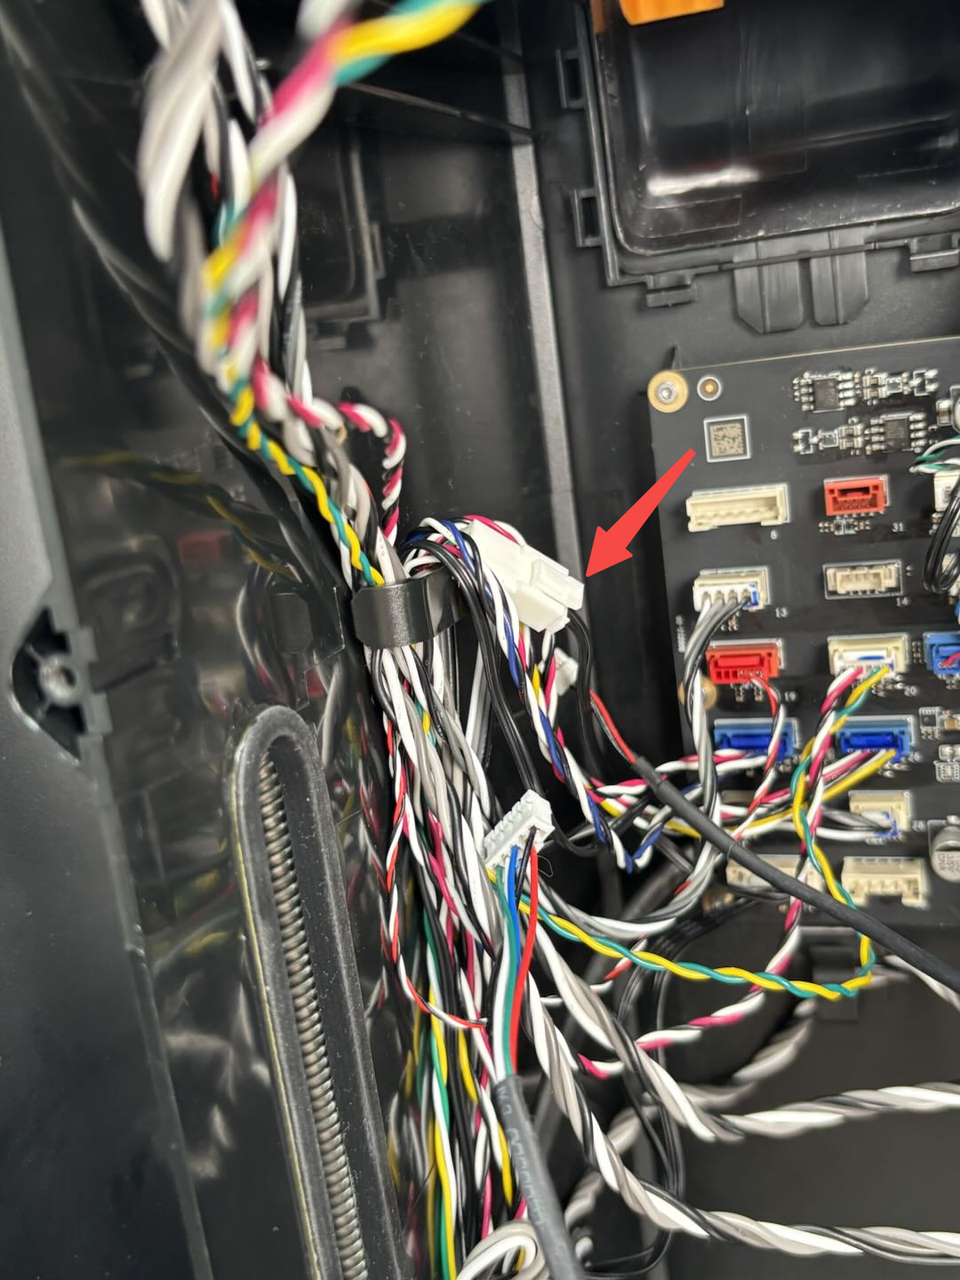
- Disconnect the power safety key base from the MC board adapter cable (cable color: yellow-green-white) and remove the cable from the cable channels.

Install the Power Safety Key Unit
Passo 1: Install the Power safety key base
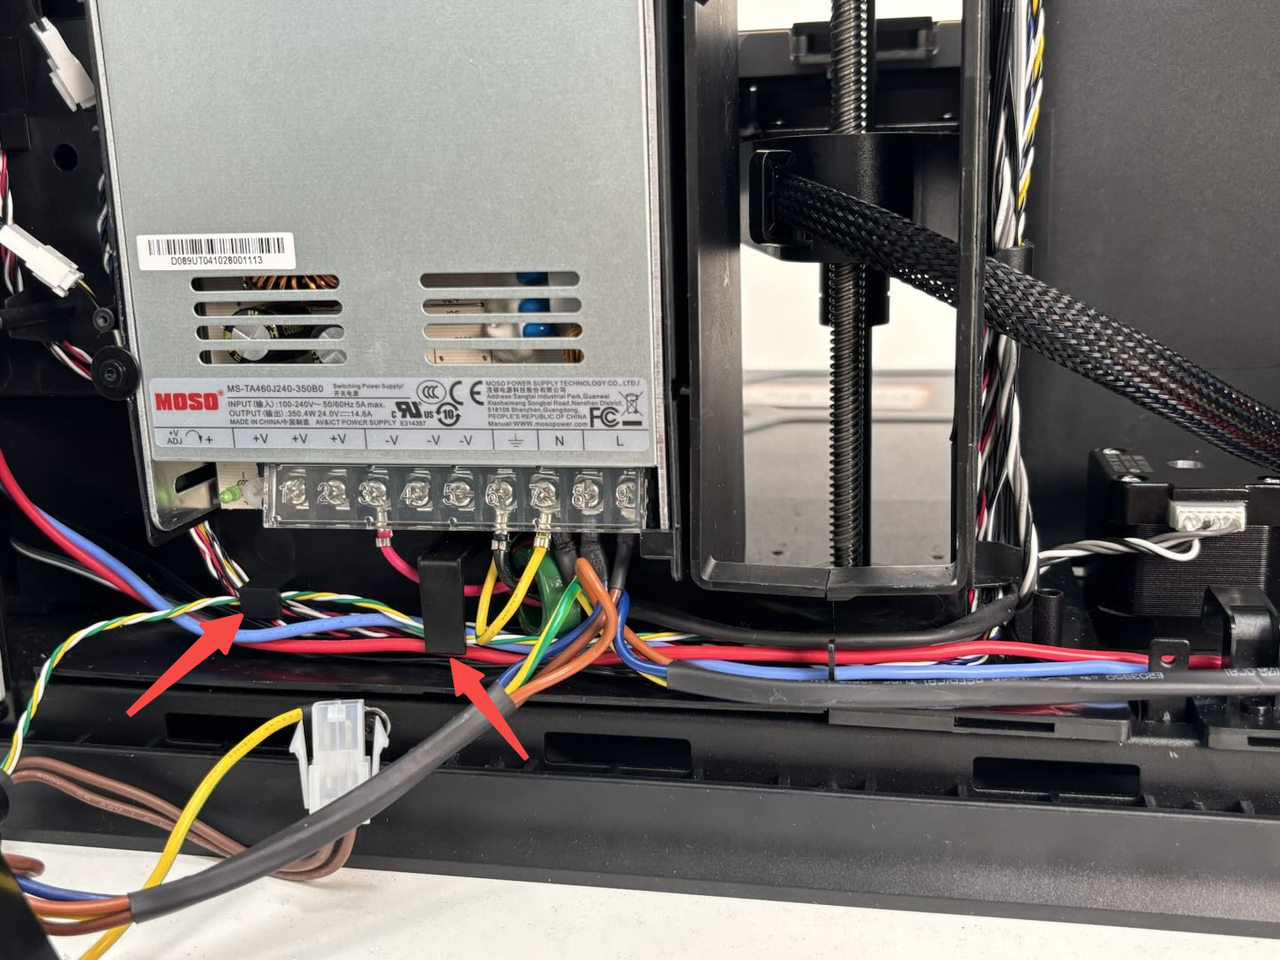
- Insert the power safety key base connectors into the cable clips in sequence and connect it to the MC board adapter cable.

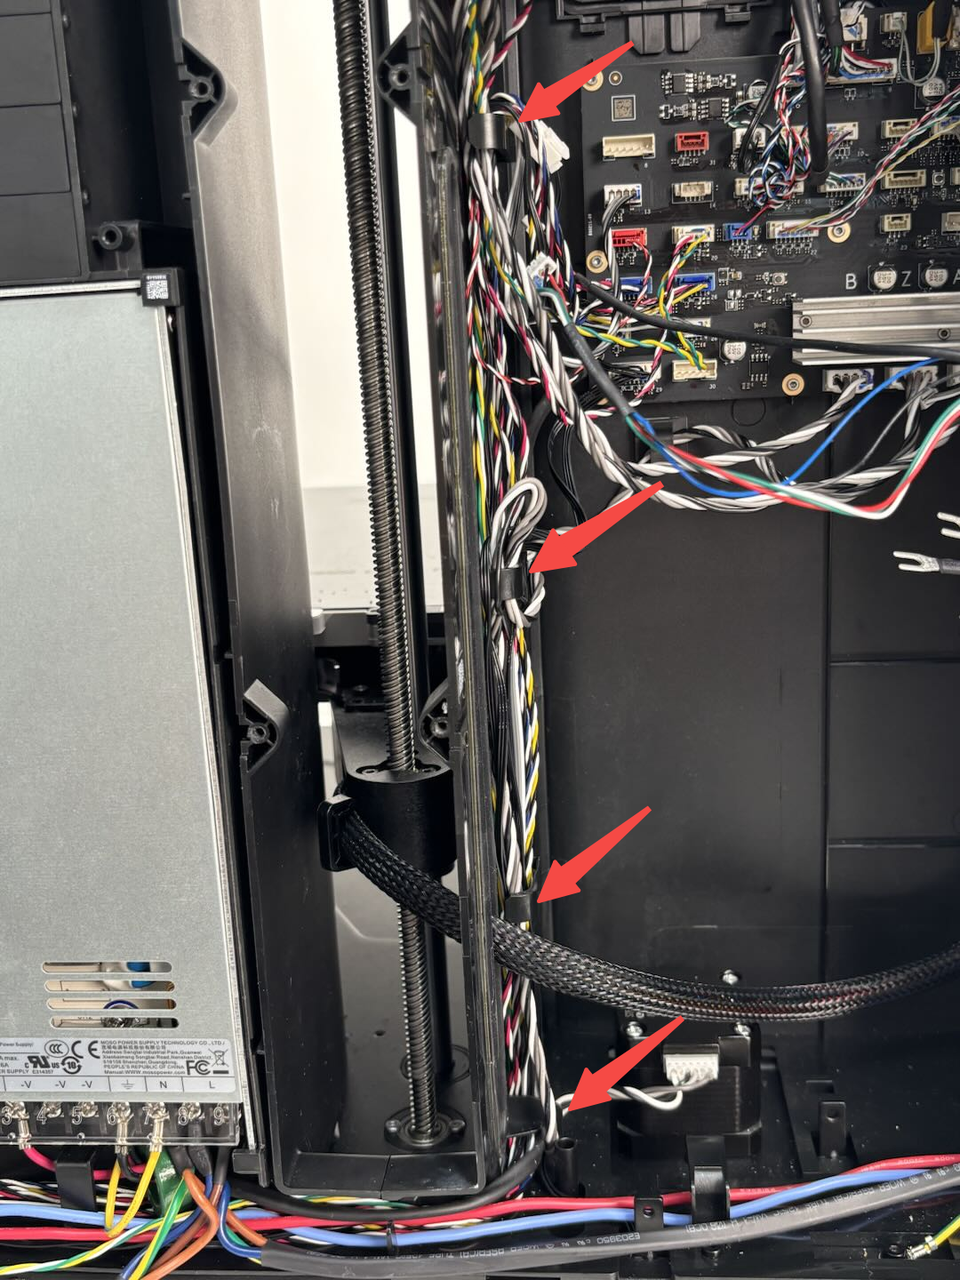

- Align the power safety key base with the screw holes, tighten the 2 fixing screws using an H2.0 Allen key, and secure the cable to the lining with the original tape.


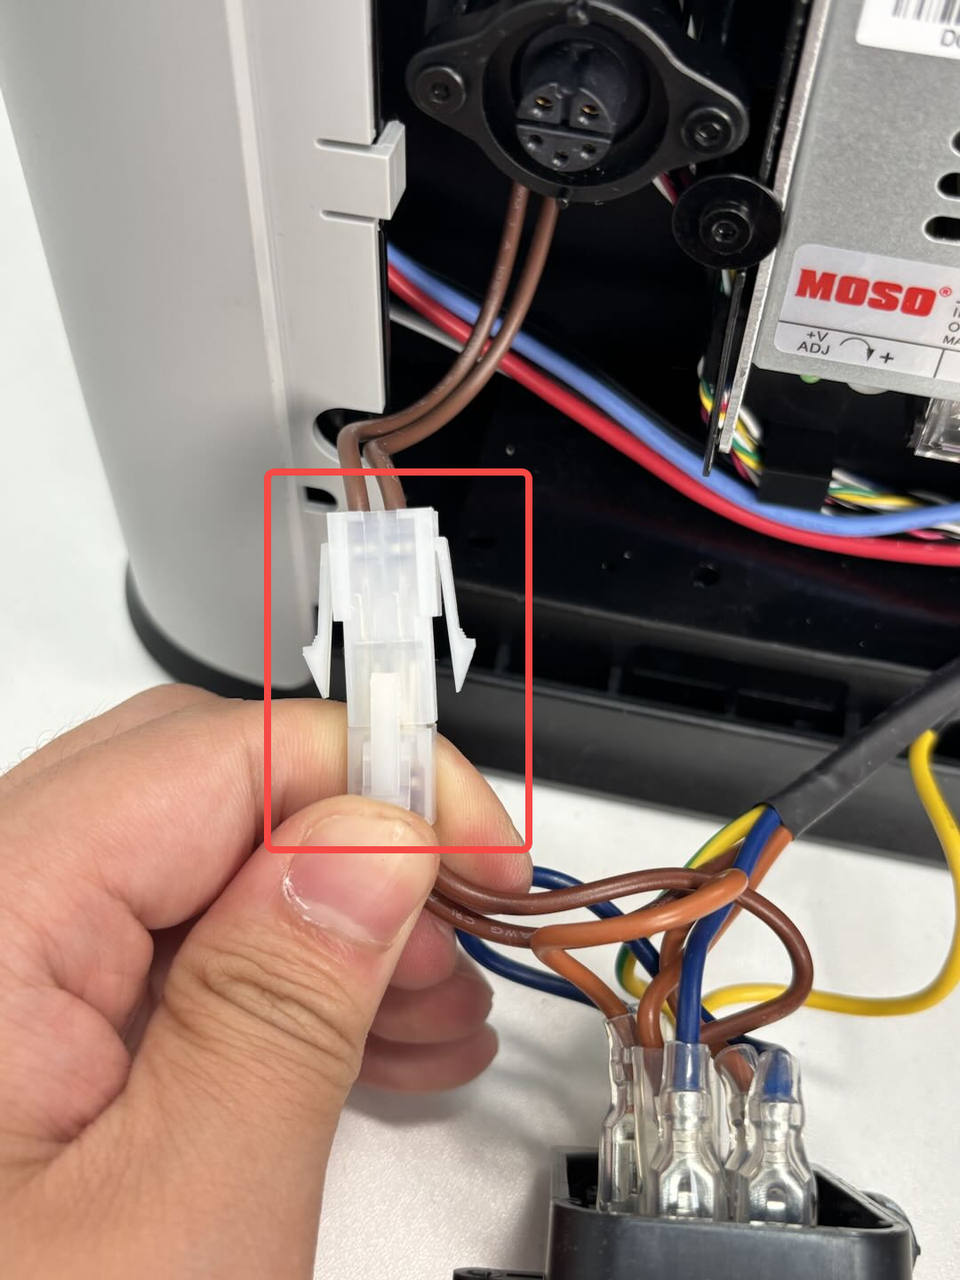
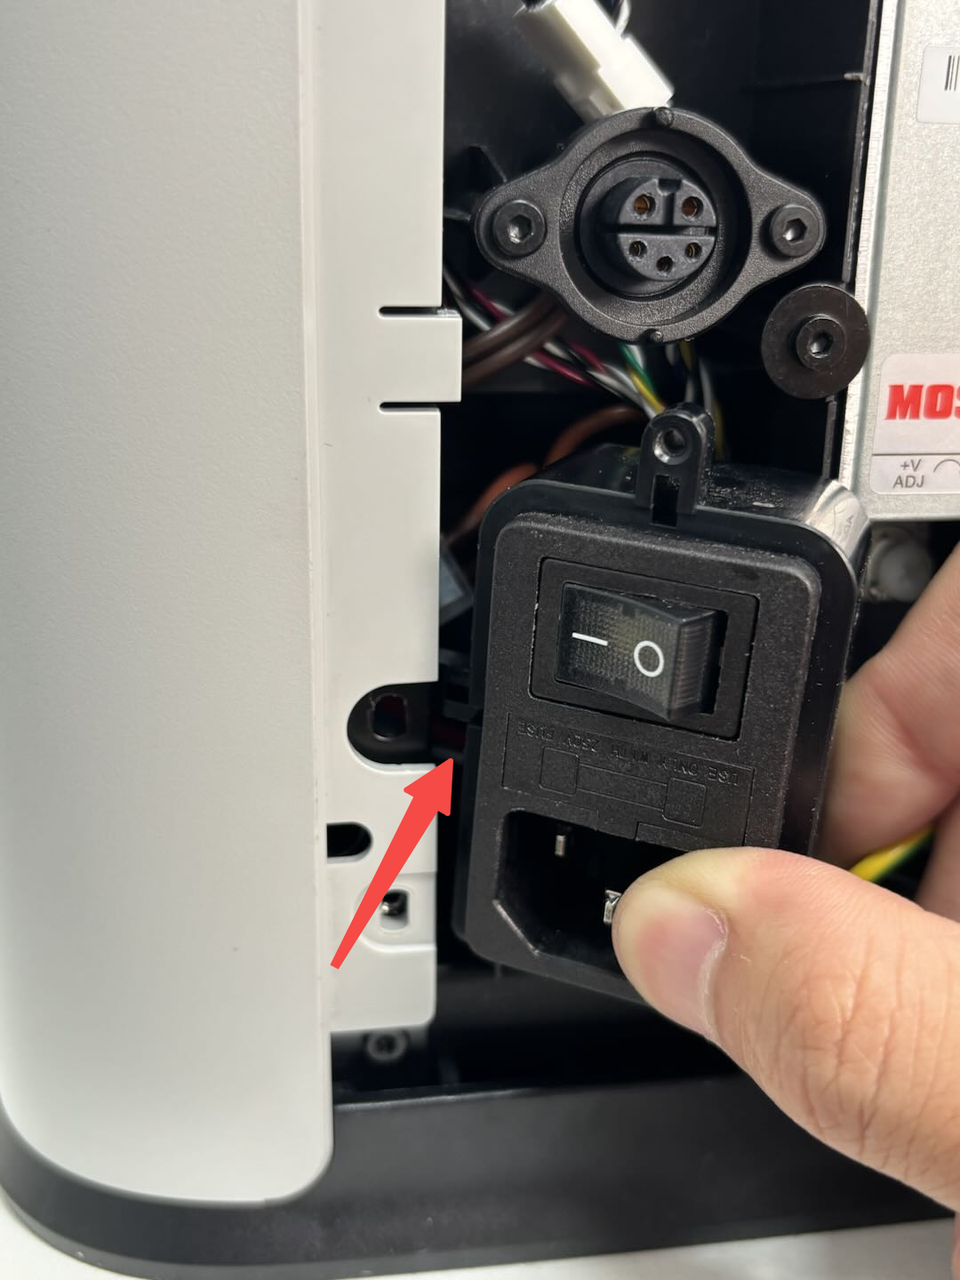
Passo 2: Install the power socket
Reconnect the power socket to the power safety key base. Tilt the power socket and insert it (the screw hole on the left should be inserted behind the post). Use an H2.0 Allen key to tighten the 2 fixing screws (red square: ST3x8; green circle: BT3x8).

Passo 3:Install the Ground Wire
Gently screw the screw clockwise into the screw hole, then adjust the direction of the two ground wires so they face upward, and finally tighten the screw completely.
Passo 4: Install the rear panel and purge chute
You can refer to the following Wiki to install the rear panel and purge chute:
Passo 5: Install the power safety key
Plug the power safety key back into the printer.
Verify the Functionality
Power on the printer and check if it can start up normally.
Notas Finais
Esperamos que o guia detalhado fornecido tenha sido útil e informativo.
If this guide does not solve your problem, please submit a chamado técnico, we will answer your questions and provide assistance.
If you have any suggestions or feedback on this Wiki, please leave a message in the comment area. Thank you for your support and attention!


