
H2 series XYZ axis and extruder lifting rail Maintenance Guide
Bambu Lab H2S • Série Comercial H2
H2 series XYZ axis and extruder lifting rail Maintenance Guide
Note: This page uses the H2D as an example. The maintenance steps for H2S and H2C are almost identical.
This page guides you through periodic H2D maintenance for the XYZ-axes and extruder lifting rail.
It explains how to clean all axes and apply lubrication to ensure smooth and accurate motion.
ℹ️ The table below lists the main sections of this procedure. ⏬ Click a section title to jump directly to that section. ⏬
Once all maintenance steps below are completed, we will Reset the XYZ Cleaning schedule.


Maintenance Frequency
When should you follow this page?
- When prompted by the machine.
- After using the Laser Module.
- If the machine axes appear dirty, have debris, or produce unusual sounds.
Required Tools and Materials
- Lubricating oil
- Lubricating grease
- Microfiber cloth
- Alcohol
- H2.0 hex wrench
Aviso de Segurança
It’s crucial to power off the printer before conducting any maintenance work, including work on the printer’s electronics and tool head wires. Performing tasks with the printer on can result in a short circuit, leading to electronic damage and safety hazards.
During maintenance or troubleshooting, you may need to disassemble parts, including the hotend. This exposes wires and electrical components that could short circuit if they contact each other, other metal, or electronic components while the printer is still on. This can result in damage to the printer’s electronics and additional issues.
Therefore, it’s crucial to turn off the printer and disconnect it from the power source before conducting any maintenance. This prevents short circuits or damage to the printer’s electronics, ensuring safe and effective maintenance. For any concerns or questions about following this guide, open a new ticket in our Support Page and we will do our best to respond promptly and provide the assistance you need.
Video Guide
This quick video shows how to clean and lubricate the XY axis.
https://public-cdn.bblmw.com/wiki/H2D/maintenance/h2d-X&Y-maintenance-en.mp4
X-Axis Linear Rail Cleaning and Lubrication
Passo 1. Clean the X-Axis.
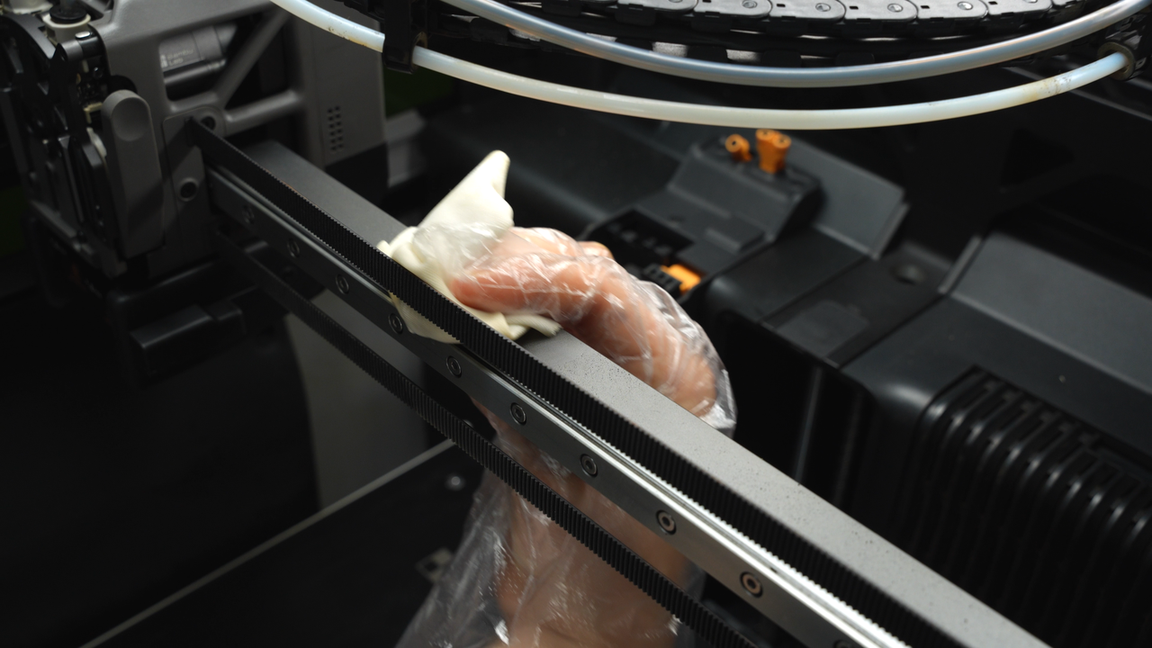
Use a microfiber cloth to clean the X Axis Linear Rail. You may also wipe the belt at the same time.
 |
 |
Be sure to clean all surfaces of the X-axis.

Then, move the toolhead to the other side to expose the hidden section of the linear rail and perform the same cleaning operation.
 |
 |
Passo 2. Lubricate the X-Axis.
Once the dust and debris on the X-axis linear rail surface are completely cleaned, apply lubricating oil to the rail. Ensure that both the top and bottom sides of the rail are coated with lubricating oil.
 |
 |
After applying the lubricating oil, move the toolhead left and right to evenly distribute the oil on the linear rail.
⚠️ Take care not to let excess oil fall onto the Build Plate. If some oil does get on the plate, it can be cleaned during the final Build Plate wash.

Y-Axis Linear Rod Cleaning and Lubrication
Passo 1. Clean the Y-Axis.
Use a microfiber cloth sprayed with alcohol to wipe the Y-axis linear rod.
 |
 |
Move the toolhead to clean the section of the Y-axis that was covered.

- Repeat the cleaning process for the other Y-Axis rod.
 |
 |
Passo 2. Lubricate the Y-Axis.
Apply lubricating oil to the rod and move the toolhead back and forth to evenly distribute the oil for thorough lubrication.
 |
 |
Use the same method to lubricate the other Y-axis linear rod.
 |
 |
Z-Axis Linear Rods and Lead Screw Cleaning and Lubrication
Passo 1. Clean the Linear rod and lead screw.
Wrap a non-woven cloth around the Z-axis linear rod, move it up and down to wipe and ensure the linear rod is cleaned thoroughly. Then, use the same motion to wipe the lead screw.
- Repeat the process to clean the other two Z linear rods and lead screws.
 |
 |
Passo 2. Lubricate the linear rod and lead screw.
Next, apply lubricating oil to the linear rod and lubricating grease to the lead screw. Please ensure not to mix up the lubricating oil and grease.
- Repeat the process to lubricate the other two Z linear rods and lead screws.
 |
 |
Passo 3. Move the bed up and down.
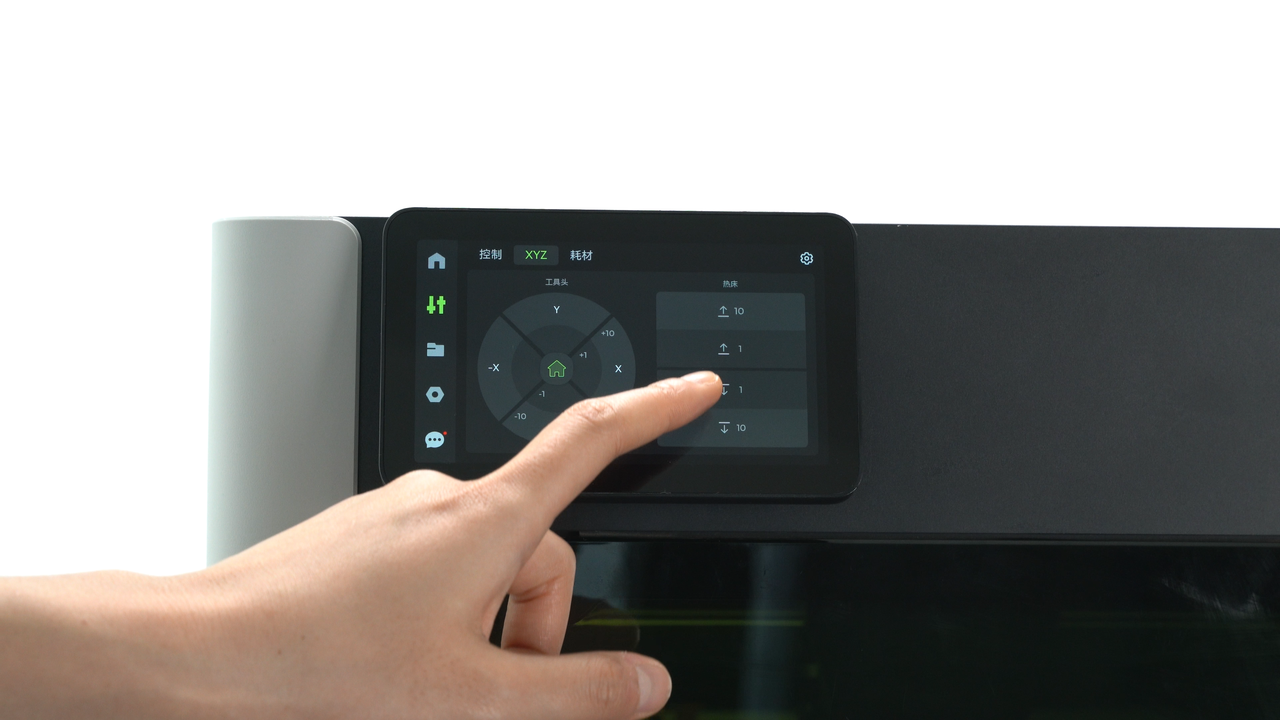
Once lubrication is complete, power up the printer again and control the movement of the heatbed up and down on the printer screen. This is to ensure that the lubricating oil and grease fully penetrate the Z-axis leadscrews and linear rods, guaranteeing adequate lubrication.
 |
 |
- Check for any excess oil or grease on the Linear Rods or Lead Screws.
- Wipe away any extra oil or grease as needed.
 |
 |
H2D/H2C Extruder Lifting Rail
This maintenance is required for H2D and H2C units; H2S units can skip it.
Applicable to H2C only: Before starting the maintenance in this section, keep the printer powered on, use the Touchscreen to uninstall the right hotend, and dock it to the frame. After docking is complete, turn off the printer and disconnect the power supply before continuing with the following maintenance steps. For detailed instructions, refer to: Induction Hotend Replacement Guide
Passo 1. Unload the Filament
If filament is loaded in the left or right nozzle, fully unload it before continuing.
Passo 2. Remove the Toolhead Front Cover
Pinch the two top corners of the toolhead front cover pull them towards you, lift it upward to release the clips, and remove the front cover.

Passo 3. Move the Flow Blocker
Move the flow blocker to the right hotend, grab the connecting rod to move the flow blocker away, preventing it from being accidentally bent when removing the left hotend.
⚠️ Warning: Do not push the flow blocker directly. The blocker is fragile, and applying force may cause it to break. Always grab it on the connecting rod on the rear.
When moving the connecting rod, the blocker may not reach its position in a single motion due to the rod’s tilt limit.
Continue pushing the rod until it reaches the far-right end and can no longer move.
At this point, the left nozzle should move downward.

Passo 4. Remove the Left Hotend
Start by removing the Silicone Sock. You may use a screwdriver to gently pry it off if needed.

Unlock the locking tab to remove the hotend.
⚠️ Danger: Always check the current temperature of the hotend before touching it to avoid burns due to high temperatures!

Pull the nozzle towards you to remove it.

Passo 5. Remove the Filament Guide
Unscrew the four screws (3x M2.5×7 (Marked green);BT2x6 (Marked Red)) on the extruder filament guide.
ℹ️ Some models don’t have the BT2x6 (marked red) Screw. Ignore it if that’s your case.

💡 Tip: Use your fingers to press upward on the black Hotend Connector. At the same time, press the left Filament Cutter Lever to slightly release it from the slot near the cutter pin.

While pressing the points mentioned above, apply gentle outward force from the lower-right corner of the Filament Guide to remove it.

The left filament cutter is located within the extruder filament guide and will be removed together when removing the extruder filament guide. Please take care to store it properly to prevent loss.
If you accidentally remove the slider, please make sure to install the spring correctly.
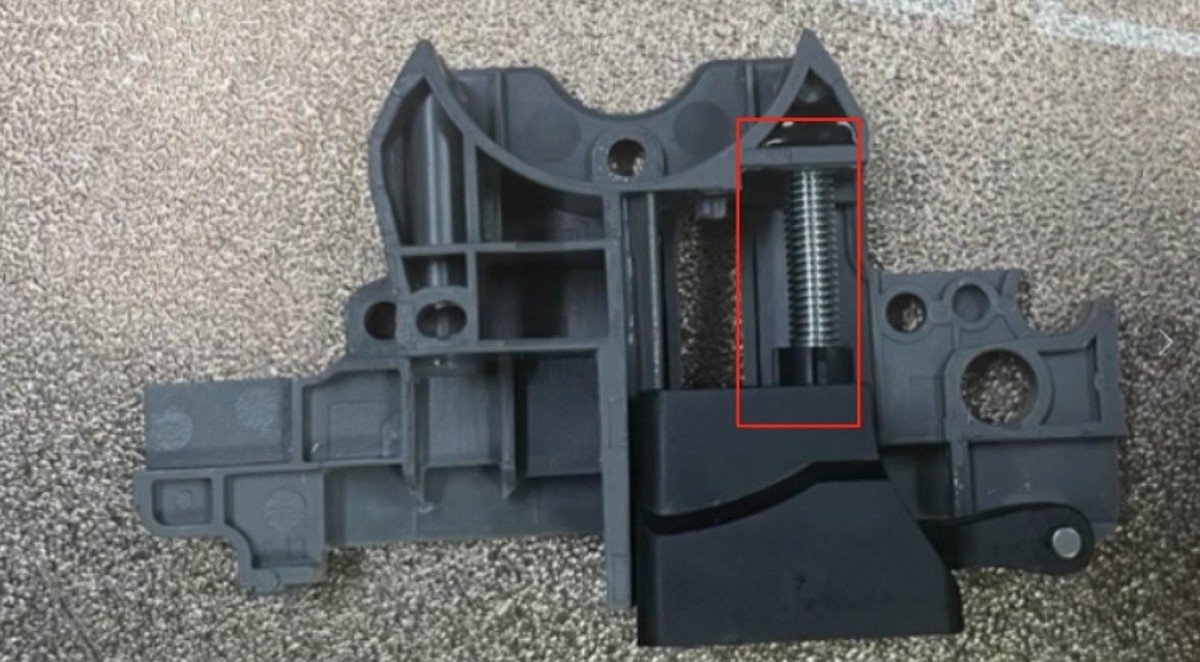 Incorrect
 Correct
Passo 6. Clean and Lubricate the Extruder Lifting Rail
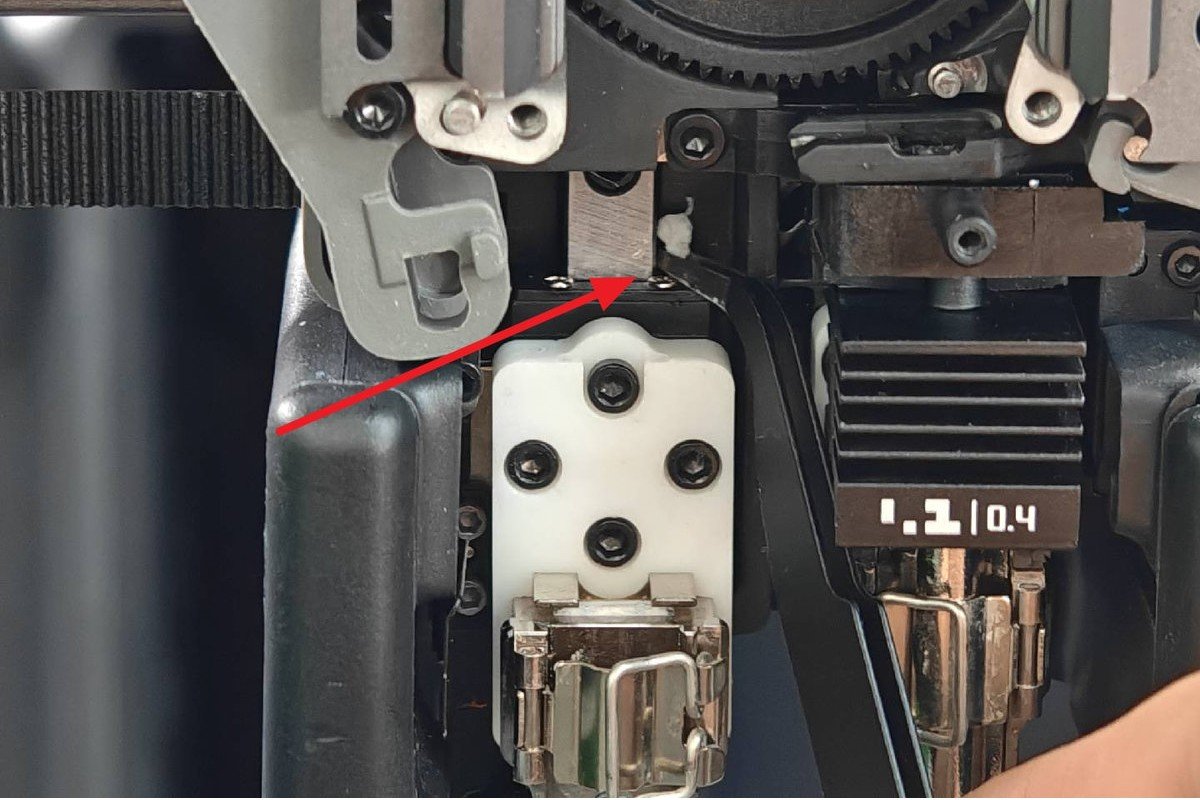
Follow the images below to clean and lubricate the extruder lifting rail.
| Remove any debris | Apply lubricating oil on both sides of the rail |
 |
 |
Passo 7. Install the Dual Extruder Filament Guide
The left filament cutter needs to be installed together with the extruder filament guide. Ensure that the notch of the left filament cutter is facing upwards, then place it into the blade slot of the extruder filament guide.
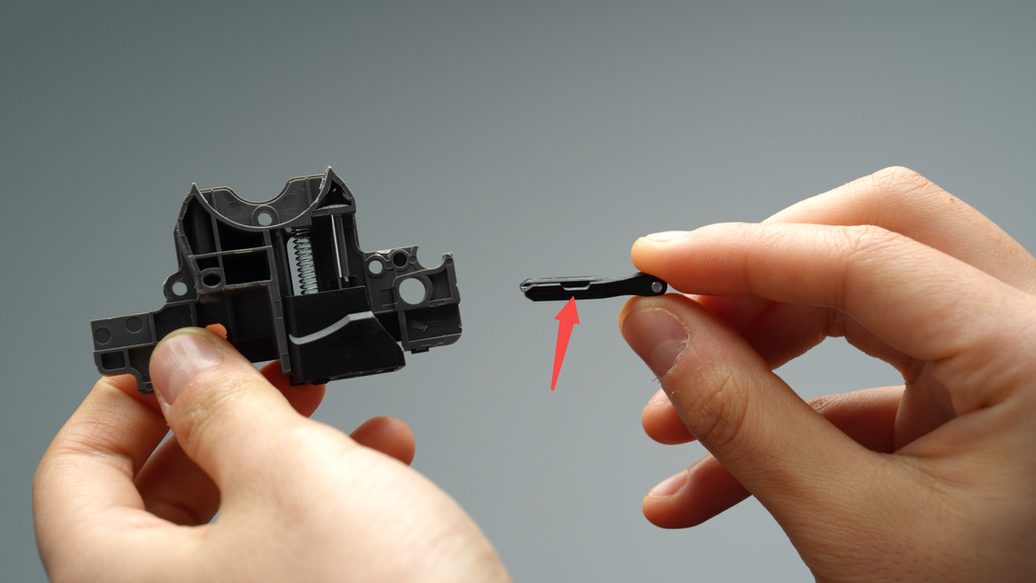 |
 |
When installing the extruder filament guide, make sure to continuously press upwards against the black hotend connector and simultaneously press the left filament cutter lever, adjusting it to an appropriate angle for easy insertion.
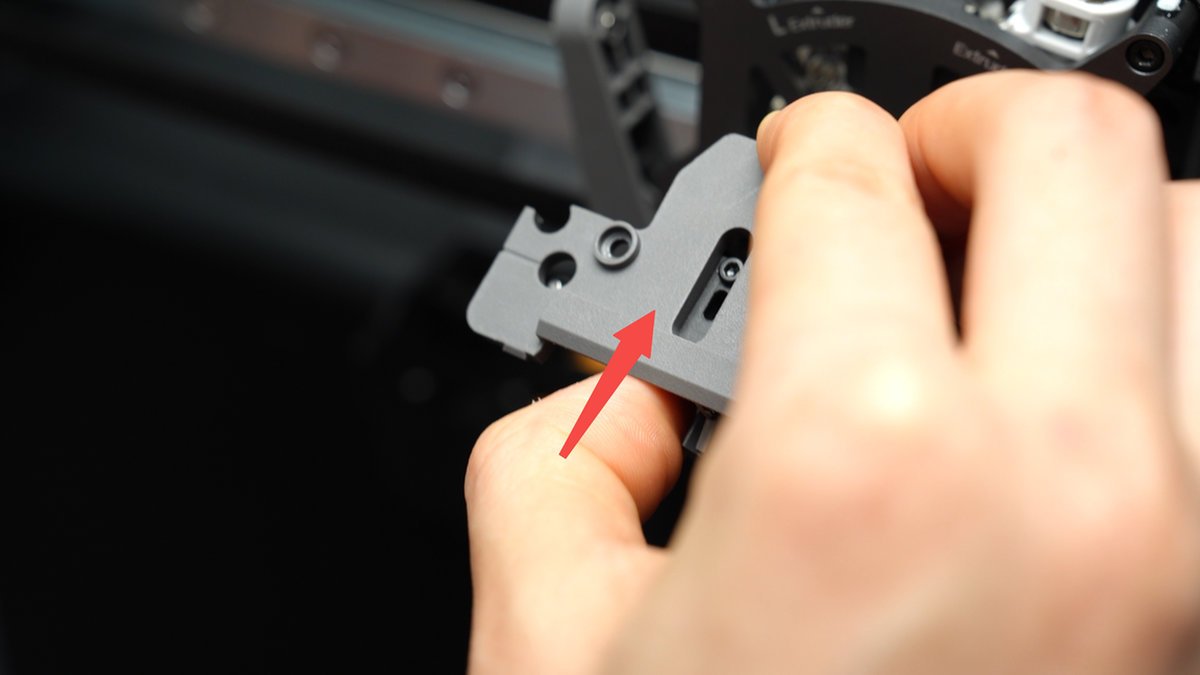
This may require some adjustment and patience. Do not apply excessive force.
Once it is correctly aligned, press on both sides of the cutter lever, applying force to completely flatten the front cover.

Then, tighten the four screws (3x M2.5×7 (Marked green);BT2x6 (Marked Red)) on the extruder filament guide.

Passo 8. Install the Left Hotend and Silicone Sock
Install the left hotend back, as shown below:
| Place the left hotend in the toolhead and close the clip | Install the silicone sock |
 |
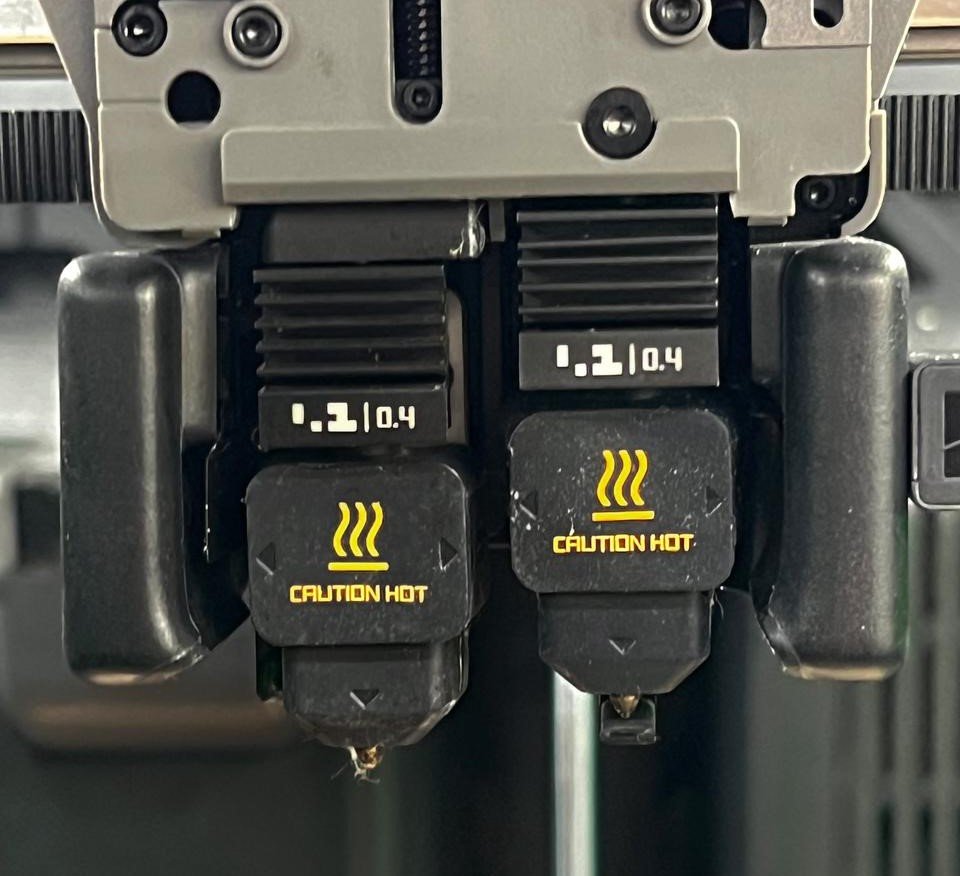 |
Note: In the figure on the left, the clip was locked incorrectly because the latch and the clip were pushed down at the same time, causing the latch to get stuck inside the clip. Therefore, make sure to fully align the left latch with the nozzle before engaging the right clip.
 |
 |
Passo 9. Install the Toolhead Front Cover
When reinstalling the toolhead front cover, first hook it into the position under the extruder, then push it forward until you hear a click, indicating it is properly installed.
Passo 10. Move the left nozzle
Connect the machine to power.
Use the screen to switch between the left and right nozzles 3-5 times to allow the oil to fully infiltrate and spread.
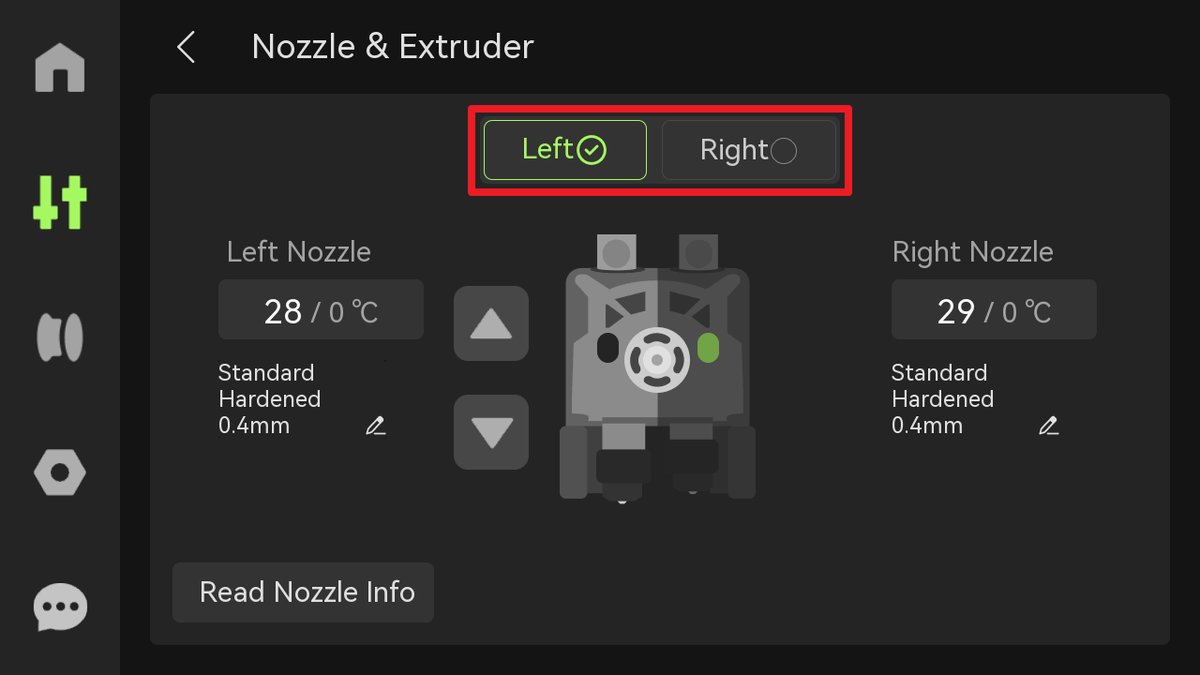
Reset the Maintenance Schedule
Once you finish all the maintenance steps in this page, you can reset the Cleaning schedule. The machine will prompt a warning the next time the machine needs a periodic clean.
- Navigate to the Toolbox menu, and click “XY Cleaning“.
- Click “Complete” and the XYZ Axis Cleaning schedule will be resetted.

Clean the Build Plate
It is strongly recommended to clean the Build Plate at this stage.
During maintenance, small amounts of oil or grease may fall onto the Build Plate.
Cleaning it helps maintain consistent adhesion and stable print quality.
Notas Finais
Esperamos que o guia detalhado fornecido tenha sido útil e informativo.
If this guide does not solve your problem, please submit a chamado técnico, we will answer your questions and provide assistance.
If you have any suggestions or feedback on this Wiki, please leave a message in the comment area. Thank you for your support and attention!


