
AP Board Replacement Guide for the H3C
Bambu Lab H3C • Série Industrial H3
AP Board Replacement Guide for the H3C
AP Board
The full name of the AP board is Application Processor Main Board. It is the circuit board within the printer that handles information exchange and is installed inside the printer’s left transparent cover. It provides the printer with an independent operating environment and supports all system functions required by the printer application, including memory management, system firmware, graphics processing, and multimedia decoding.

AP Board Connector Labels:

| No. | Connected To | No. | Connected To |
|---|---|---|---|
| 1 | MC – AP Communication 2 | 6 | BirdsEye Camera (Optional) |
| 2 | Left Fill Light | 7 | Chamber Temperature Sensor |
| 3 | MC – AP Communication 1 | 8 | Live View Camera |
| 4 | MC – AP (24V Power Cable) | 9 | Screen |
| 5 | Toolhead (USB Cable) | 10 | WIFI Antenna |
Applicable Printer Model
Bambu Lab H3C
When to Replace
- Visible physical damage to the AP board, such as damaged connectors, dislodged components, or burn marks;
- Bambu Lab technical support determines that the AP board needs to be replaced.
Safety Tips
Before performing any maintenance on the printer and its electronic components (including the Toolhead Cable), turn off the printer and disconnect the power supply to prevent accidental Screen touches or short circuits, which could cause additional electronic damage and safety hazards.

When performing maintenance or troubleshooting on your printer, please first check the temperature of the hotend and heatbed. Avoid operating at high temperatures. If operating at high temperatures is unavoidable, wear insulated gloves to ensure safe and effective maintenance.
Tools and Materials
- H2.0 allen key
- H1.5 Allen Key
Remove AP Board
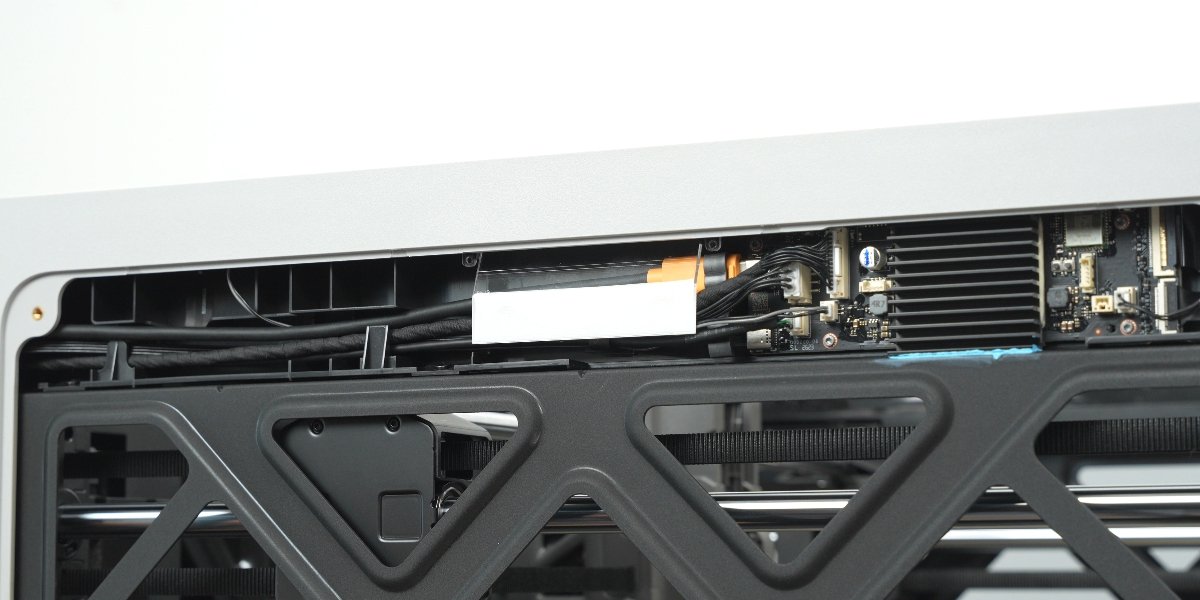
Passo 1. Remove the Left Transparent Cover
Refer to the dedicated Transparent Cover Replacement Guide for the H3C to remove the left transparent cover.
Passo 2. Remove the Light Guide Plate
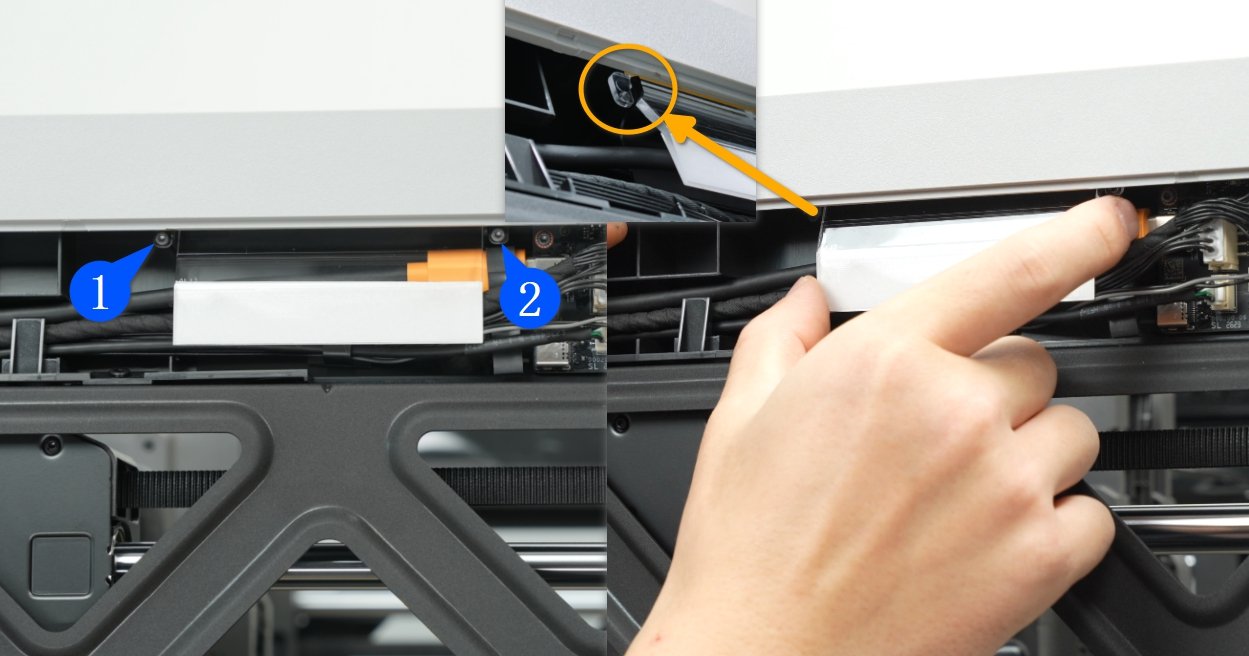
Use an H1.5 allen key to remove 2 screws and take out the light guide plate. Note: You need to lift the light guide plate upwards, away from the locking tabs, before removing it.
Passo 3. Disconnect the Cables
Use an H1.5 allen key to remove the screws for the USB cable bracket and take off the bracket.
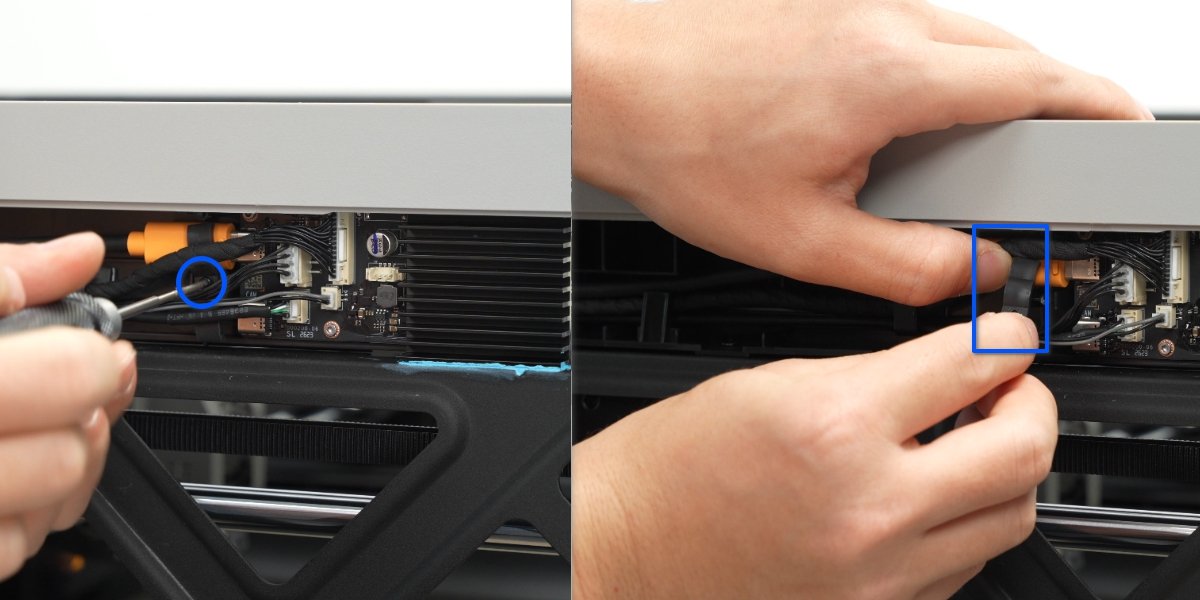
Disconnect the visible cables from the AP board connectors. There are 8 in total (excluding the WIFI antenna).

Passo 4. Remove the AP Board
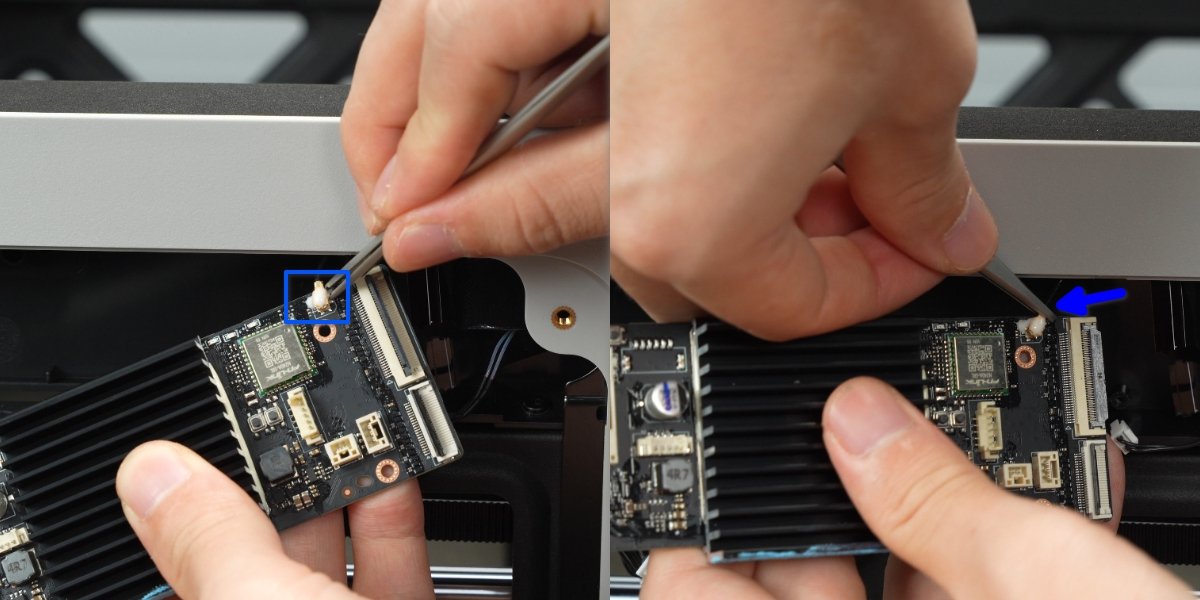
Use an H1.5 allen key to remove the 4 screws of the AP board and take the AP board out of the frame.

Use tweezers to remove the silicone from the WIFI antenna plug. Then, use tweezers to grip the base of the plug cable and disconnect the WIFI antenna from the connector.
Install the AP Board
Passo 1. Connect the Antenna and Ribbon Cables
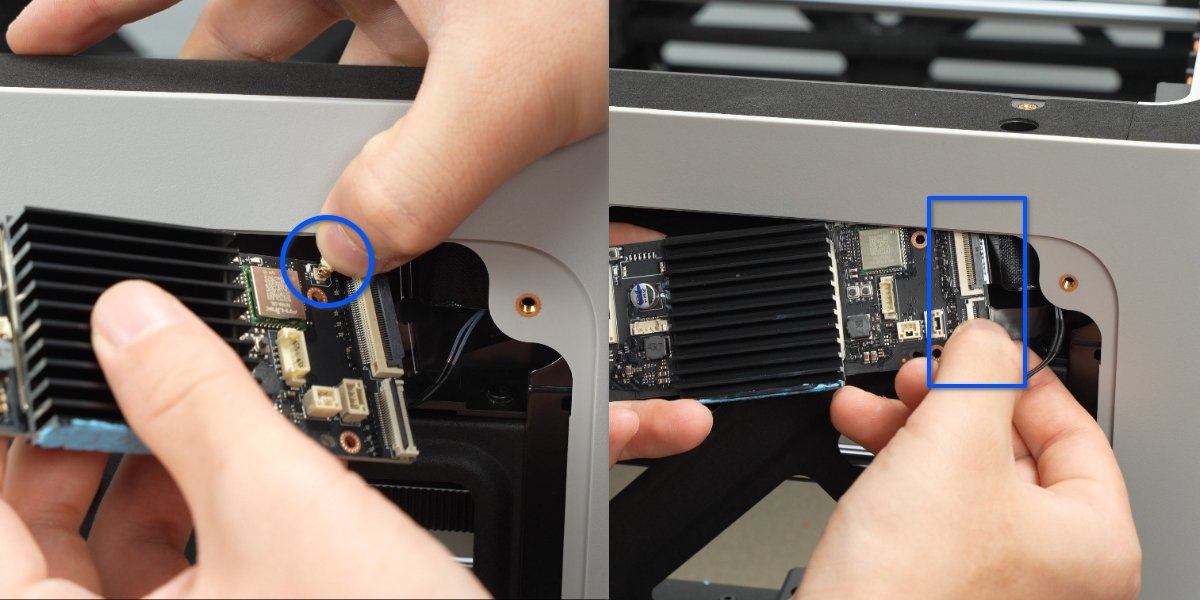
Connect the antenna plug first. Ensure the coaxial cable is aligned before pressing down. Then, connect the screen FPC and camera FPC, and close the connector covers.
Passo 2. Install the AP Board
Install the AP board according to the 2 positioning posts. First, install the end with the connected FPC cable on the right side. Align the screw holes and then tighten the 4 screws in the order indicated in the diagram.
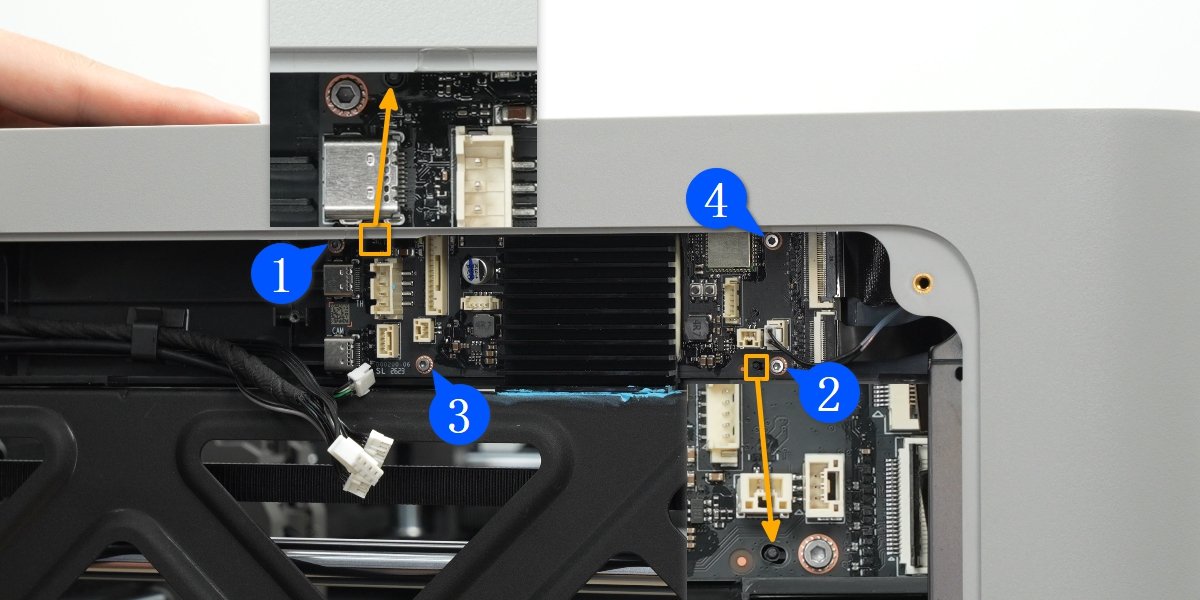
Connect the cables. Note that the side with the raised part on the USB cable connector should face outwards.

Passo 3. Install the Light Guide Plate
Align the light guide plate with the 2 screw holes. First, hook the screw positions on both sides of the light guide plate into the locking tabs, then secure it with 2 screws.

Passo 4. Install the Window (can Be Installed After Verifying the Issue Is Resolved)
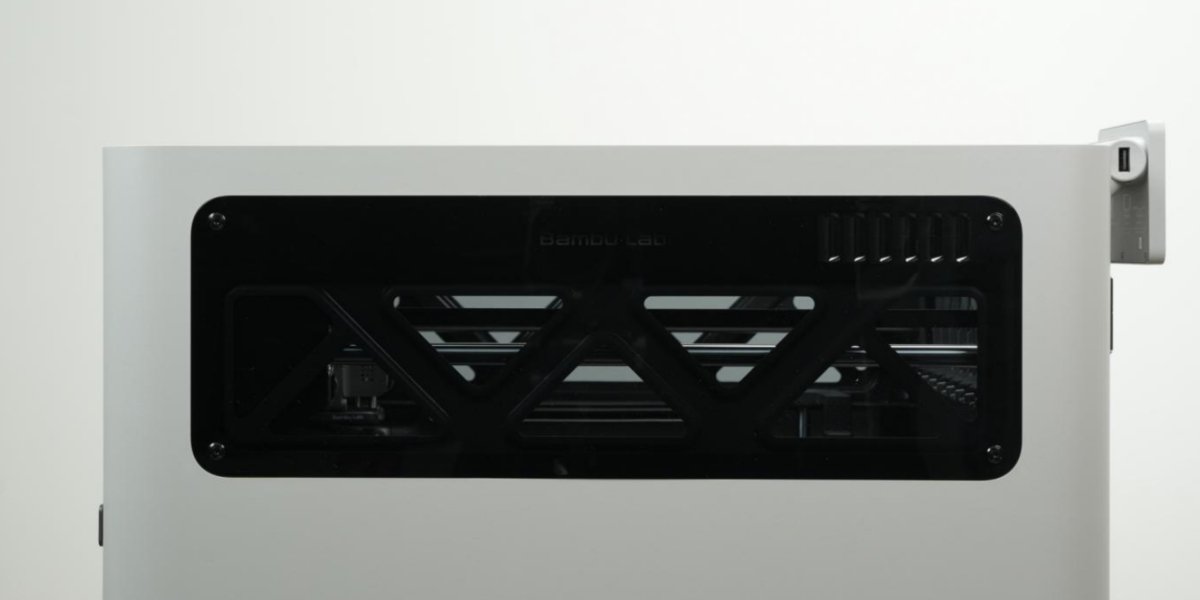
Refer to the dedicated Window Replacement Guide for the H3C to install the left window onto the left panel.
Passo 5. Bind the New Serial Number (sn)
Important Reminder:
After the new SN is successfully registered, the old SN will be invalidated, and the old AP board will no longer be registrable or bindable.
For machines that have had their AP board replaced, binding operations cannot be performed because the new SN has not been registered. Therefore, when powering on for the first time after replacing the AP board, you can skip the machine binding step and verify if replacing the AP board resolves the issue (except for network connection problems). After confirming the issue is resolved, you can log in to the Bambu Lab official website to apply for new SN registration, or contact Bambu Lab customer service to register a new SN.

Verify Functionality
Connect the power cable and turn on the printer to perform the printer calibration process.
Notas Finais
We hope this guide has provided clear and practical support.
If the issue remains unresolved, please submit a support ticket and include your recent printer logs and additional pictures or other details. Our customer support team will review your request and provide detailed assistance.
You can also visit Bambu AI, which can instantly answer common questions and provide you with operational guidance.


