
USB – C Cable and Cable Chain Replacement Guide
Bambu Lab H3C • Série Industrial H3
USB – C Cable and Cable Chain Replacement Guide
USB-C Cable and Cable Chain
Bambu USB-C cable connects the printer’s AP board and TH board, enabling control and data communication with the toolhead. The Cable Chain is a chain-like structure connected between the toolhead and the rear of the printer’s Top Lid, used to manage and protect the USB-C cable.
When to Replace
- Bambu USB-C cable is damaged.
- Bambu Lab technical support has confirmed that replacement is needed.
Tools and Materials
- H2.0 allen key
- H1.5 Allen Key
Safety Tips
Before performing any maintenance on the printer and its electronic components (including the Toolhead Cable), turn off the printer and disconnect the power supply to prevent accidental Screen touches or short circuits, which could cause additional electronic damage and safety hazards.

When performing maintenance or troubleshooting on your printer, please first check the temperature of the hotend and heatbed. Avoid operating at high temperatures. If operating at high temperatures is unavoidable, wear insulated gloves to ensure safe and effective maintenance.
Remove the USB-C Cable
Passo 1. Remove the Rear Panel
Refer to the wiki: Rear Panel Replacement Guide to remove the Rear Panel, exposing the connection point of the USB-C cable to the Top Lid.
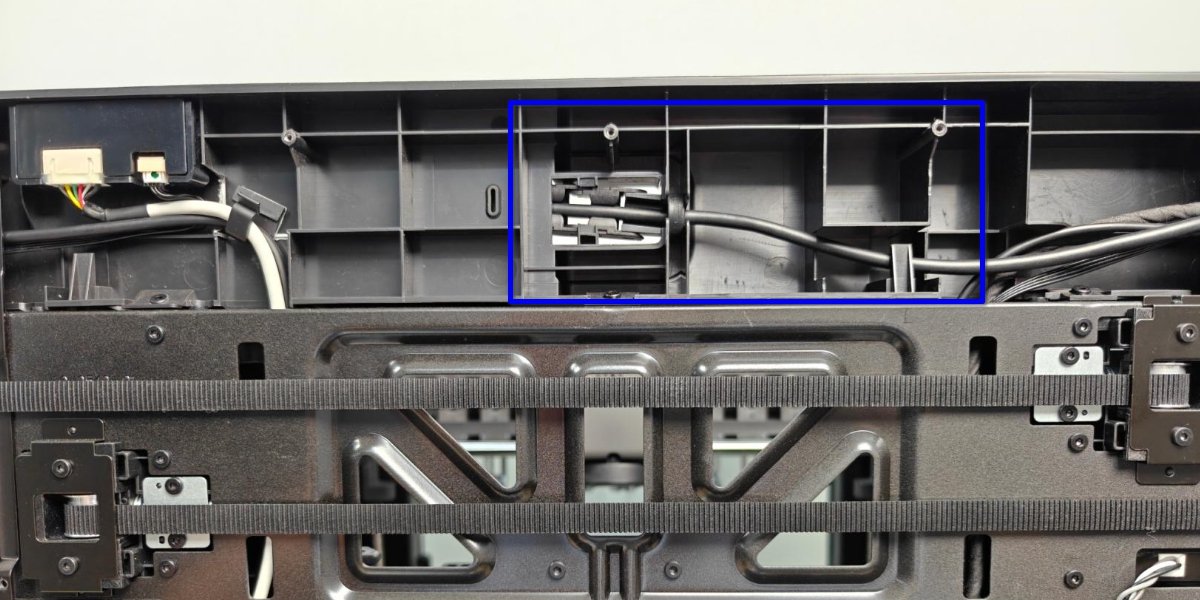
Passo 2: Remove the Cable Chain
This step applies to removing the main body of the Cable Chain, not the Base Housing. It is listed as Passo 2 to correspond with the separate Cable Chain replacement procedure. If your goal is to replace the USB-C cable and not the Cable Chain, you can perform this step later.
Adjust the position of the Cable Chain at the toolhead so that it is nearly perpendicular to the X-Axis direction. Then, as shown in the figure below, forcefully push down the Cable Chain bracket on the Cable Chain holder.
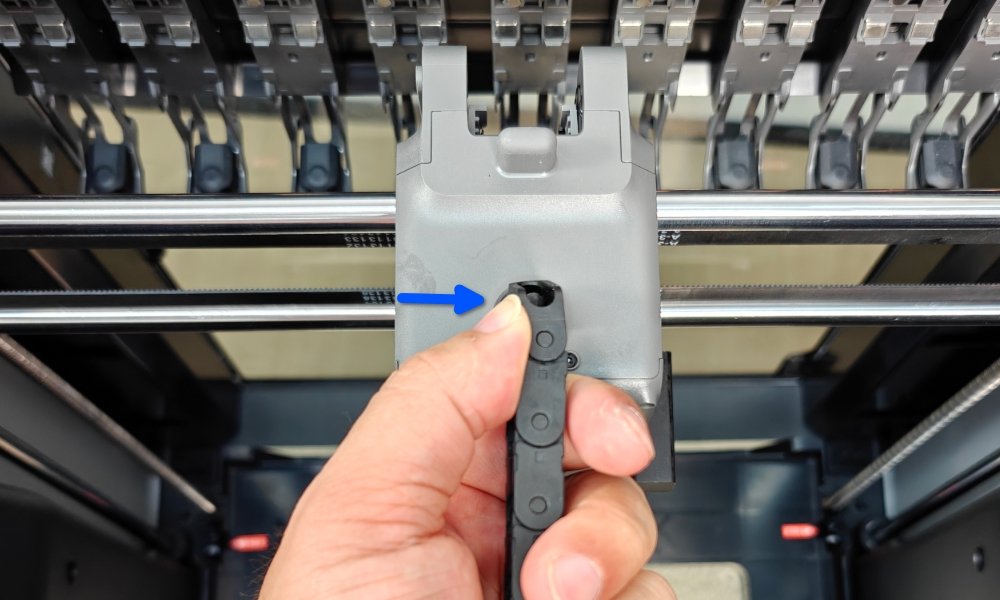 |
 |
Loosen the USB-C cable from the link bracket.
 |
 |
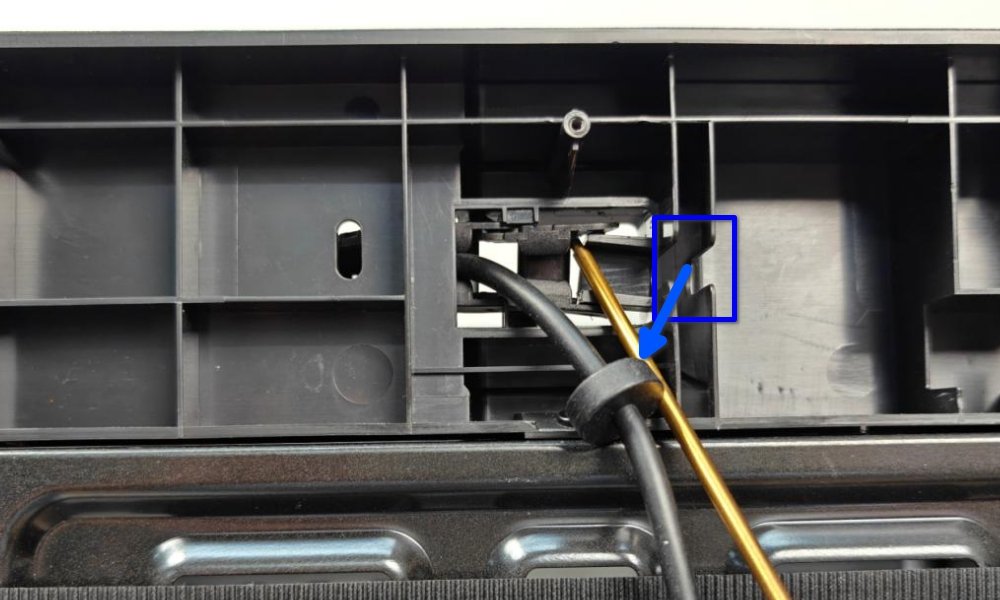
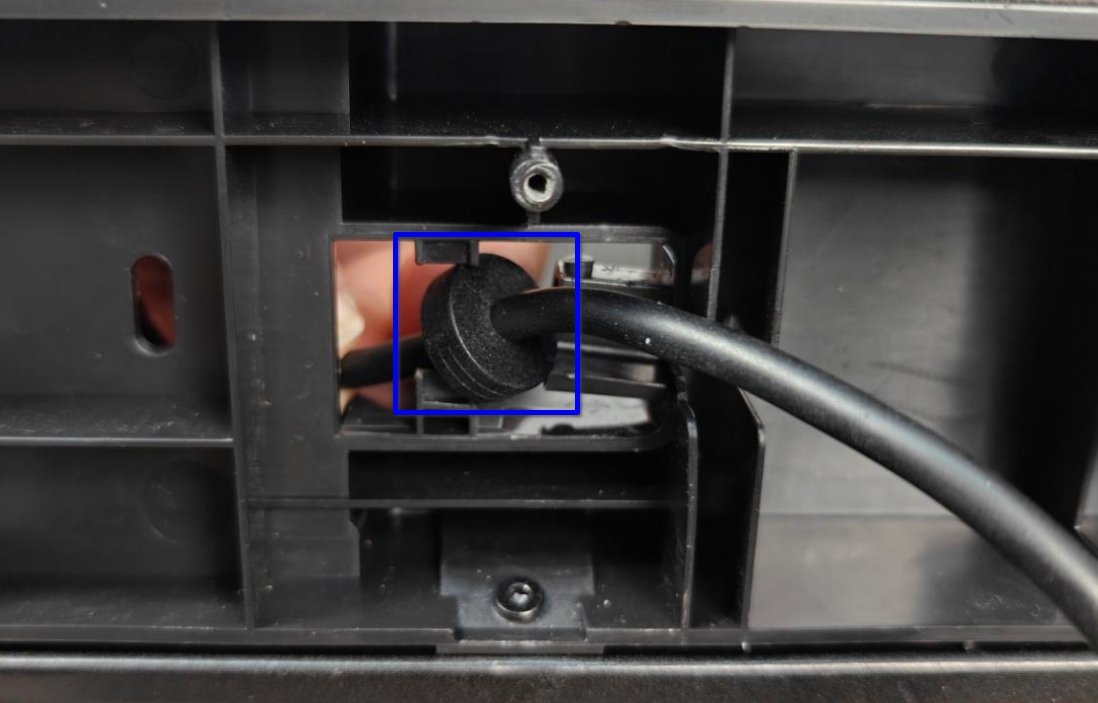
Locate the connection point between the Cable Chain and the Top Lid assembly from the back of the printer. Pull the ferrite ring on the USB-C cable out of its slot, then use an allen key to pry the end of the Cable Chain upwards to release its lock and detach it.
 |
 |
Along the notch in the Cable Chain, release the cable from the chain and remove the Cable Chain.
Passo 3. Remove the Side Glass and Light Guide Plate
Refer to the wiki: AP Board Replacement Guide, steps 1-3 to remove the side glass – left, light guide plate, and USB-C cable bracket.

Passo 4. Remove the TH Board
Refer to the wiki: Toolhead Circuit Board Replacement Guide to remove the TH Board.

Passo 5. Remove the USB-C Cable
Using an H1.5 allen key, remove the three screws securing the base of the Cable Chain bracket. Adjust the bracket’s position to allow the thinner part to pass through the clip on the toolhead’s top cover, releasing the Cable Chain bracket base.
 |
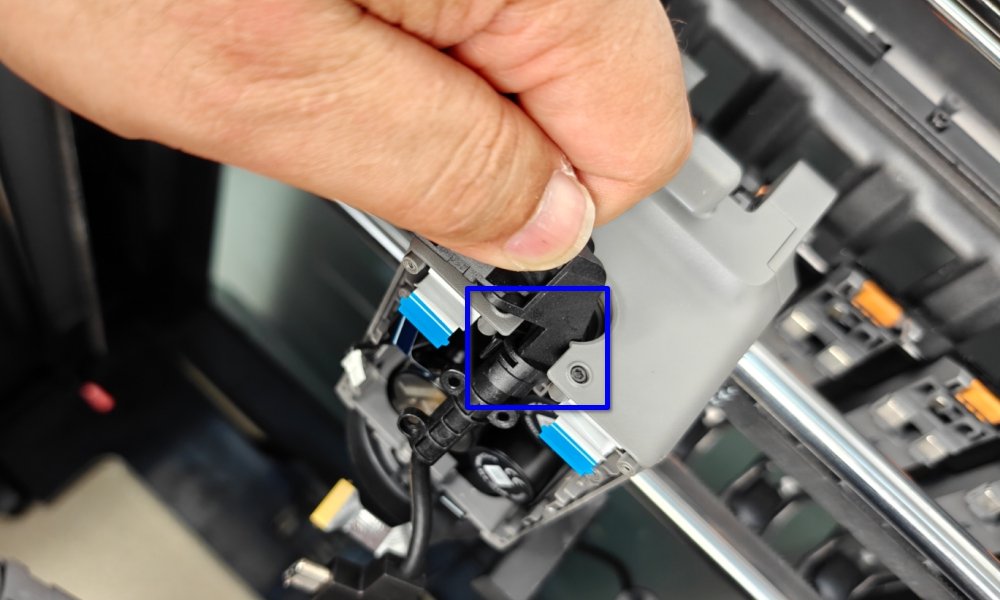 |
Disconnect the USB-C cable connector from the AP board and release the cable from the clip. Then, pull the USB-C cable connector out from the rear of the printer.
 |
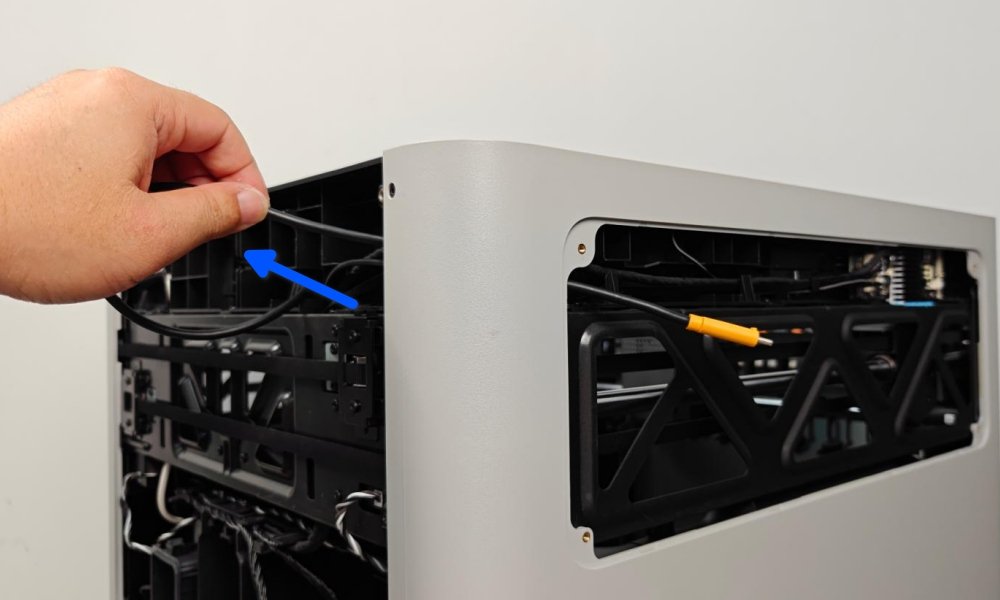 |
Pull the ferrite ring on the USB-C cable out of its slot, then use an Allen key to pry the end of the Cable Chain upwards to release its lock and detach it. Adjust the angle of the ferrite ring so that it retracts into the printer cavity. This allows the USB-C cable and Cable Chain assembly to be completely removed from the printer.
 |
 |
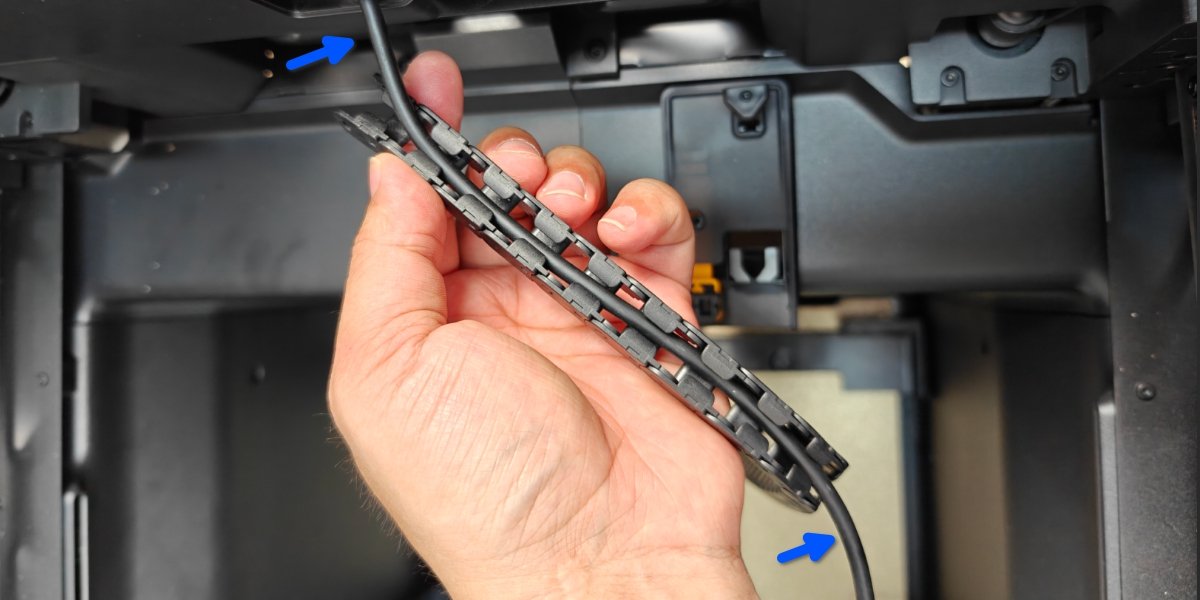
Finally, separate the USB-C cable from the Cable Chain.
Install the USB-C Cable
Passo 1. Connect the USB – C cable to the AP Board
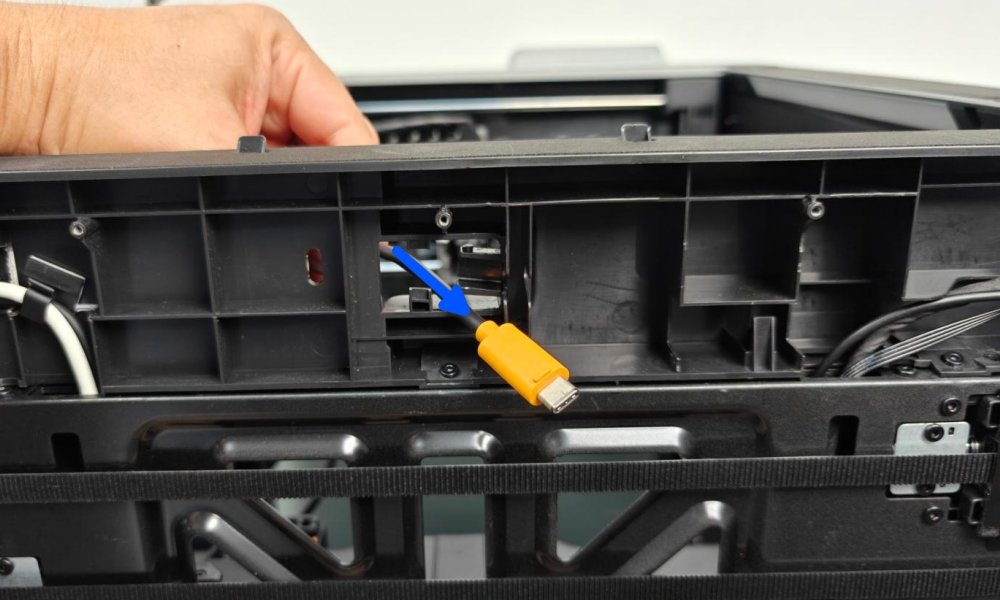
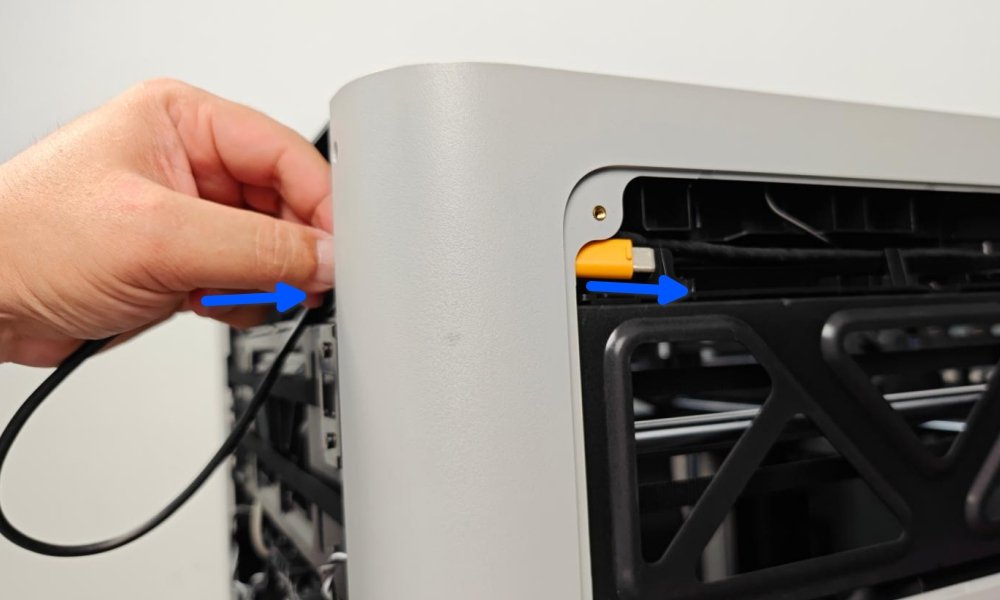
Pass the USB-C cable connector through the cable hole on the printer’s Top Lid assembly, and route it through the rear-left pillar to the AP board area.
 |
 |
Then, refer to the wiki: AP Board Replacement Guide, steps 2 & 3 for installation procedures, connect the USB-C cable, and install the light guide plate.

Passo 2. Install the Cable Chain
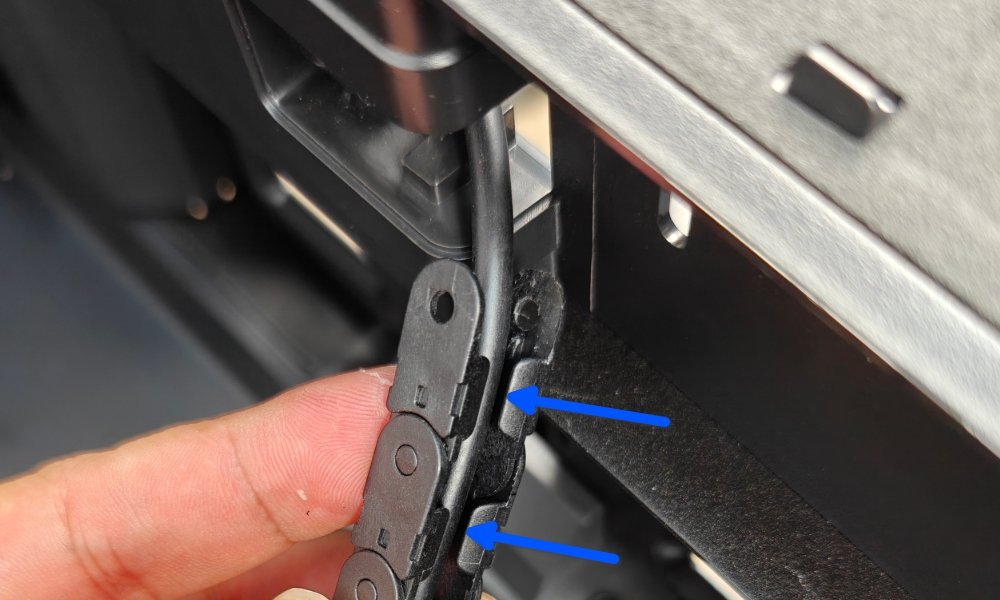
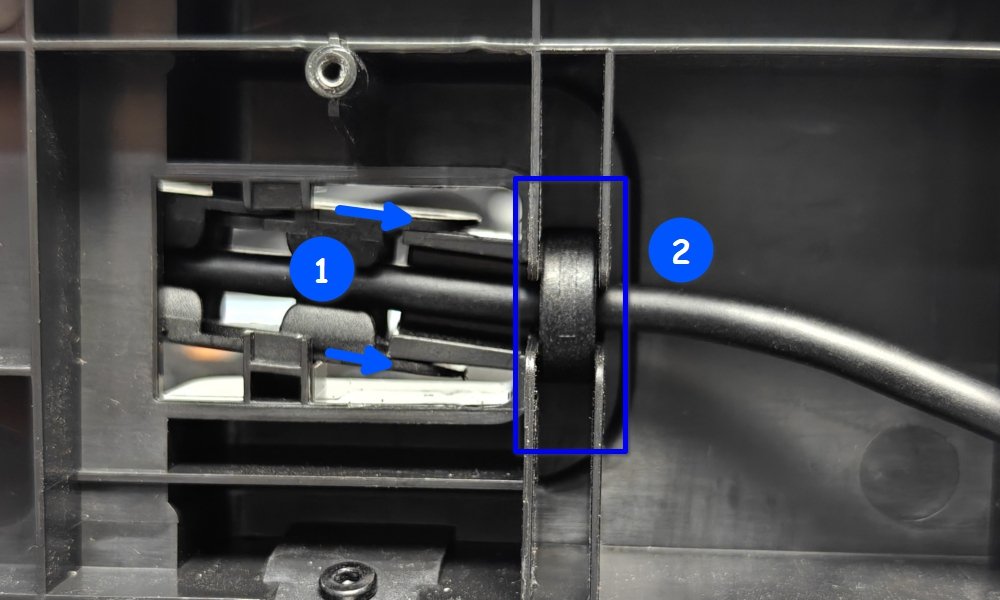
Clip the USB-C cable into the end of the cable chain, then install the end of the cable chain onto the printer and insert the ferrite ring into the mounting slot.
 |
 |
- If you are only replacing the cable chain and removed it by referring to Passo 2 of the removal instructions, follow the steps below to install it:
Align the notch on the filament holder with the cable and press firmly onto the cable to seat it within the holder. Route the cable into the fold of the holder and the first section of the cable chain.
 |
 |
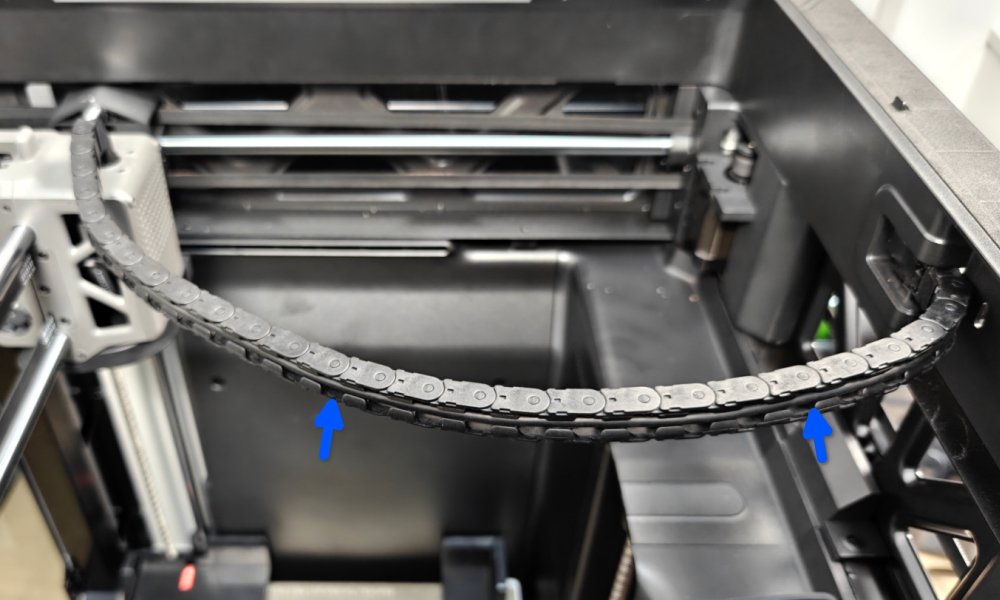
Adjust the position of the cable chain and press down onto the base housing to engage the clip. Route the cables into the cable chain.
 |
 |
- If you replaced the USB-C cable or removed the cable chain base housing, follow the steps below:
Important:
The USB cable and the cable chain base housing have specific installation directions and positioning requirements. When installing, ensure the white mark on the cable (as indicated by the arrow in the left image) is aligned with the edge of the notch on the cable chain base housing (as indicated by the arrow in the right image). See the image below for the specific alignment position:
 |
 |
Insert the USB cable into the cable chain along the notch of the cable chain bracket and the cable trough of the base. Finally, install the cable chain bracket onto the toolhead and secure it with screws.
|
|
Passo 3. Install the TH Board
Refer to the dedicated Toolhead Connection Board Replacement Guide for the H3C to install the TH board and the toolhead rear cover.

Passo 4. Install the Rear Panel (It Can be Installed After Verifying the Issue Is Resolved)
Refer to the dedicated Rear Panel Replacement Guide for the H3C to install the rear panel and other accessories.

Passo 5. Install the Window (can Be Installed After Verifying the Issue Is Resolved)
Refer to the dedicated Side Glass – Left Replacement Guide for the H3C to install the side glass – left onto the left panel.

Verify Functionality
Connect the power and turn on the printer. Start a print; if no errors occur, the installation is successful.
Notas Finais
We hope this guide has provided clear and practical support.
If the issue remains unresolved, please submit a support ticket and include your recent printer logs and additional pictures or other details. Our customer support team will review your request and provide detailed assistance.
You can also visit Bambu AI, which can instantly answer common questions and provide you with operational guidance.


