
Z Motor Replacement Guide
Bambu Lab H3C • Série Industrial H3
Z Motor Replacement Guide
Z Motor
The Z-axis motor is installed at the back of the printer and drives the heatbed along the Z-axis.
When to Replace
- The motor is burnt out.
- Bambu Lab Technical Support confirms that the Z-axis motor needs to be replaced.
Tools and Materials
- H2.0 Allen key
- Heatbed Slider Mounting Bracket
Safety Tips
Before performing any maintenance on the printer and its electronic components (including the Toolhead Cable), turn off the printer and disconnect the power supply to prevent accidental Screen touches or short circuits, which could cause additional electronic damage and safety hazards.

When performing maintenance or troubleshooting on your printer, please first check the temperature of the hotend and heatbed. Avoid operating at high temperatures. If operating at high temperatures is unavoidable, wear insulated gloves to ensure safe and effective maintenance.
Disassembly and Assembly Tips
- Removing and installing the top screws requires removing the AMS 3H first. Please refer to the wiki: AMS 3H Removal and Installation Guide to remove and reinstall the AMS 3H from the printer. All operations in this guide are performed with the AMS 3H removed.
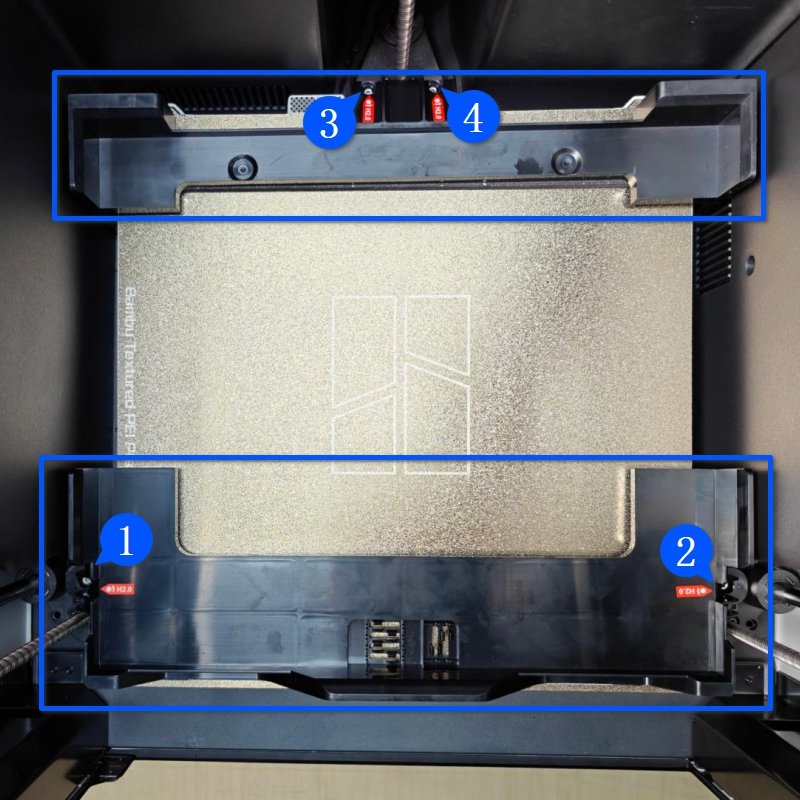
- To ensure the synchronization of the print bed height after replacing accessories, the print bed must be lowered to the bottom and the sliders locked prior to any disassembly. This guide assumes that the print bed sliders are already locked. There are two methods for locking the sliders; please choose the appropriate one based on your conditions:
Method 1: Use the original packaging shipping brackets that came with the product to lock the print bed.

Method 2: Download the dedicated model and use the screws from the unboxing fixing brackets to lock the sliders
Attachment: 2516-0922.3mf


Remove the Z Motor
Passo 1. Lower and Lock the Heatbed
Turn on the printer, perform an XYZ homing operation, then tap the “Lower Heatbed” icon on the screen to lower the heatbed to the bottom.

Using the heatbed mounting bracket, secure the three sliders and lock in the four screws.
Passo 2. Remove the Rear Panel
Refer to the dedicated Rear Panel Replacement Guide for the H3C, disconnect the power cable, and remove the rear panel.

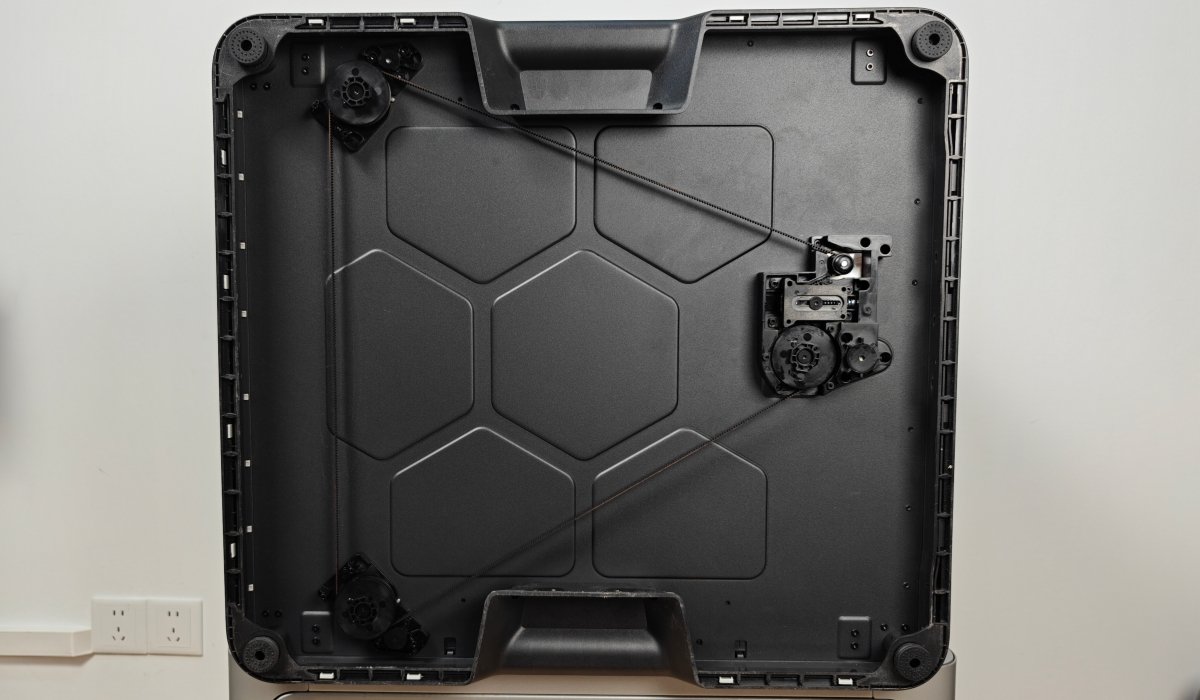
Passo 3. Place the Printer on Its Side
Have two people carefully lay the printer on its side on a flat surface.
Passo 4. Loosen the Z Belt from the Motor Pulley
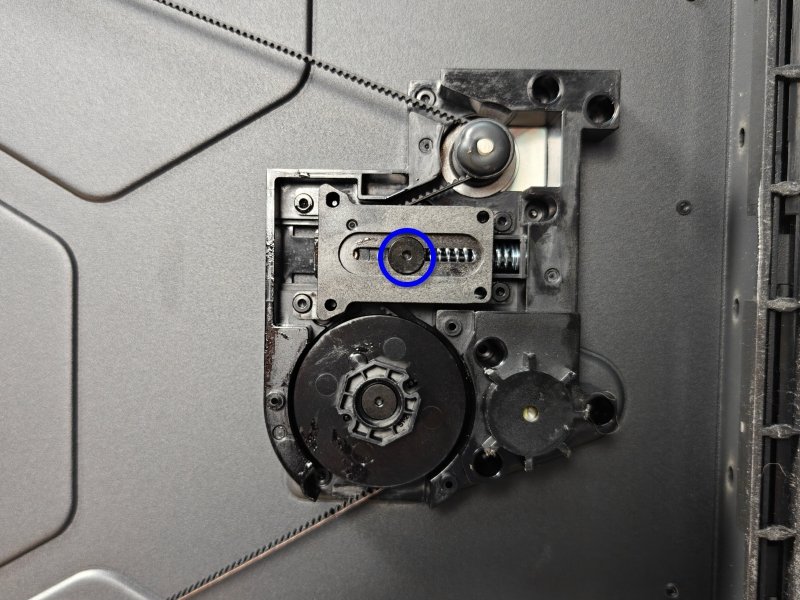
Use the H2.0 allen key to loosen the tensioner screw by a single turn. Then, manually press the Z belt as shown in the diagram to fully compress the tension spring. Re-tighten the tensioner screw to lock the spring in its compressed state.
 |
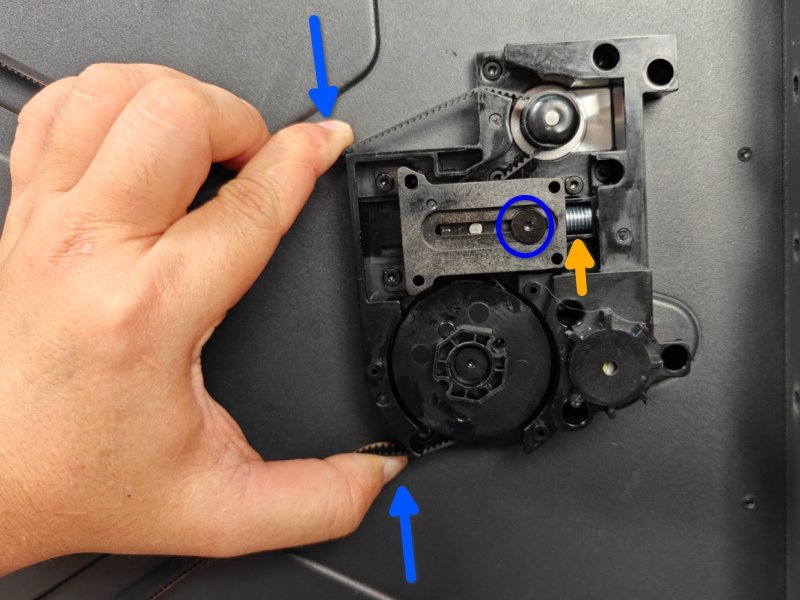 |
At this point, the Z belt should be completely loose, allowing you to easily remove it from the motor drive pulley and place it on the stopper at the front.
 |
 |
Passo 5. Remove the Z Motor
Unplug the Z motor from the MC board and release the motor cable from the two locking tabs. Open the locking tab of the magnetic ring and remove the magnetic ring.
 |
 |
Use an H2.0 allen key to remove the four screws, then remove the Z motor from the back of the printer.
 |
 |
Install the Z Motor
Passo 1. Install the Z Motor
Mount the Z motor onto the base housing with the connector facing the rear panel, then tighten the four screws in the indicated order. (Position four has slight interference, so tighten this screw last)
 |
 |
Install the magnetic ring near the connector. Before latching, ensure the cable is not pinched. Then, route the cable into the two locking tabs, and finally connect it to the connector on the MC board.
 |
|
Passo 2. Install the Z Belt Onto the Motor Pulley
Hook the Z belt onto the motor pulley. Slowly loosen the tensioning screw; the Z belt will be tensioned. Leave the tensioning screw loosened by two turns.
|
|
Passo 3. Release the Heatbed Lock and Tighten the Screw
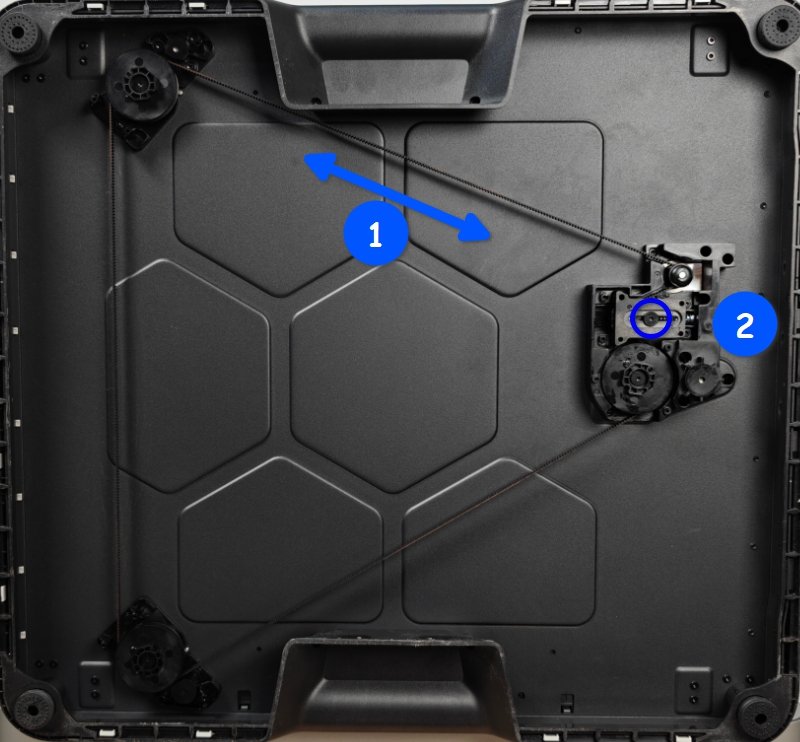
Using the H2.0 allen key, remove the four screws securing the bracket and take off the bracket (try to remove it while the printer is on its side to avoid repeatedly adjusting its position). Pull the Z-axis belt back and forth 2-3 times to confirm no abnormalities, tighten the tensioning screw, and finally, place the printer upright.
|
 |
Passo 4. Install the Rear Panel
Refer to the dedicated Rear Panel Replacement Guide for the H3C to install the rear panel and other accessories.

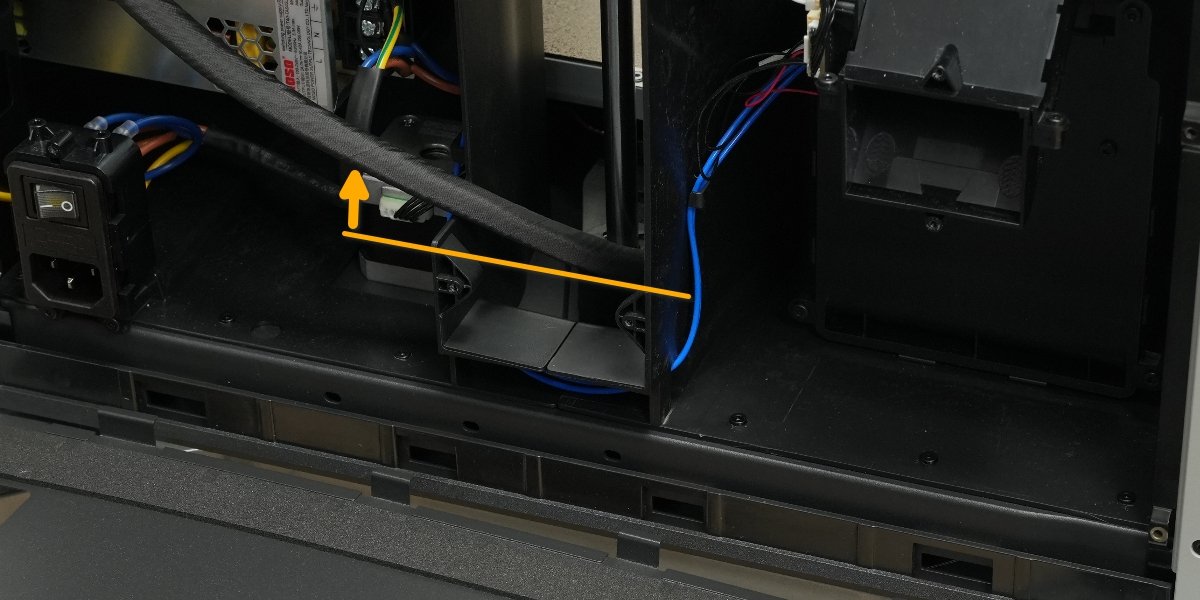
Rear Panel Installation Tip: Be sure to check and ensure that the heatbed cable is positioned above the screw holes of the left and right inner linings. This prevents the cable from being trapped underneath, which would prevent the heatbed from lifting properly.
Verify Functionality
Configure the printer and run the heatbed auto-leveling procedure once. The procedure must complete successfully.
Notas Finais
We hope this guide has provided clear and practical support.
If the issue remains unresolved, please submit a support ticket and include your recent printer logs and additional pictures or other details. Our customer support team will review your request and provide detailed assistance.
You can also visit Bambu AI, which can instantly answer common questions and provide you with operational guidance.


