
Replacing the LED Fill Light – Front
Bambu Lab P2S • Série Performance P2
Replacing the LED Fill Light – Front
LED fill light – front
LED Fill Light – Front: An LED light strip installed inside the front cover that can be used to fill light into the printer cavity.
Accessory package includes:
- LED fill light – front* 1
When to replace
- LED fill light – front connecting cable is damaged;
- LED fill light – front is off/flickering/partially dimmed.
Safety Tips
Important reminder!
Before performing any maintenance on the printer and its electronics (including the tool head cable), turn off the printer and disconnect the power cord to avoid short circuits that could cause additional damage to the electronics and potentially lead to safety hazards.
When performing maintenance or troubleshooting on your printer, please first confirm the temperature of the hot end and heated bed and avoid operating under high temperature conditions. If you must operate under high temperature conditions, please wear heat-insulating gloves to ensure that maintenance work is performed safely and effectively.
Remove LED fill light – front
Step 1 – Disconnect the cables
Open the access end of the AP board cover and disconnect the LED fill light-front connection cable from the AP board;

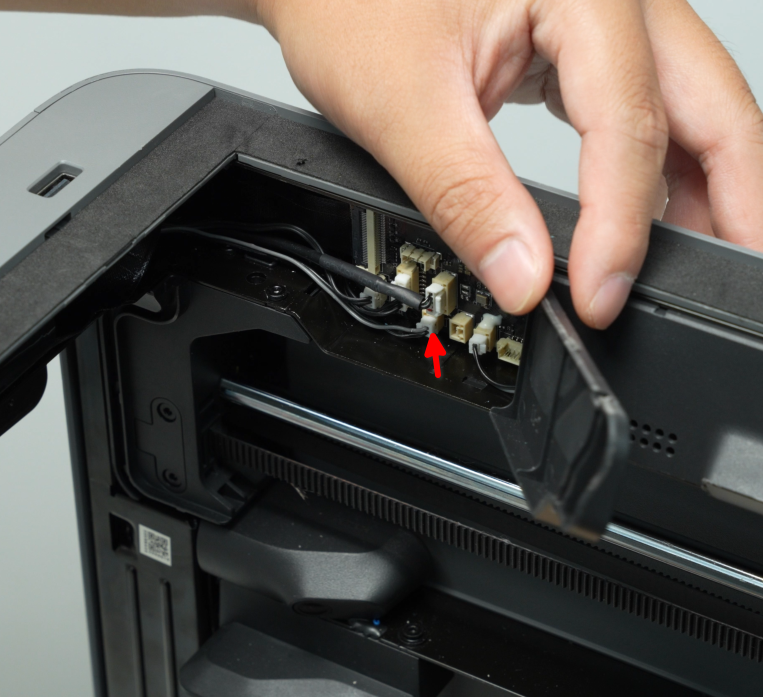
Step 2 – Remove the LED Light – Front
Tear open the LED fill light – front a little from the left side (as indicated by the arrow), and then pull the cable out from the small hole on the beam toward the light bar.
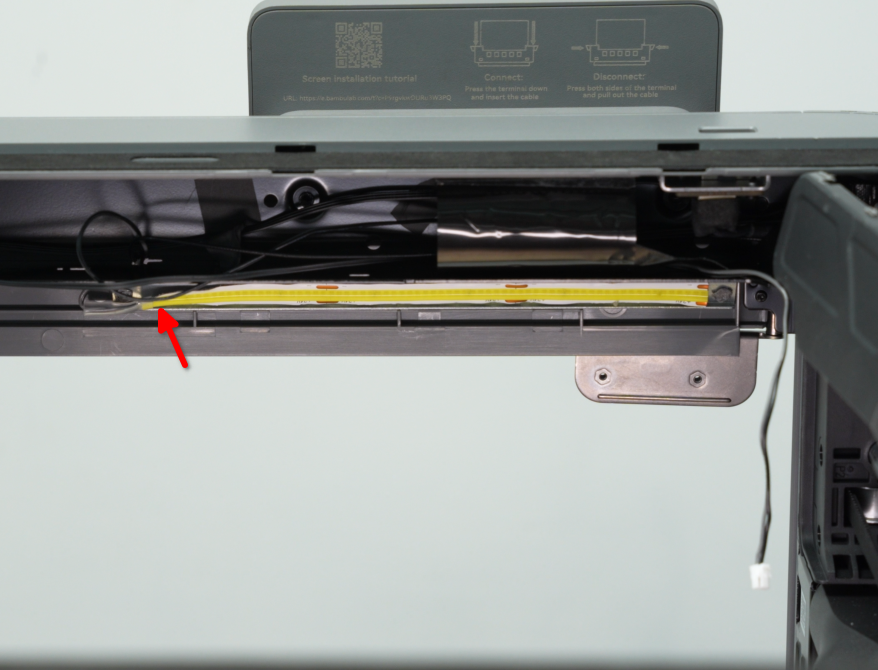
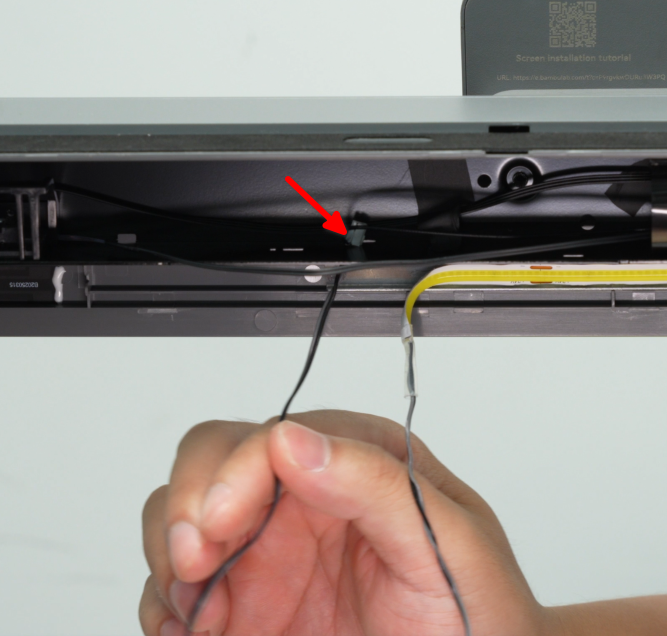
Finally, tear off the LED fill light – front from the metal strip.
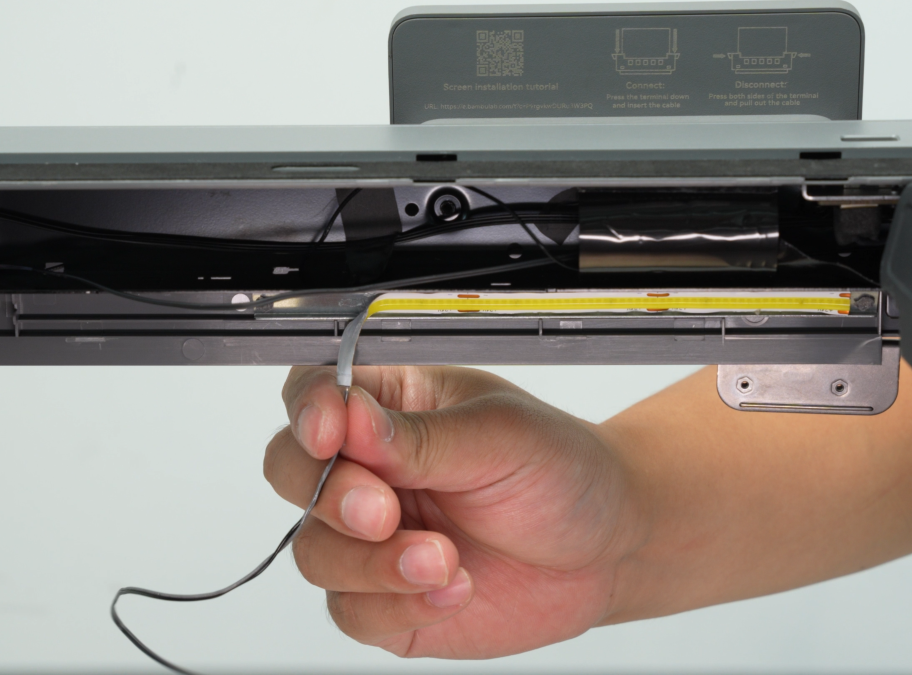
Install LED fill light – front
Step 1 – Attach LED Light – Front
Remove the adhesive backing from the new LED light. Align the light with the left side of the heat-insulating post on the metal strip. Secure the right side of the LED light along the metal strip. Leave the end of the connecting wire unattached for now.
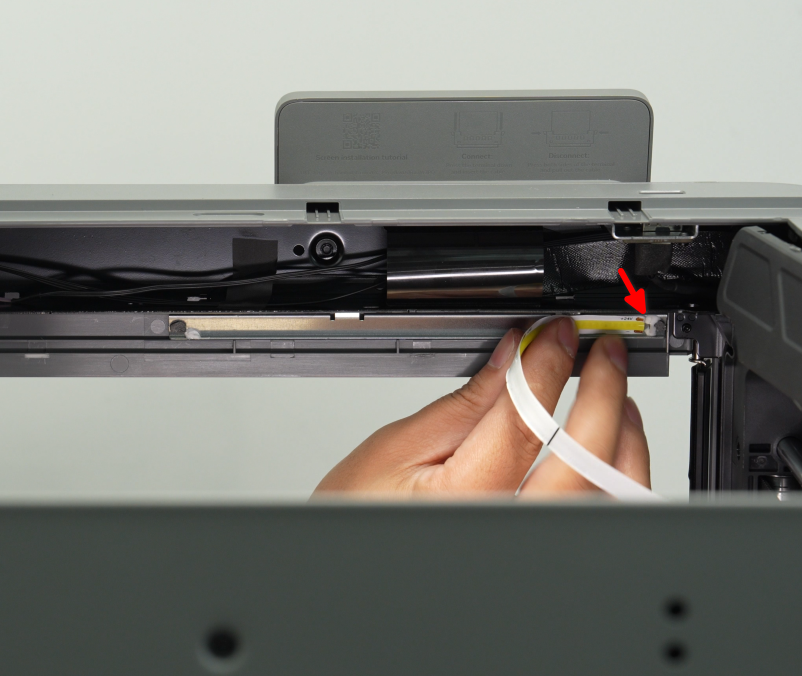
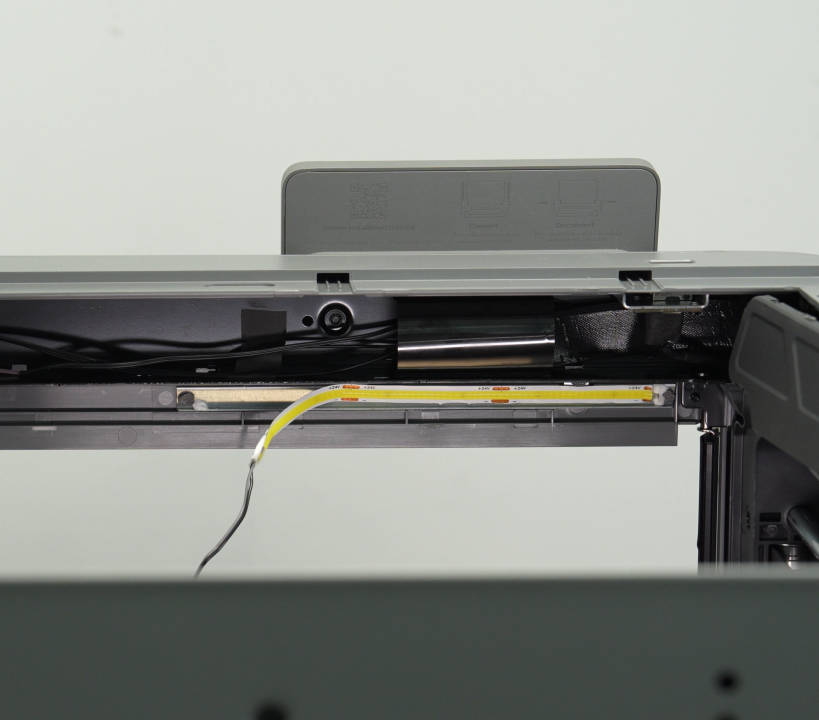
Then pass the plug on the front of the LED fill light through the small hole on the beam, and then pass the cable along the beam to the vicinity of the AP board.
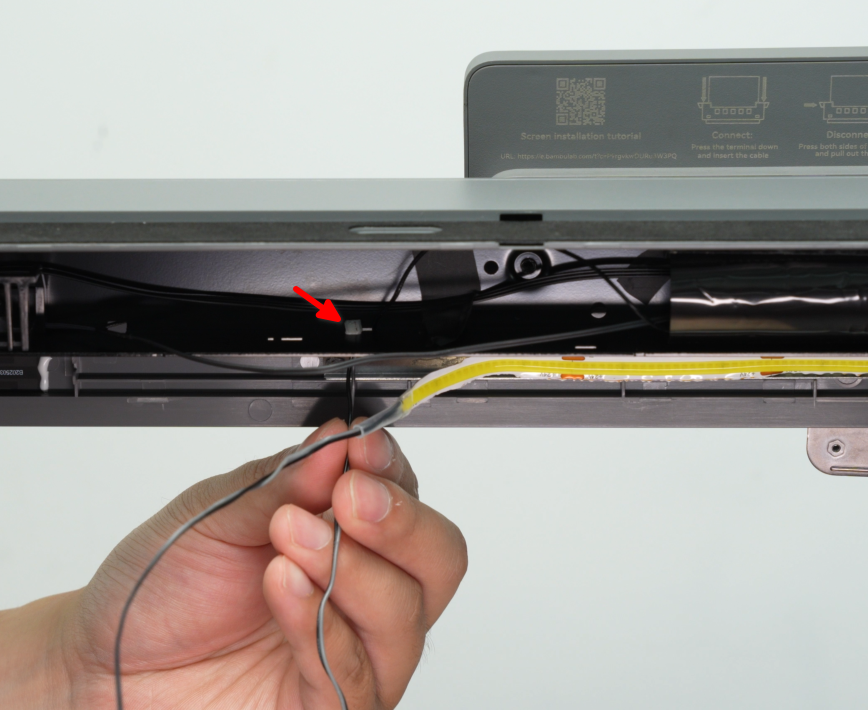
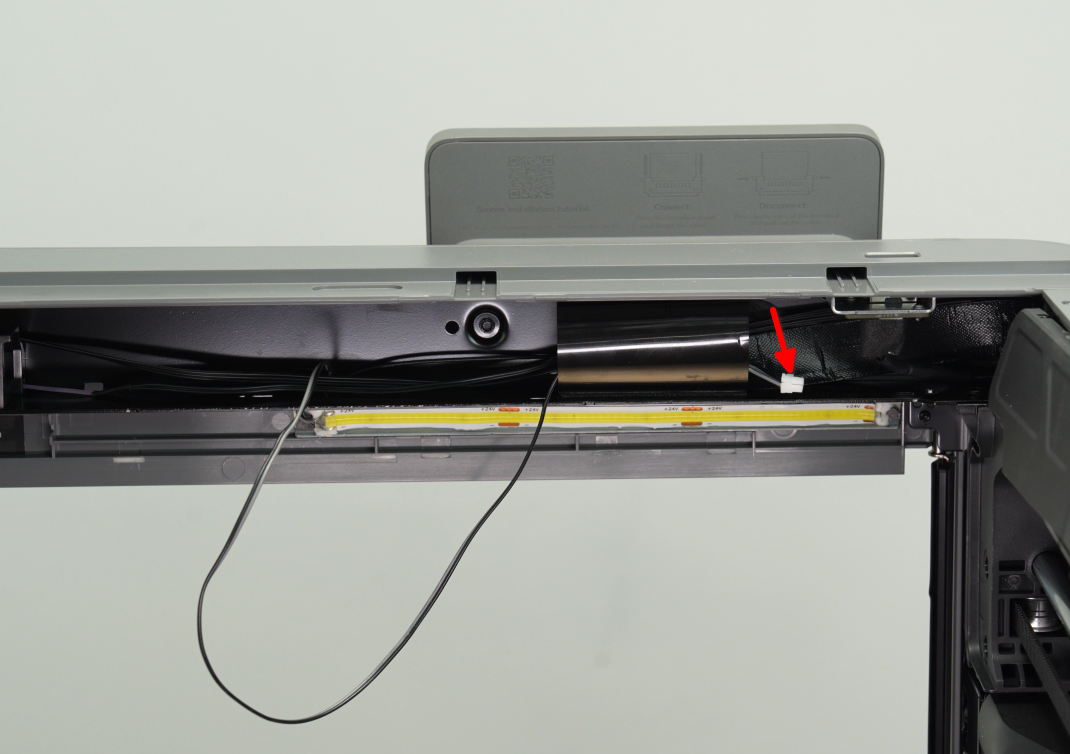
Step 2 – Connect the cables
Connect the LED fill light – front connection cable to the AP board and refasten the AP board cover inspection end.
How to verify success
Connect the power supply, turn on the printer, and check whether the LED fill light can be used normally.
If you encounter any issues, please retrace your steps and check that the LED Fill Light’s front cable is properly connected, then check again to see if it works properly. If the problem persists, please contact the Bambu Lab support team for further assistance.


