
Replacing the AMS Mainboard
What is the AMS main board
The AMS main board is the center circuit board of the AMS. It provides a series of connectors through which the various functional components are connected by cables.

Manual Bambu Lab
Quando substituir a Mainboard AMS
Abnormal voltage, components abnormally hot or burnt out, the communication of a module is abnormal, broken connectors, unrecoverable FW upgrade failed.
Tools and materials needed
H2.0 & H1.5 allen key
Aviso de segurança e estado da máquina antes de iniciar a operação
Turn the power OFF to the printer and disconnect the connection of the AMS with the printer.
Guia de operação para substituição da mainboard AMS
Passo 1 – (Desmontagem) Remova o tubo PTFE
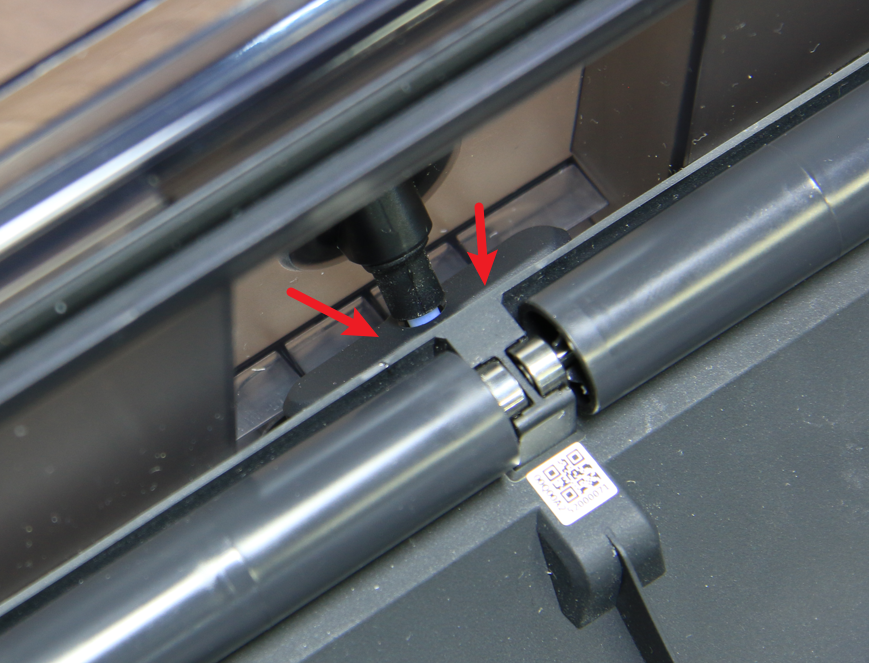
Open the AMS cover, press the button on the filaments hub and pull out the PTFE tube.
Manual Bambu Lab

Manual Bambu Lab
Passo 2 – Remova 2 parafusos
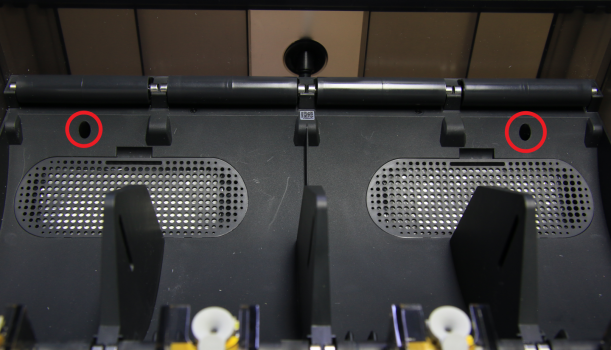
Remove 2 screws.
Manual Bambu Lab
Passo 3 – Remova o módulo do quadro intermediário
Inverta o quadro central para cima, desconecte o cabo bambu bus e o cabo de alimentação, e remova a module do quadro central.

Manual Bambu Lab

Manual Bambu Lab
Passo 4 – Desconectar 11 cabos
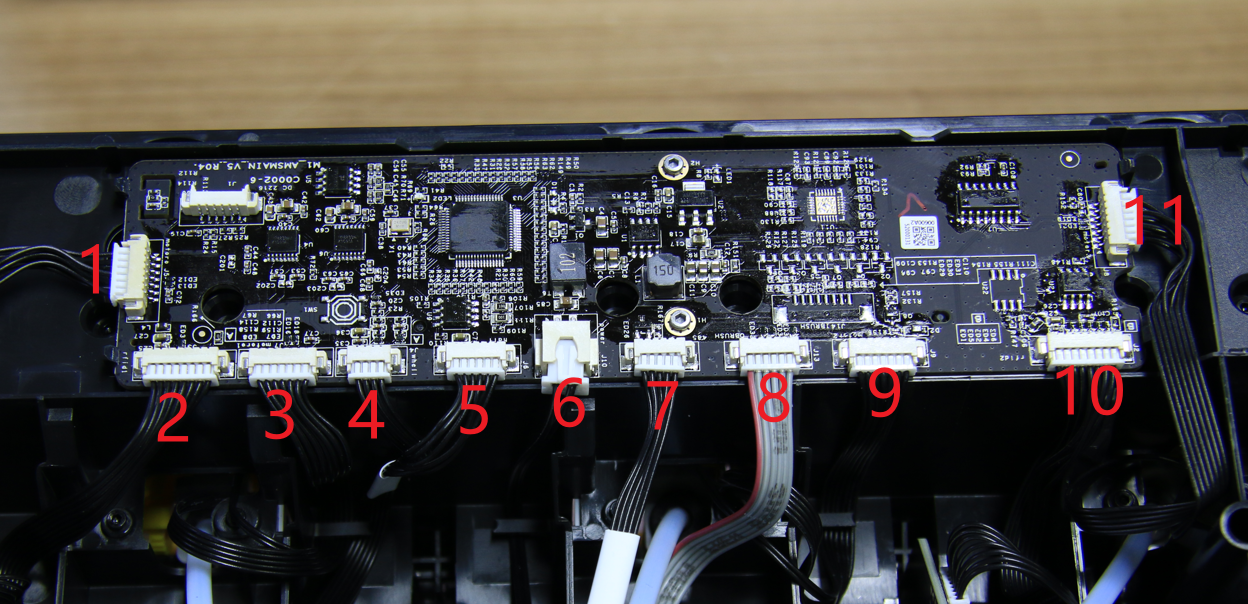
Disconnect all the cables from the connectors on the main board. Make some marks if needed or take pictures of the connections.

Manual Bambu Lab
Passo 5 – Remova a placa principal AMS
Remova 2 parafusos, desbloqueie a mainboard da 4 buckles e, em seguida, remova a mainboard.

Manual Bambu Lab
Passo 6 – (Montagem) Instale a placa principal AMS
Install the main board to the middle frame, prefix with the 4 buckles, and then lock in 2 screws.
Manual Bambu Lab
Step 7 – Connect 11 cables
Connect 11 cables, according to the marks or pictures taken before disconnected.
Manual Bambu Lab
NO.
Connect Object
N0.
Connect Object
NO.
Connect Object
1
The first stage feeder 1
5
Conduíte Hall ao hub de fio de impressão
9
The first stage feeder 3
2
RFID board 1
6
Conexão de energia para a placa principal AMS
10
RFID board 2
3
The first stage feeder 2
7
Condução de cabo Bambu para placa de alimentação
11
The first stage feeder 4
4
Odometer
8
Conector do motor para o hub de fio de material
Step 8 – Install the middle frame module
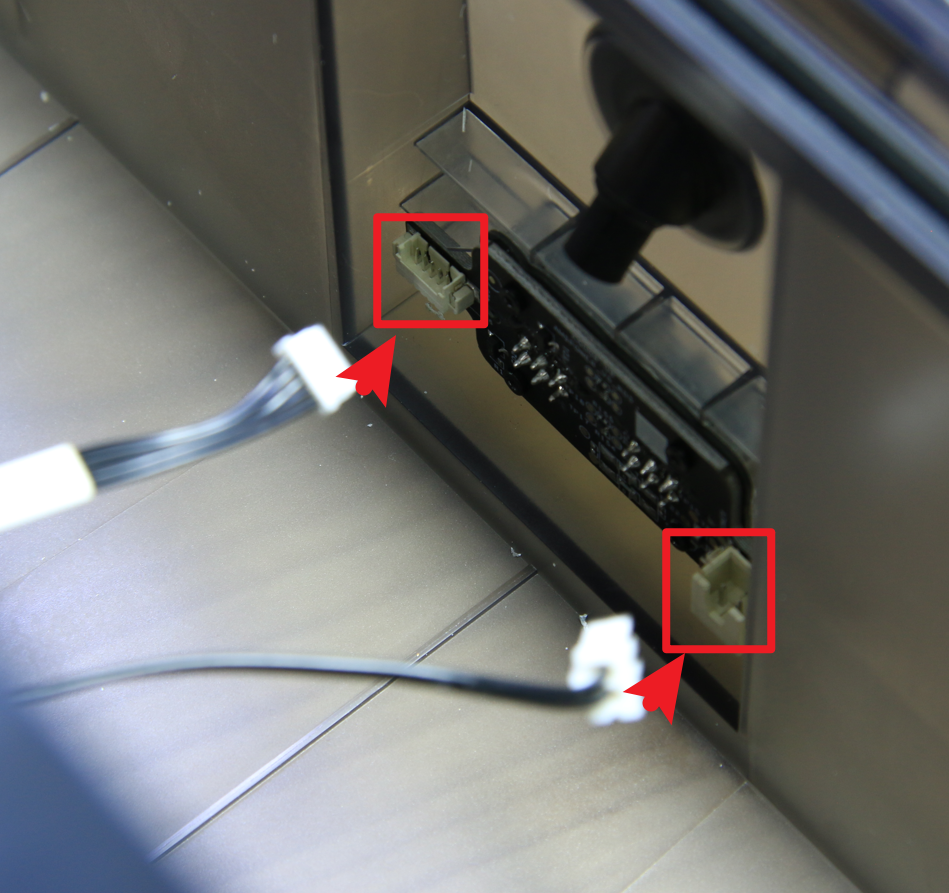
Instale o quadro central na caixa principal AMS, conecte o cabo bambu bus e o cabo de alimentação.

Manual Bambu Lab
Manual Bambu Lab
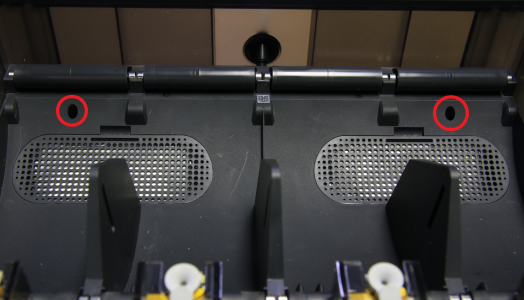
Passo 9 – Fixar 2 parafusos com travamento
Install the middle frame in place, lock in 2 screws.
Manual Bambu Lab
Passo 10 – Conectar o tubo PTFE
Verifique o suporte do tubo e insira o tubo PTFE. Tente puxá-lo para garantir que o tubo esteja bem conectado.

Manual Bambu Lab

Manual Bambu Lab
Como verificar a conclusão/sucesso
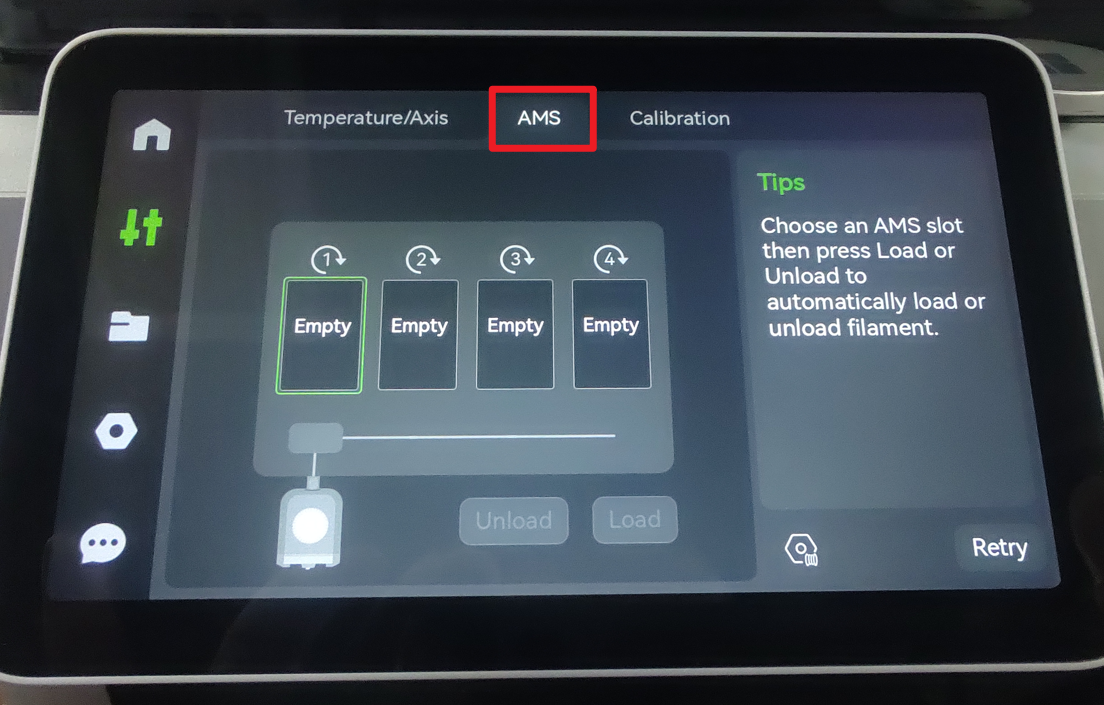
1. Connect the AMS to printer and power on, confirm that the AMS menu is on.
Manual Bambu Lab
2. Check the SN and firmware, the FW and SN should be showed after entry, update the FW if new FW found.

Manual Bambu Lab

Manual Bambu Lab
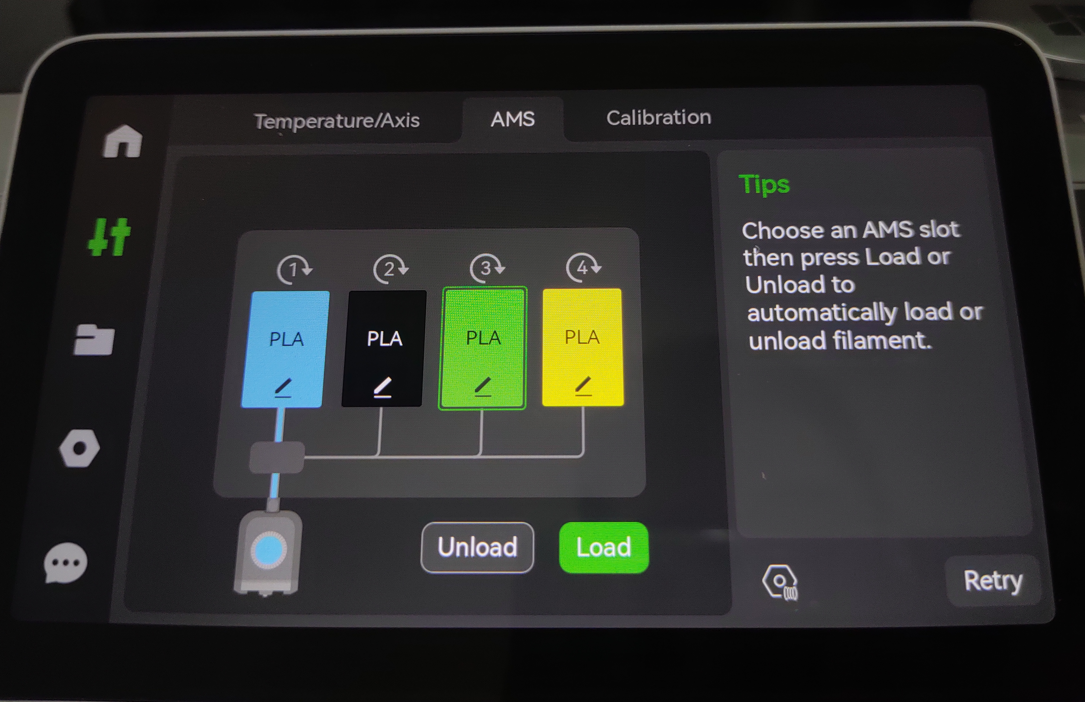
3. Load filaments to the 4 slots, and confirm that every slot works fine. If you load Bambu Lab official filaments, the filaments’ information will be recognized.
Manual Bambu Lab
If your AMS is not like this, please check the connections. If it still malfunctions, contact the Bambu Lab service team for further assistance.
Precisa de Peças Originais Bambu Lab?
A 3D Centro Oeste é especialista em impressoras 3D com estoque a pronta entrega de peças oficiais Bambu Lab no Brasil com envio imediato. Garanta bicos de aço endurecido, hotends montados, engrenagens da extrusora, placas PEI e filamentos com nota fiscal e garantia.

