
Guia de Embalagem e Transporte X2D Combo
Bambu Lab X2D • Série Avançada X2
Guia de Embalagem e Transporte X2D Combo
Packing Tips
Proper packaging is the most effective way to avoid shipping damage, as it ensures the safety of your goods and minimizes unnecessary economic losses.
To ensure your equipment remains secure during transit, we kindly remind you to:
- Check that all screws are tightened, to secure internal components.
- Check that all cushioning foam is properly placed, to fully protect the equipment.
Video Guide
Packing Steps
1. Unload Filament, Lower Heatbed, and Power Off
- On the screen tap Unload, roll the filament back to the spool, and remove it.
 |
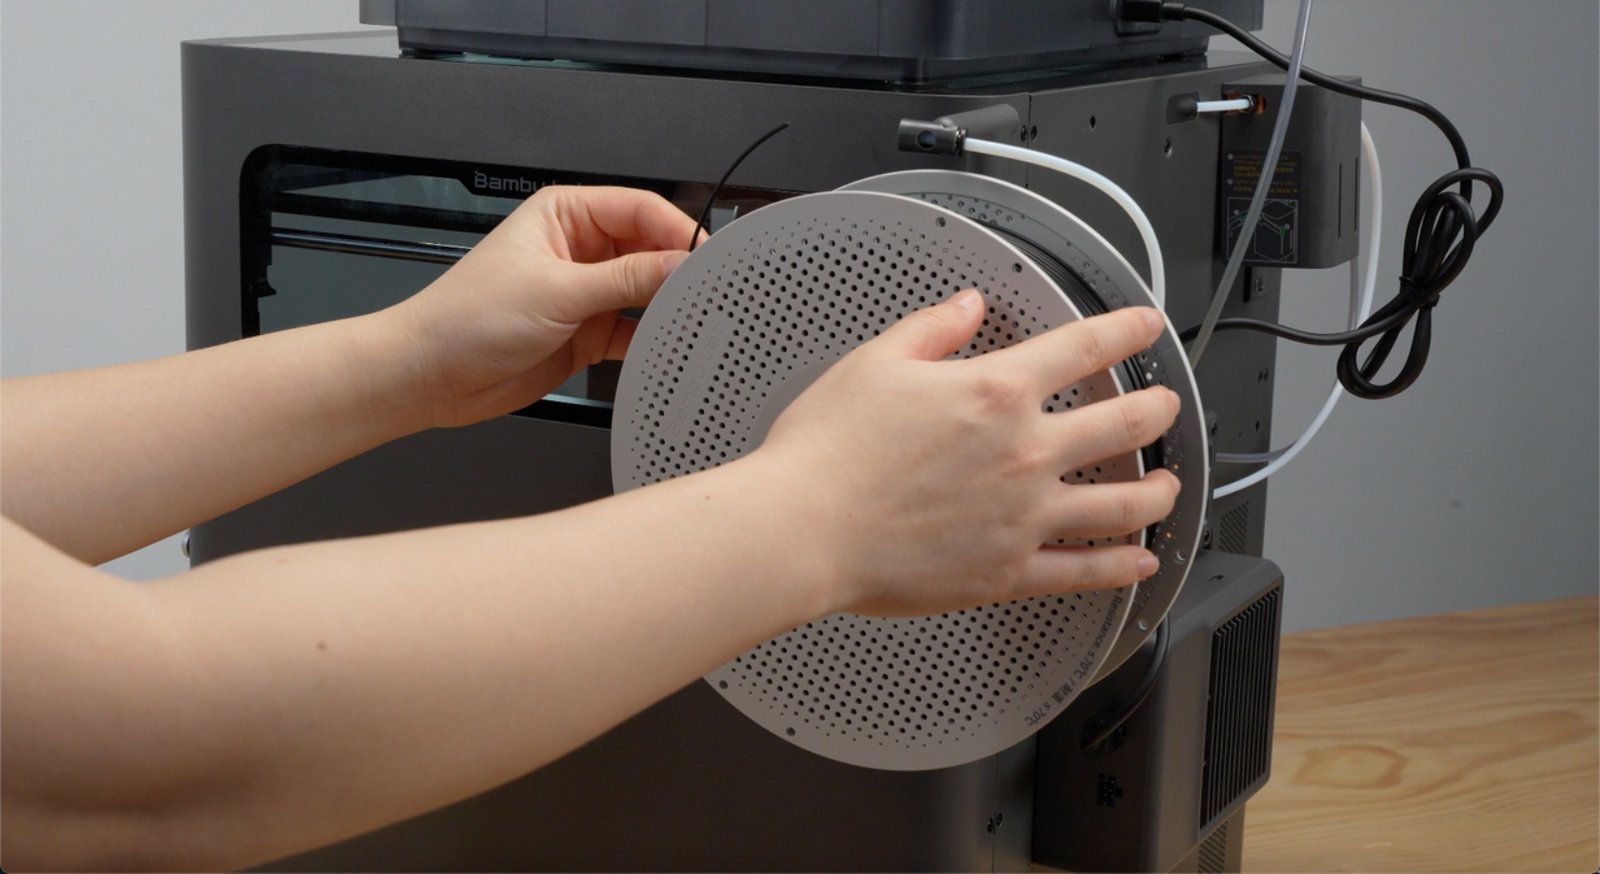 |
- Remove all filament spools from the AMS 2 Pro.

- Place back the foam under the heatbed.
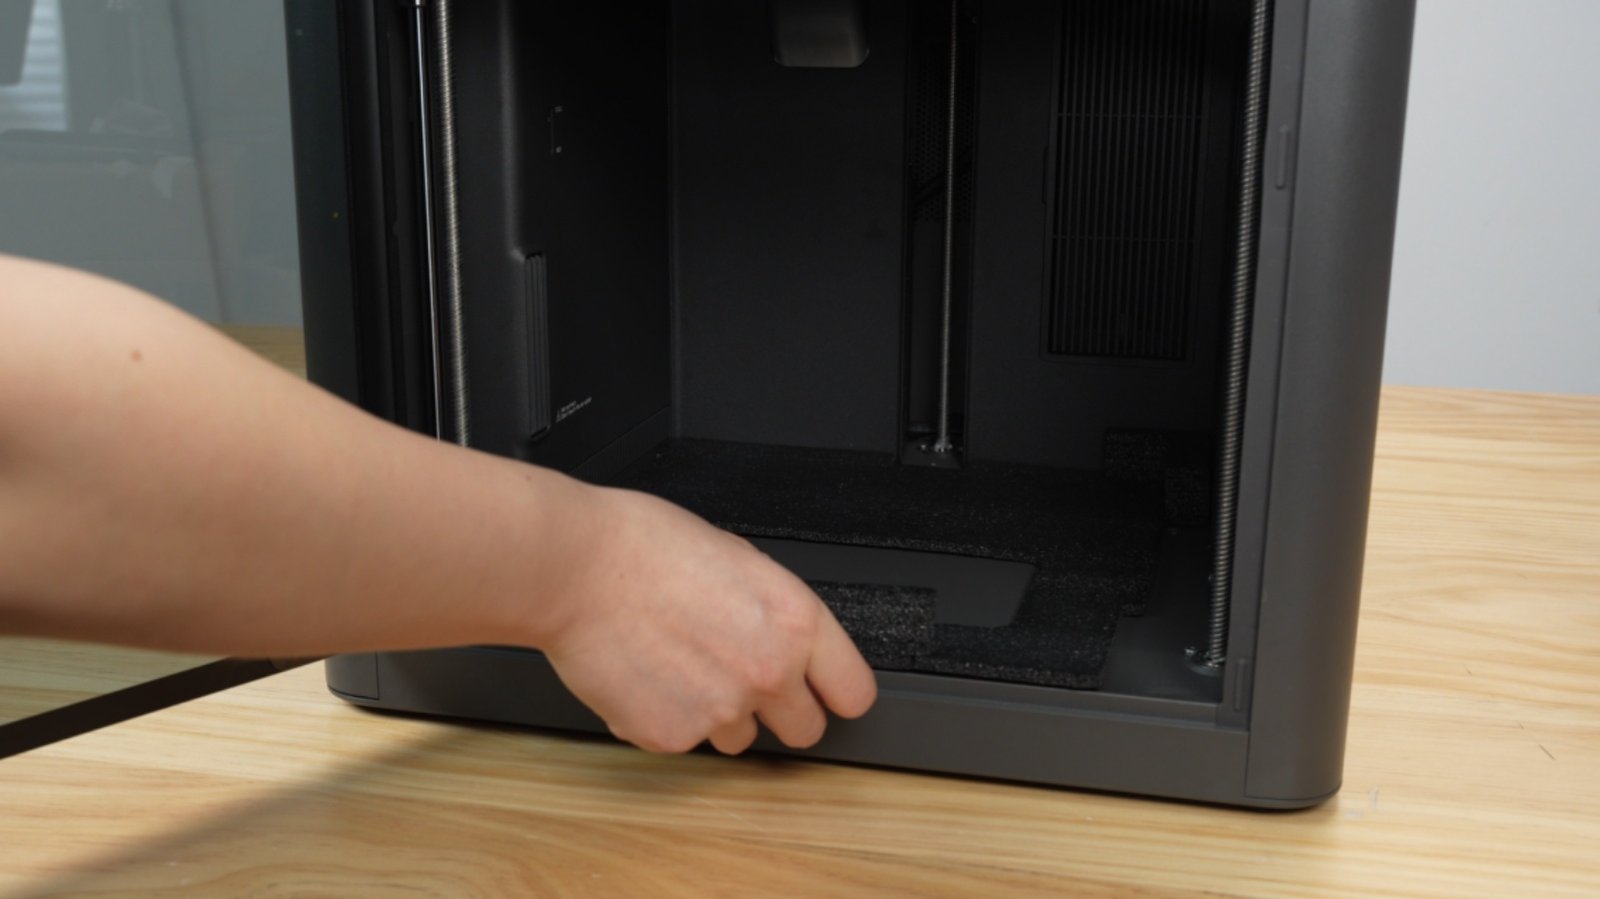
- Use the screen to lower the heatbed until it presses firmly against the foam pad.
 |
 |
Note: When the heatbed is near the bottom, lower it 1 mm at a time to prevent it from hitting the base.
- Power off and unplug the power cord.
 |
 |
2. Remove External Exhaust Fan Bundle
- Disconnect the Bambu Bus 6-pin cable.
 |
 |
- Press the area shown and slide right to unlock, then pull the fan out.
 |
 |
3. Remove Spool Holder
- Press the pneumatic connector to disconnect the PTFE tube from the spool holder.

- Pull out the spool holder.

- Wiggle the holder up and down to disassemble.

4. Remove AMS 2 Pro
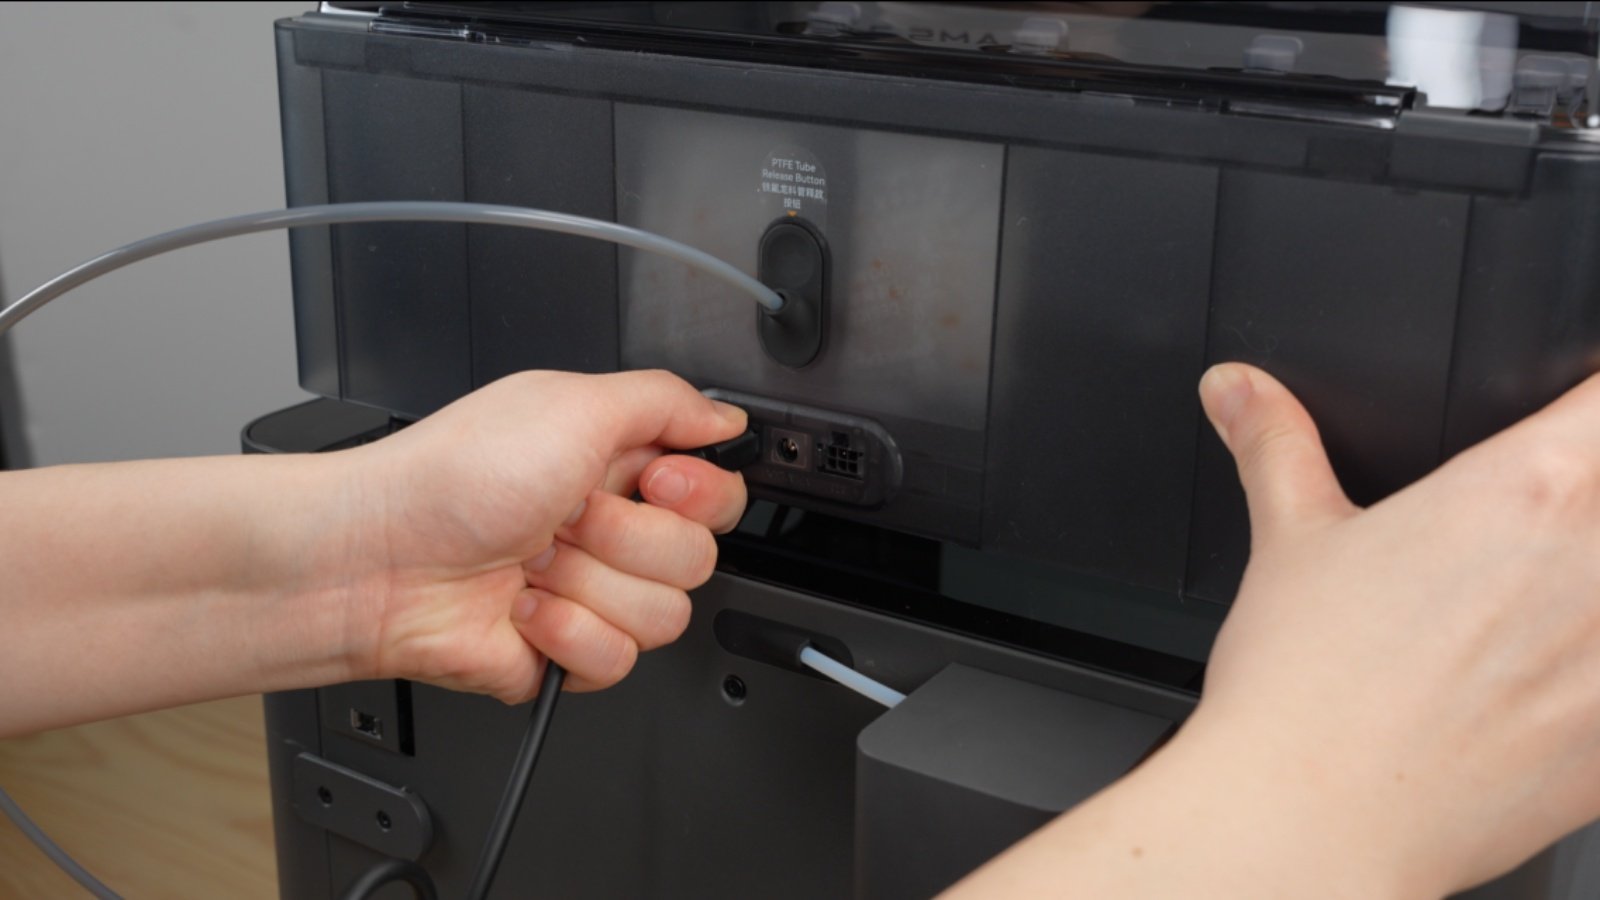
- Disconnect the 6-pin cable.
 |
 |
- Press the release button and pull out the PTFE tube.
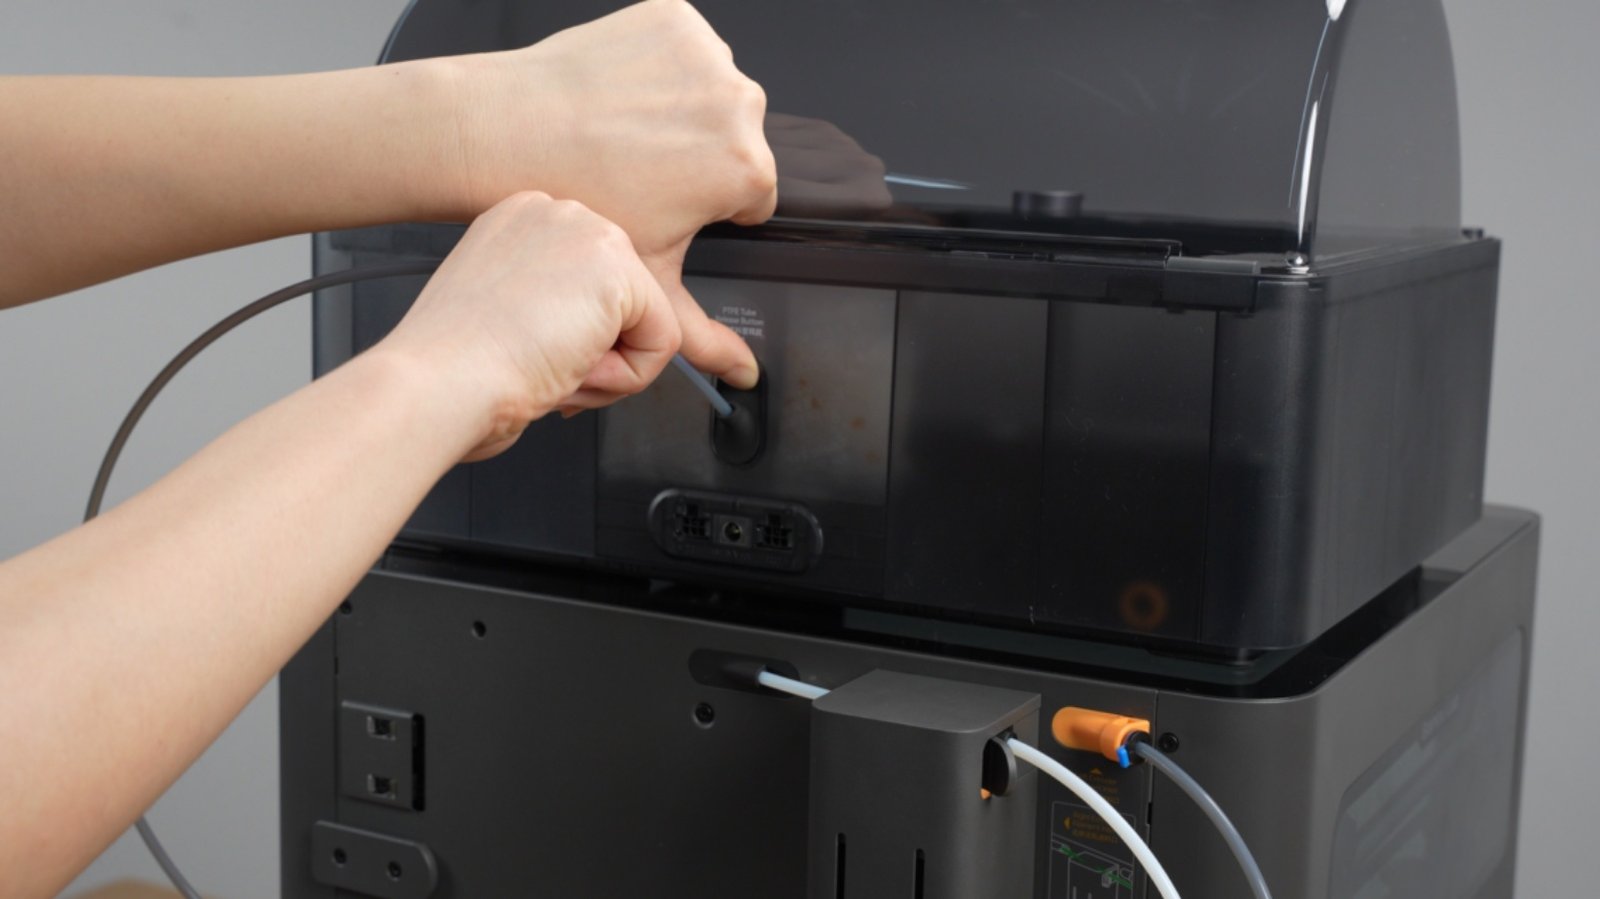
- Take off the AMS 2 Pro and put the external exhaust fan bundle back.
 |
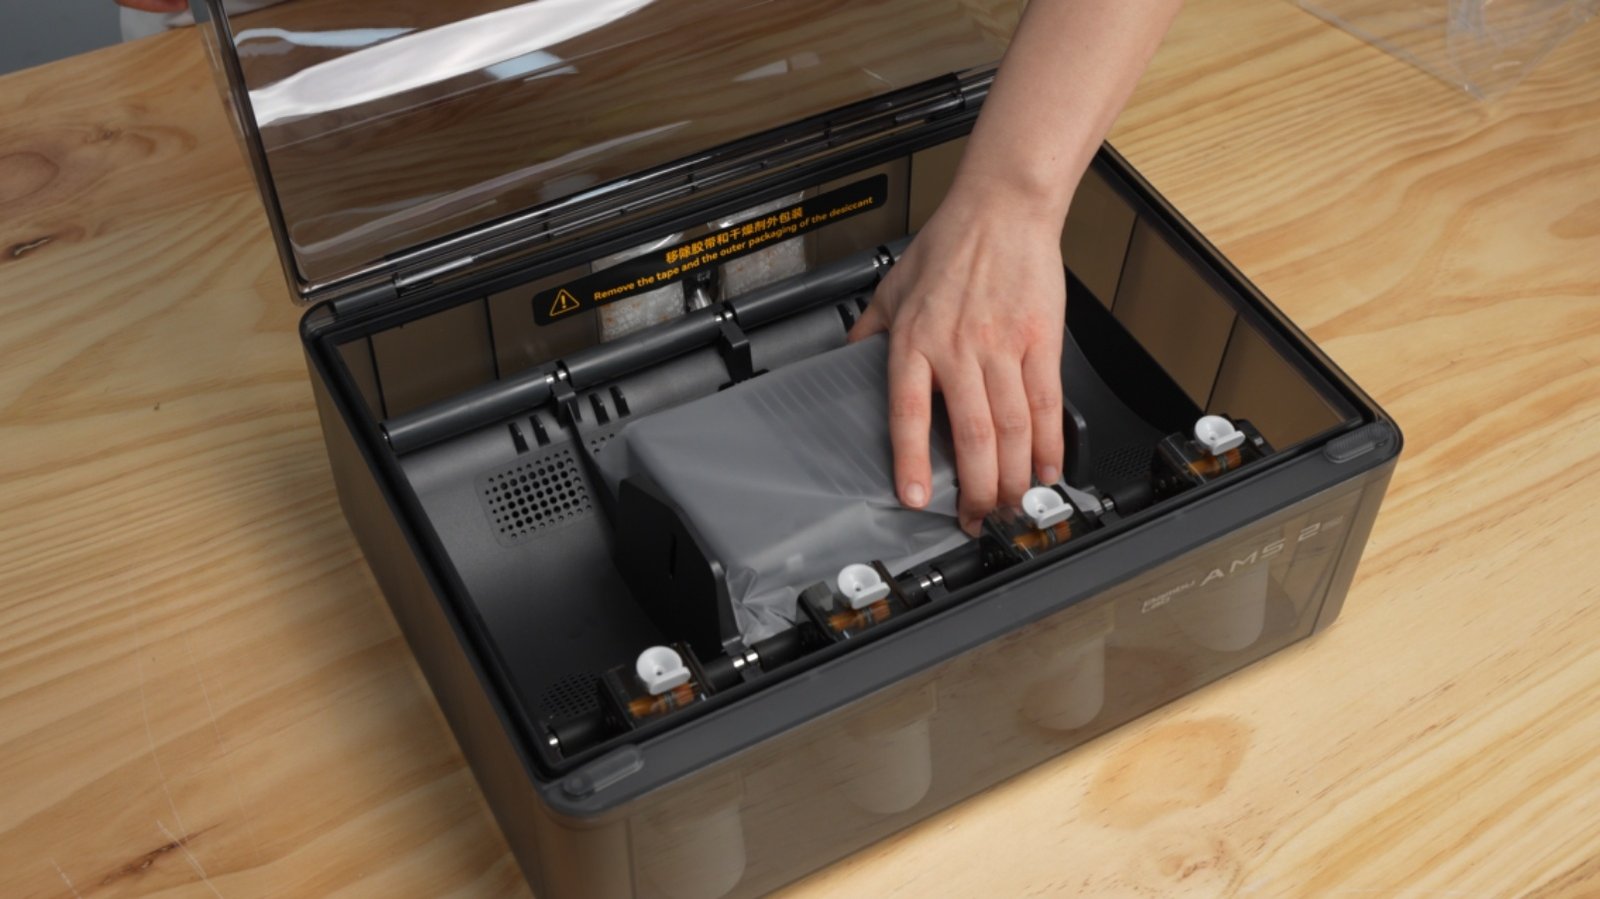 |
- Put back the foam and cardboard and secure the external exhaust fan bundle.
 |
 |
5. Remove Auxiliary Extruder
- Press the pneumatic connector and pull out the white PTFE tube.
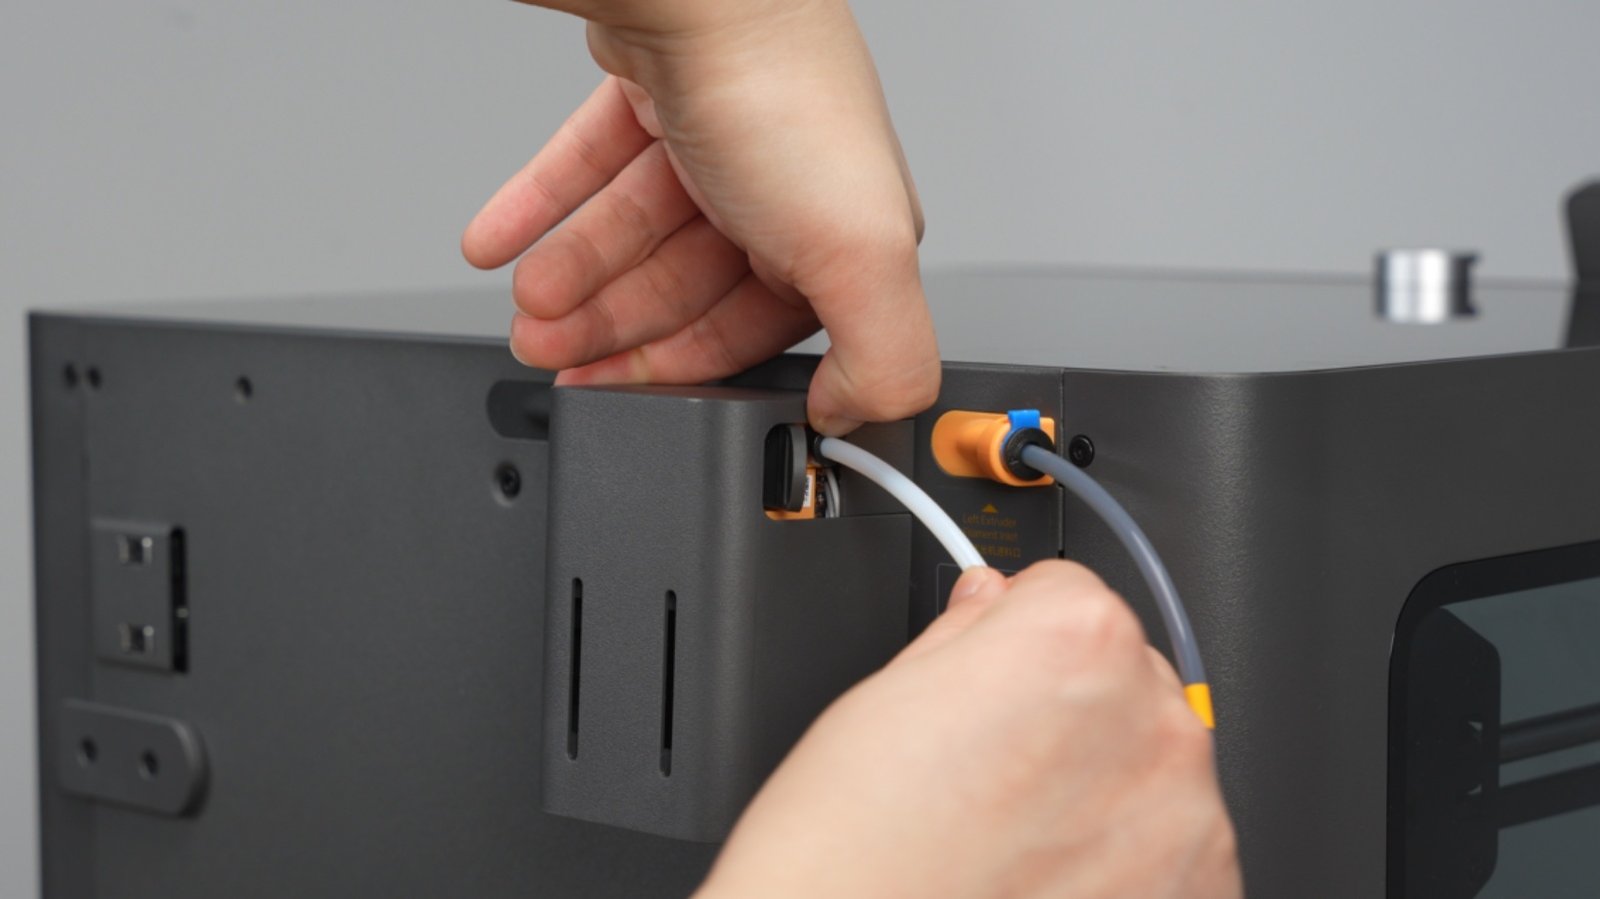
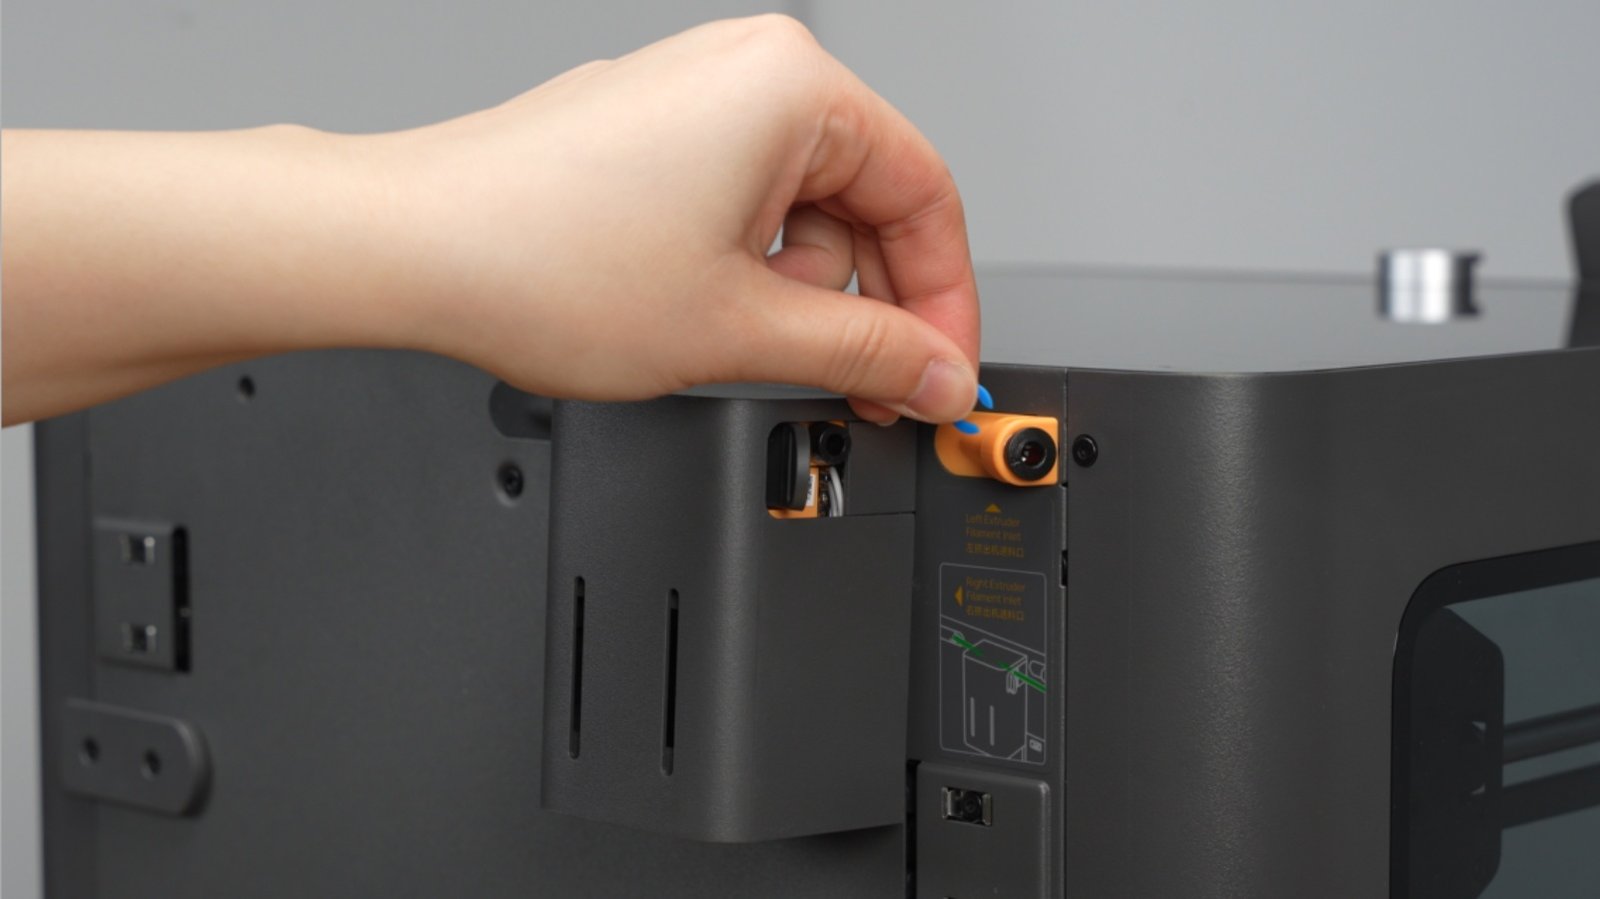
- Remove the blue clip.

- Pull out the gray PTFE tube, and reinstall the blue clip.
 |
 |
- Use the open-end wrench to loosen the nut on the auxiliary extruder.

- Lift the auxiliary extruder slightly and pull it outward.
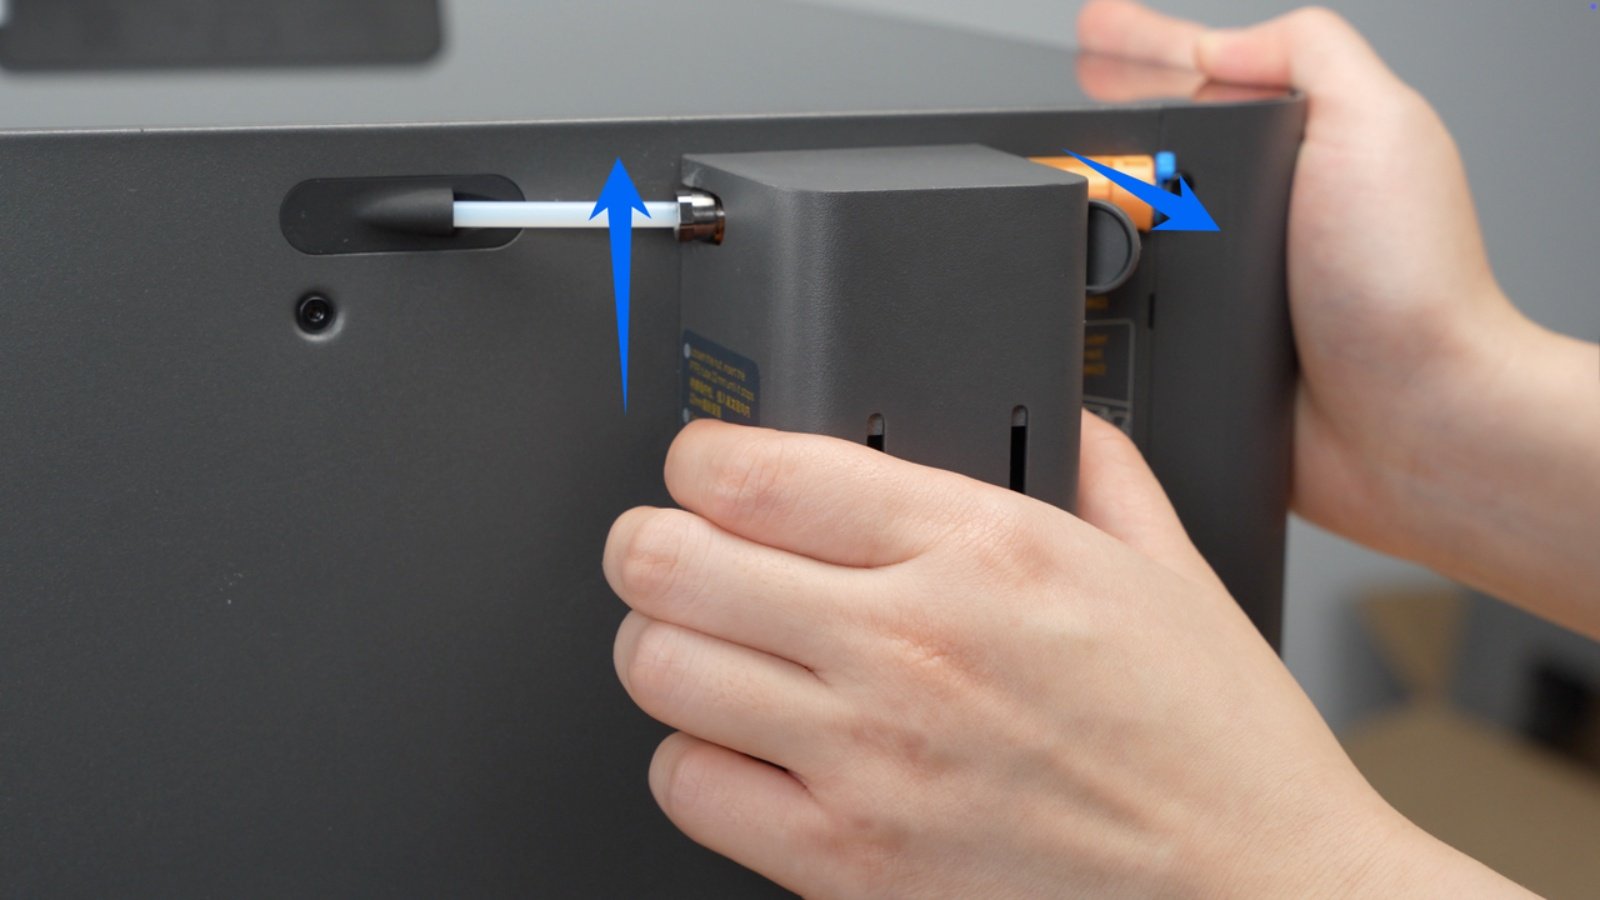
- Pull out the left-side PTFE tube.
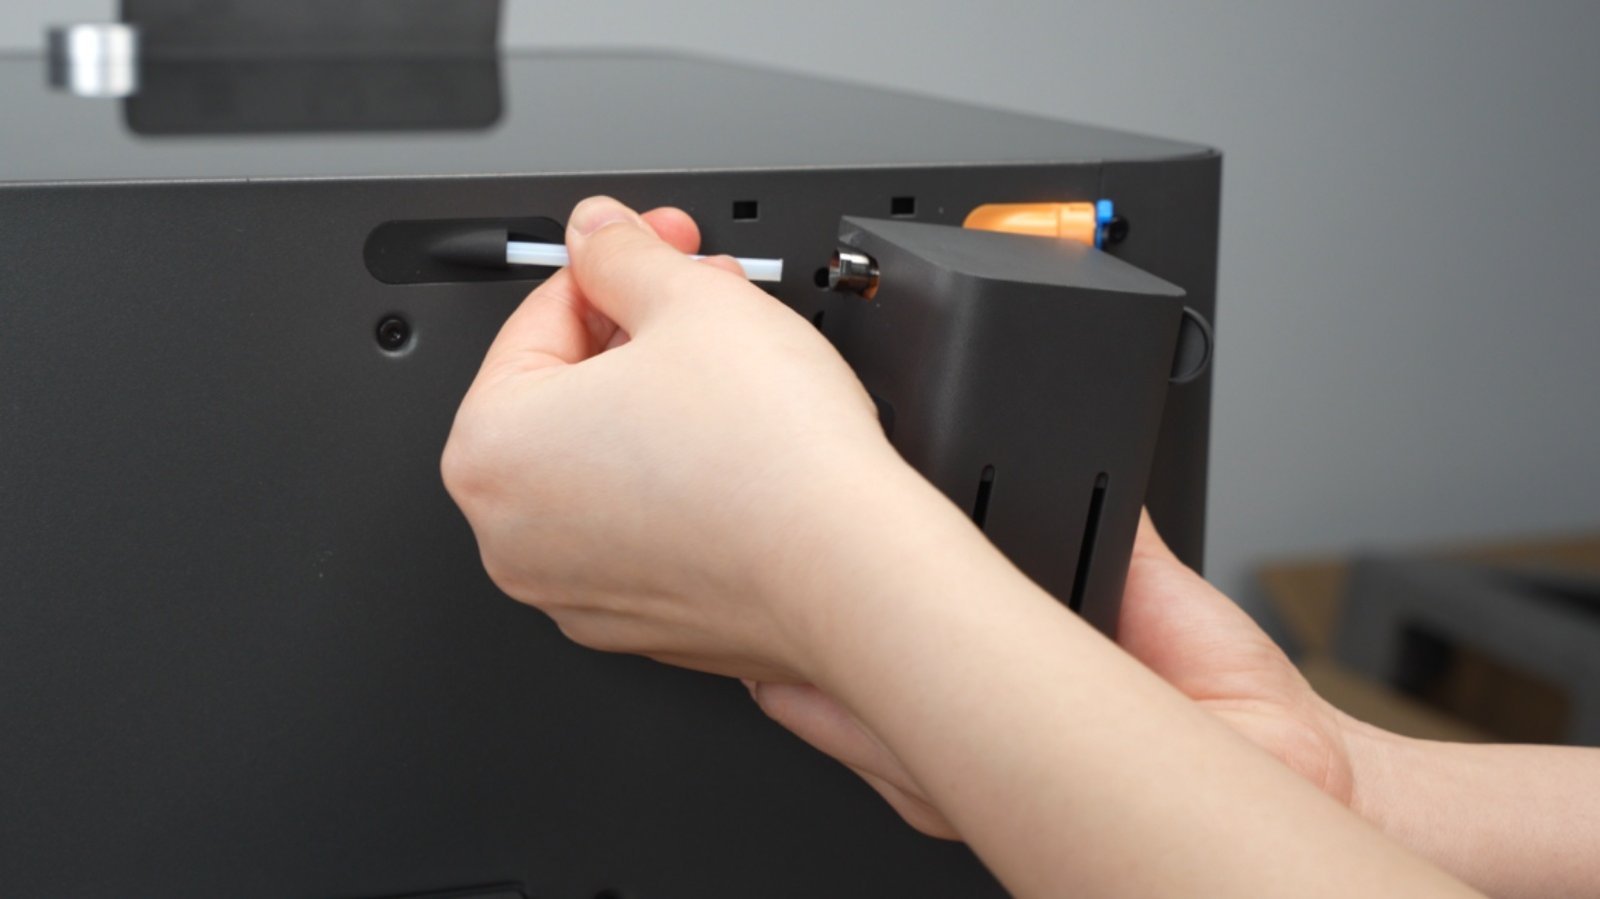
- Slide out the cover plate and disconnect the cable.
 |
 |
-
Reinstall the cover plate.

-
Use tape to secure the cables and tubes on the rear panel.
 |
 |
6. Remove Touchscreen
- Press the unlock point, slide the screen to the right, then pull it outward.
 |
 |
- Hold the cable terminals on both sides and disconnect the screen.
 |
 |
- Secure the cable with tape.

7. Secure Toolhead, Lead Screws, Heatbed
- Remove the glass top cover.

- Use a zip tie to secure the toolhead and move it to the rear-right of the chamber.
 |
 |
- Thread the zip tie through the holes shown to secure the linear rod.
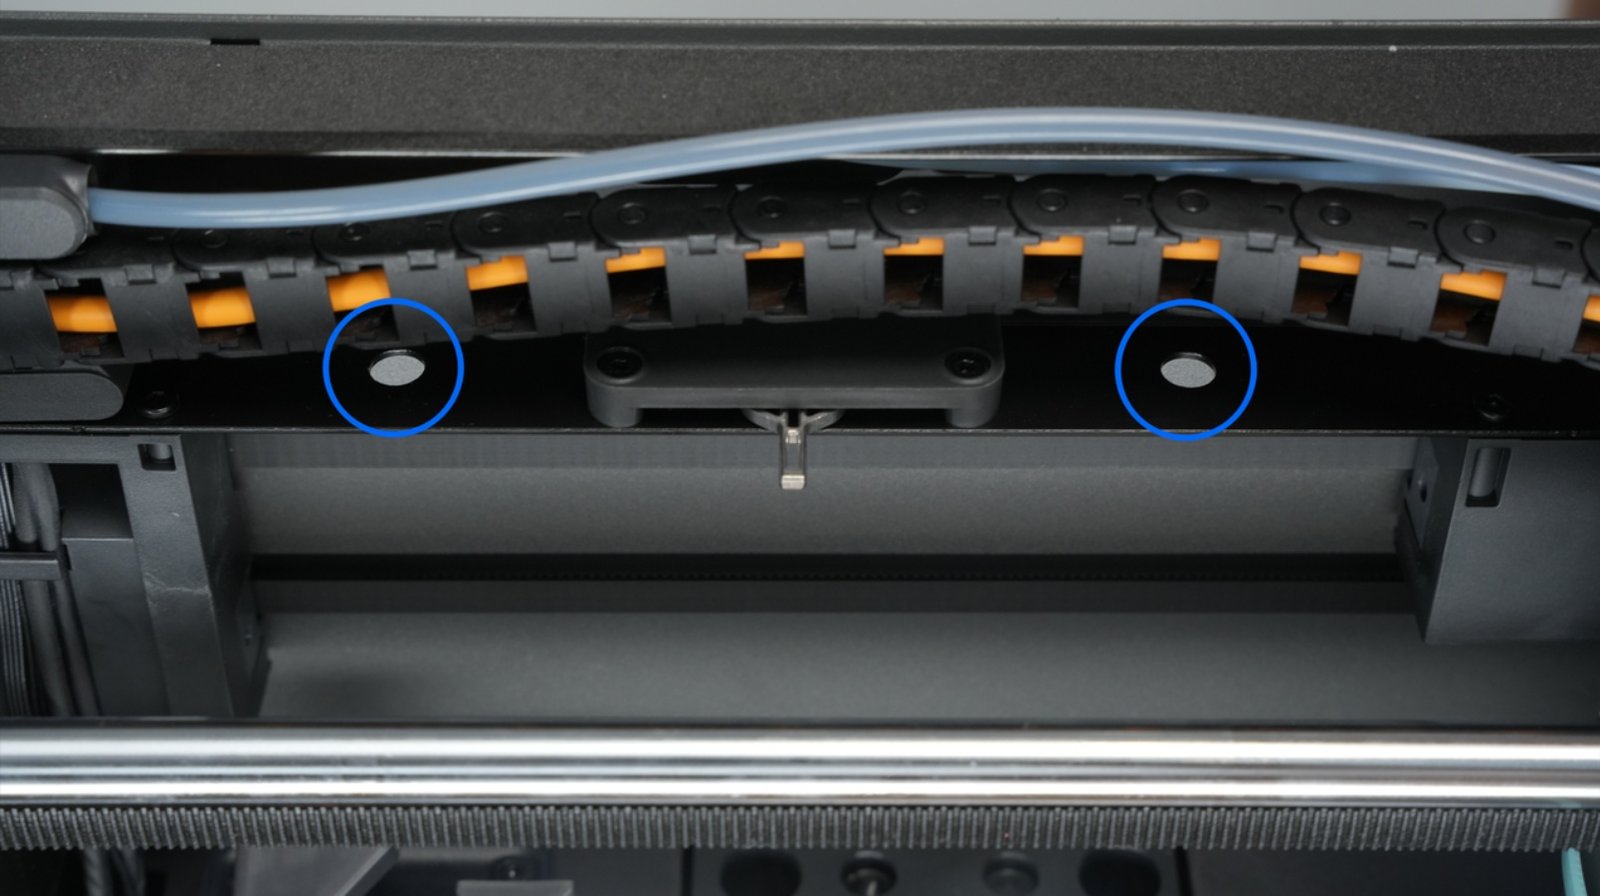 |
 |
- Install the two lead-screw protectors.
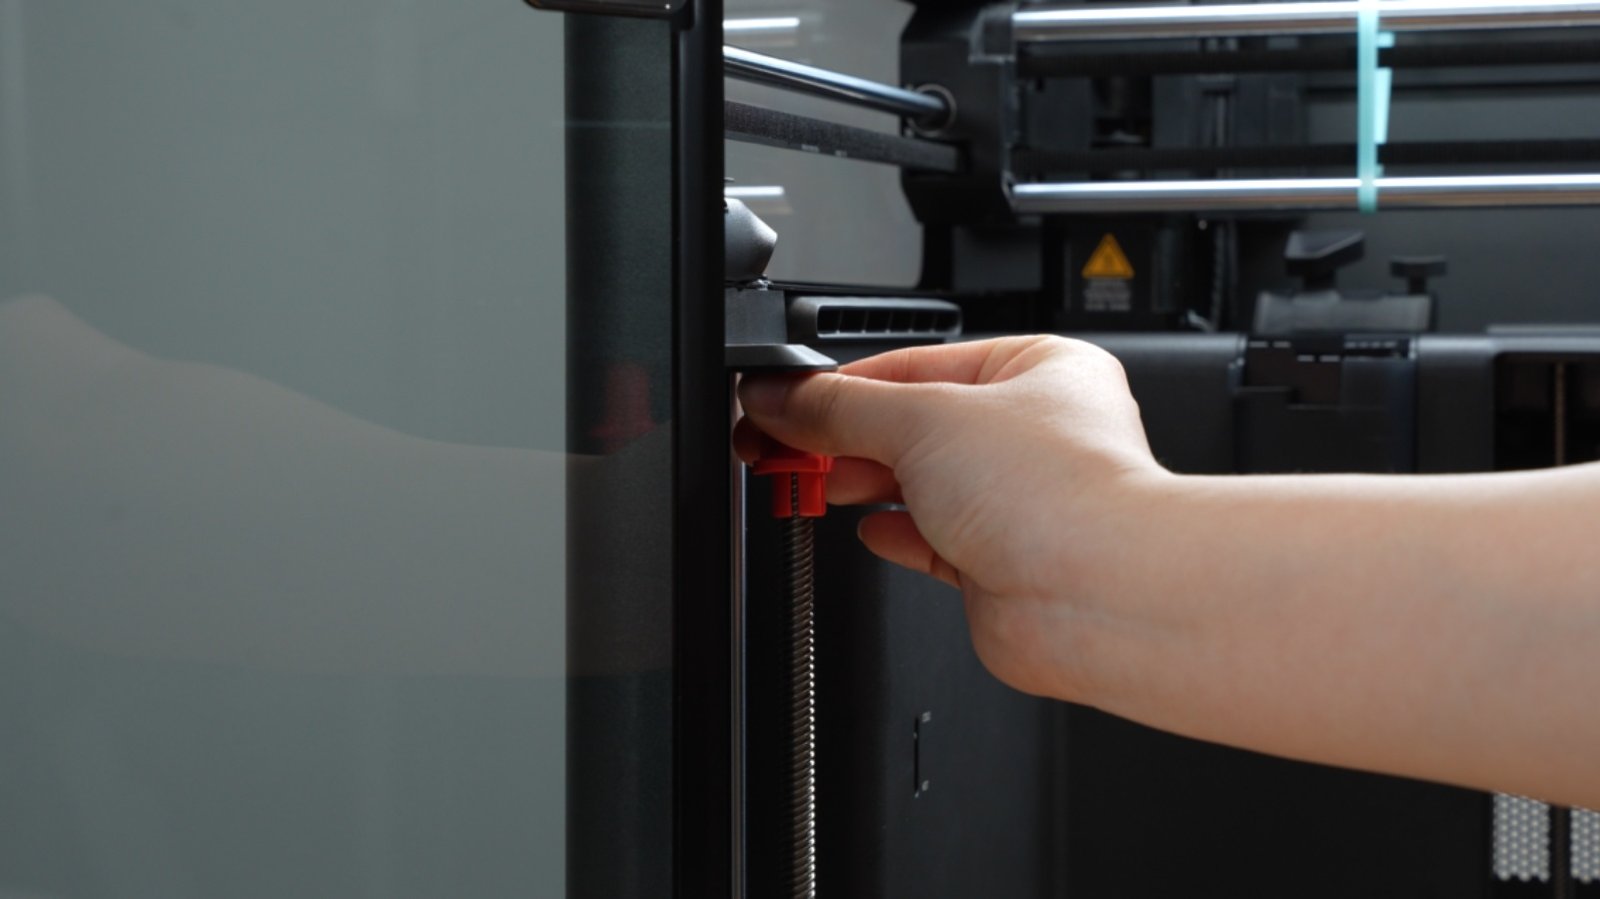 |
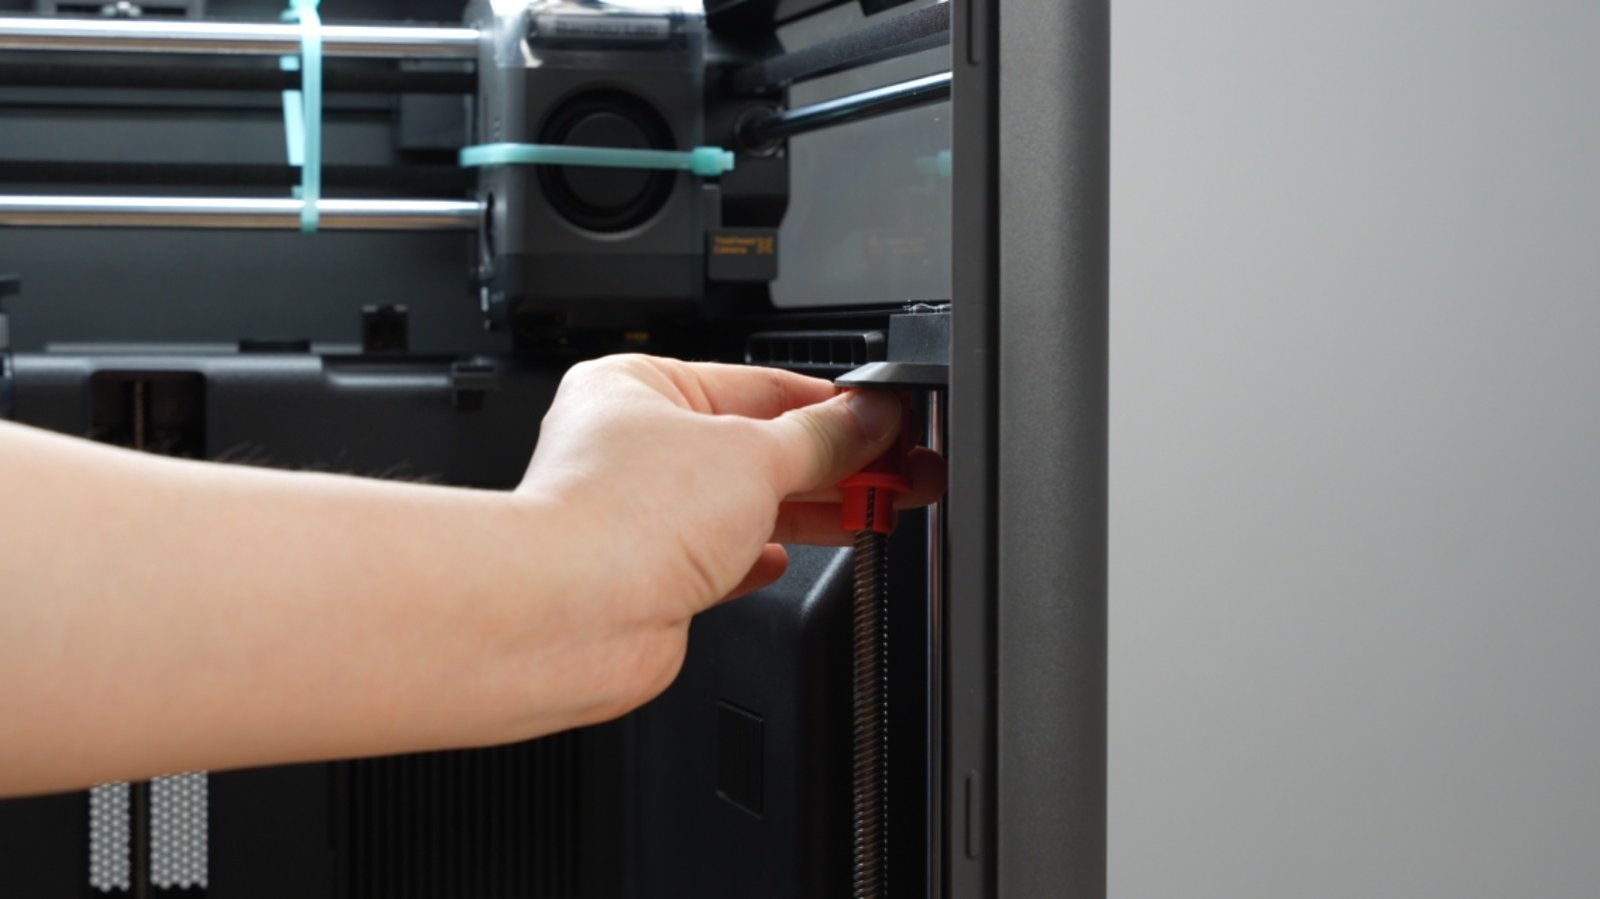 |
-
Put the desiccant back inside.

-
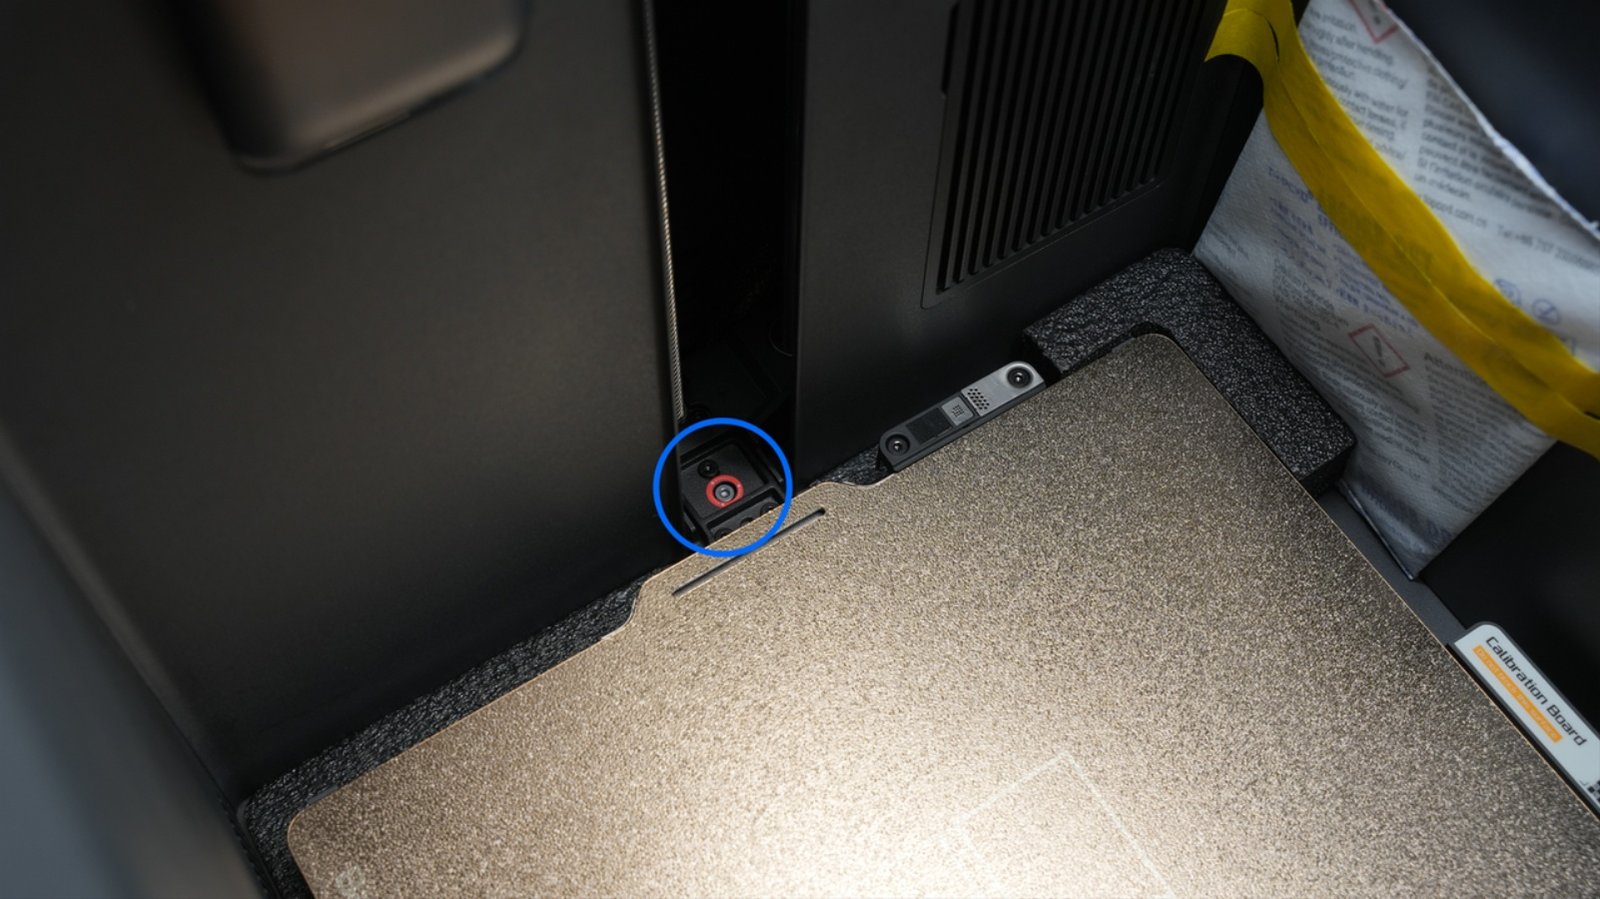
Tighten one screw to secure the heatbed.
8. Secure AMS
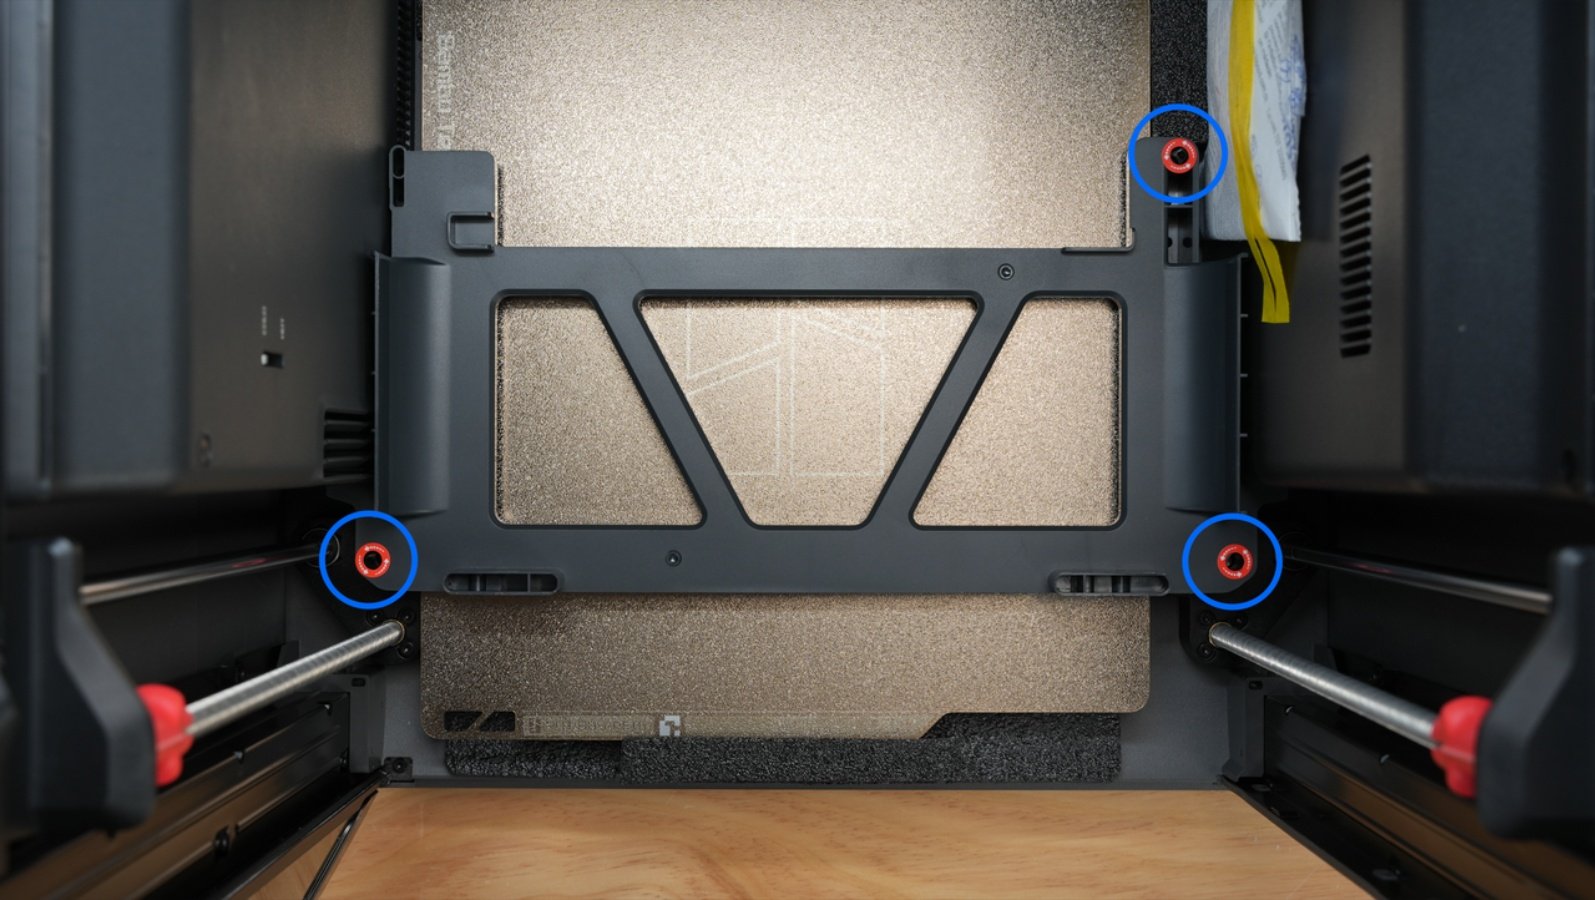
- Put back the AMS 2 Pro transport fixture, and tighten three screws.
 |
 |
- Put back the foam on the inner chamber wall.
 |
 |
- Align the slots and place the AMS on the bottom fixture. Make sure the top lid is pressed against the foam.

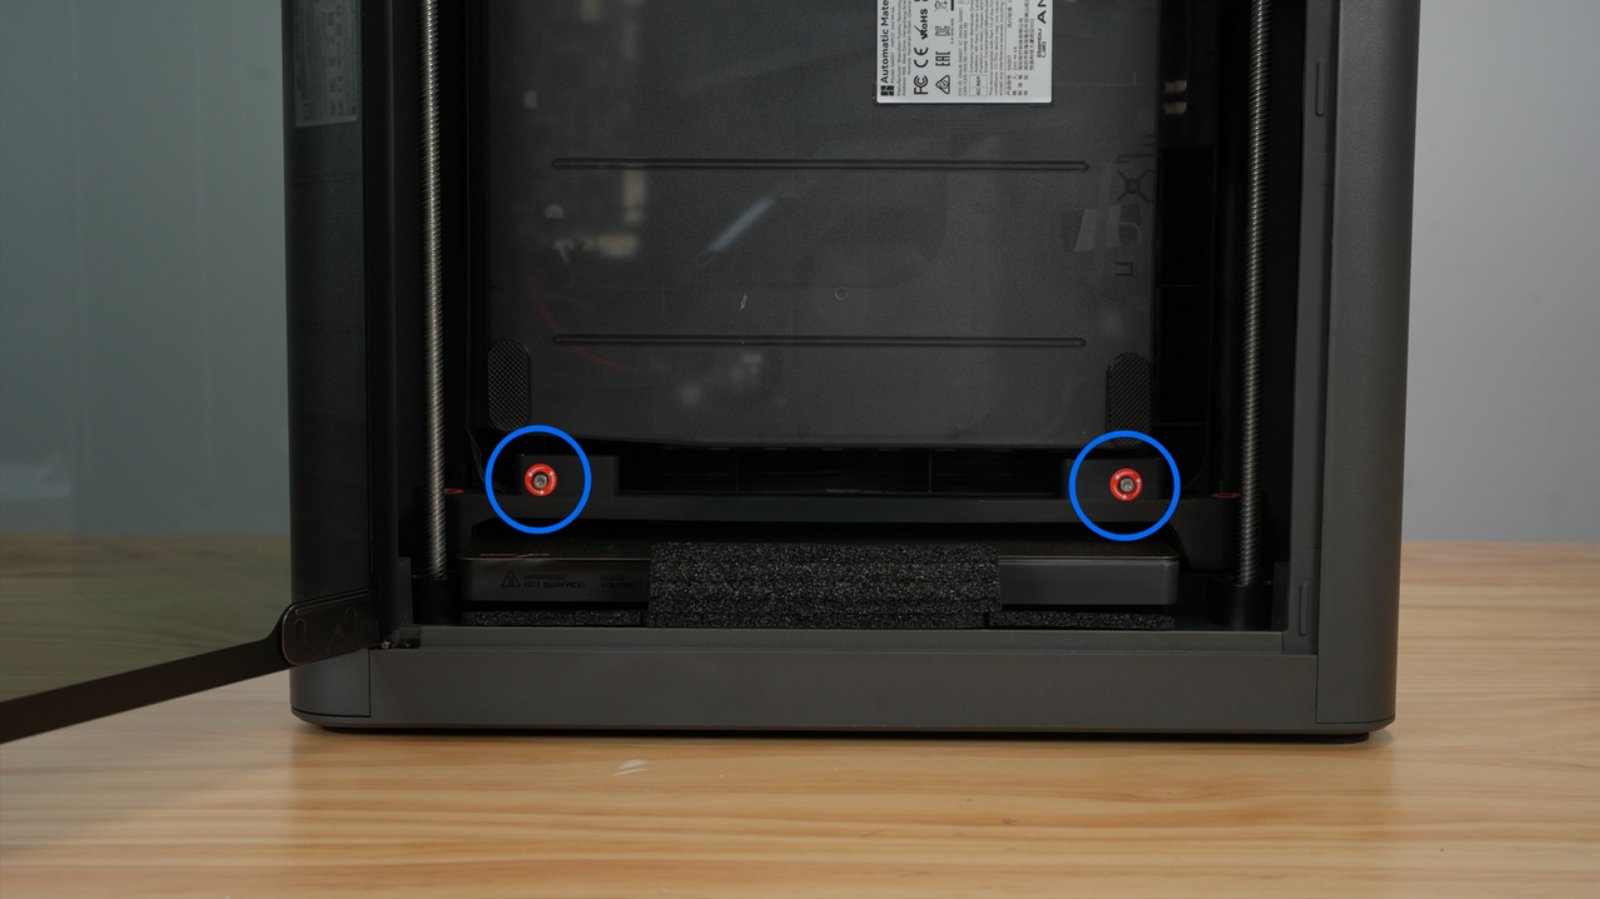
- Tighten the two screws.
- Put back all top foam pieces and the accessory box.
 |
 |
The packaging has been updated. Please place all foam pieces as shown in the image below.

9. Secure Printer and Pack
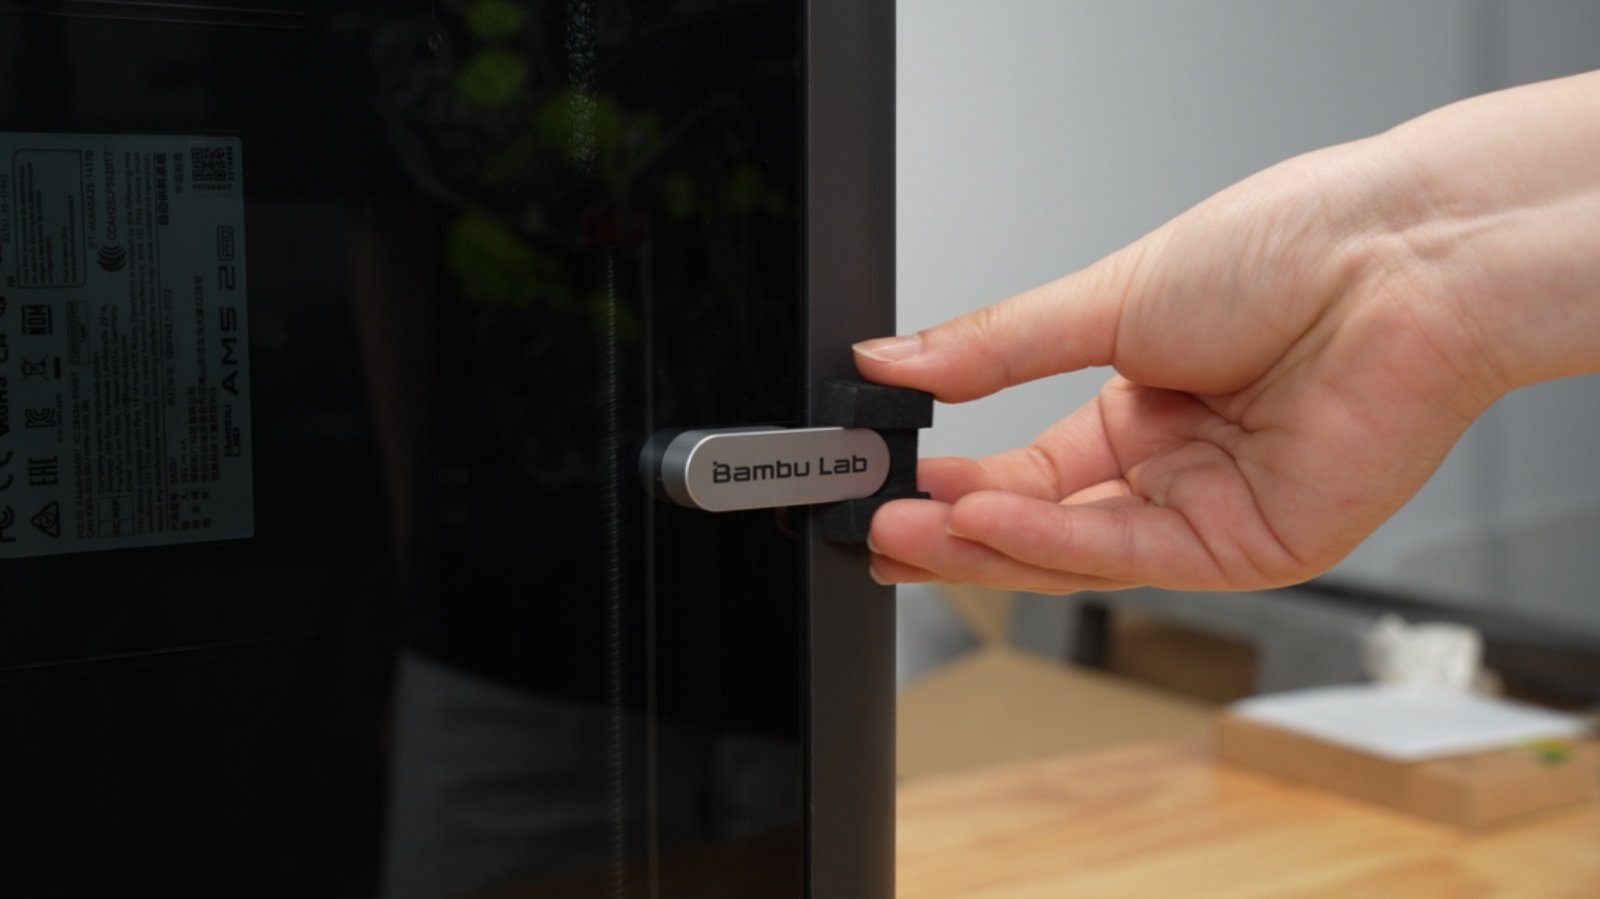
- Put back the handle foam, cover the front door with the protective bag and secure it with tape.
 |
 |
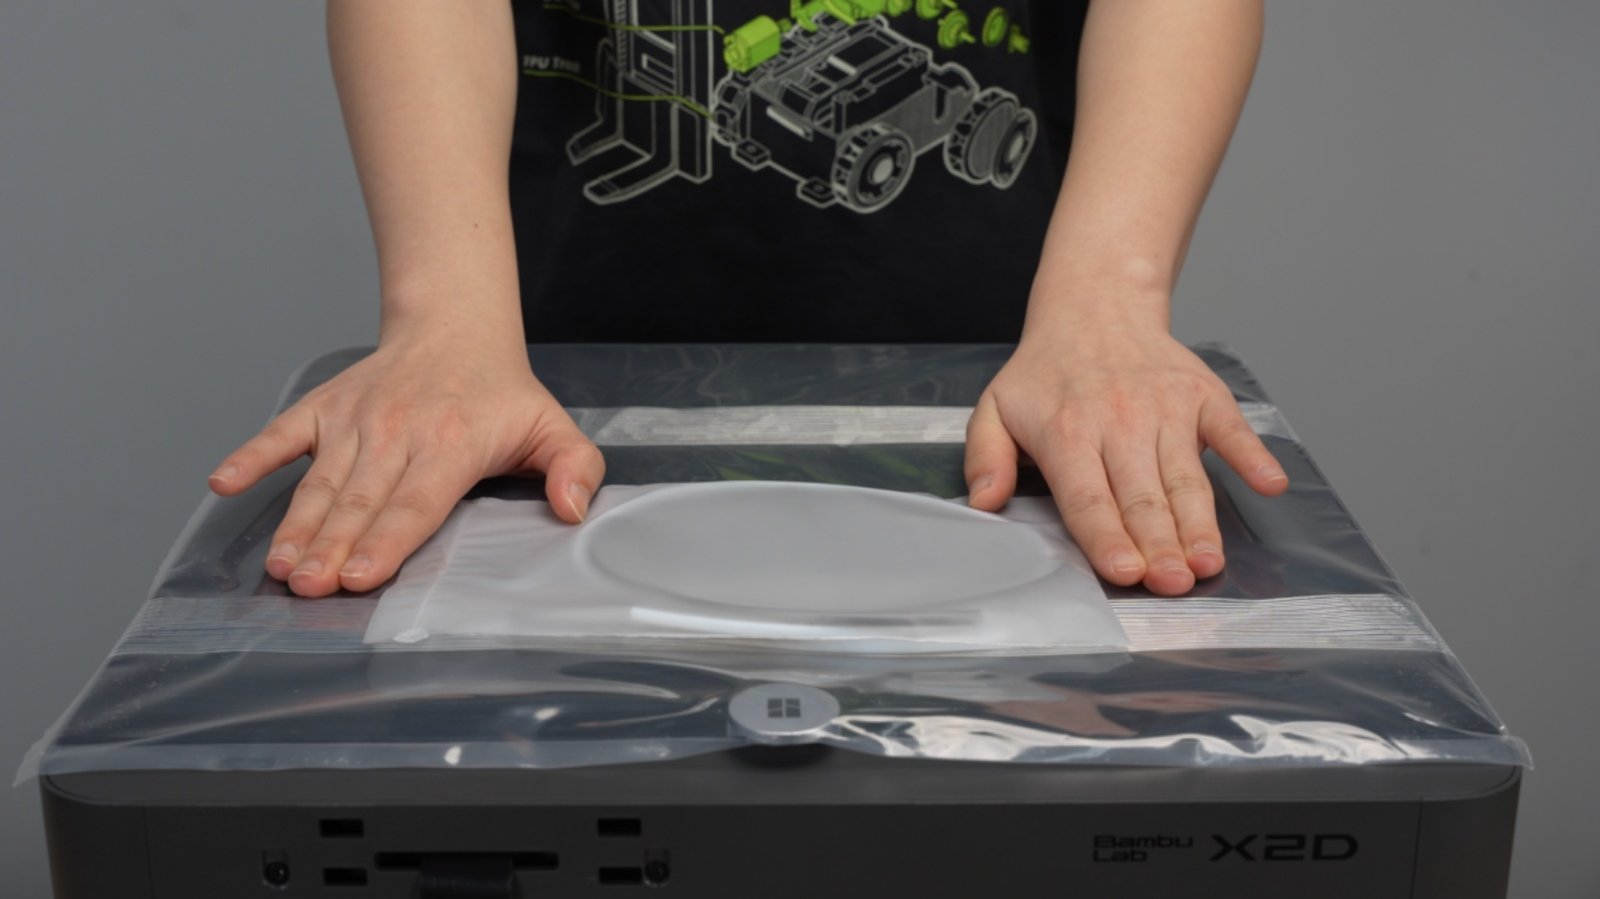
- Slip the protective bag over the top glass cover and secure it with tape.

- Tape the PTFE tube, and place the printer in the moisture-proof bag.
 |
 |
- Lift the printer into the outer box and place air cushions around it.
 |
 |
- Put back the top foam, cardboard, and toolbox.
 |
 |
- Seal the outer box with tape.

Notas Finais
We hope this guide has provided clear and practical support.
If the issue remains unresolved, please submit a support ticket and include your recent printer logs and additional pictures or other details. Our technical team will review your request and provide detailed assistance.
You can also visit Bambu AI, which can instantly answer common questions and provide you with operational guidance.


