
AP Board Cover/LED Light – Left Replacement Guide for the P2S/X2D
Bambu Lab X2D • Série Avançada X2
AP Board Cover/LED Light – Left Replacement Guide for the P2S/X2D
AP Board Cover/LED Light – Left
AP Board Cover:
A plastic cover installed on the left side of the printer to protect the AP board cover and its connecting cables.
Accessory package includes:
-
AP Board Cover* 1
-
LED lamp cover* 1
-
BT2x8 screw* 2

LED Light – Left:
An LED light strip mounted on the AP board cover to illuminate the printer chamber.
Accessory package includes: -
LED Light -Left* 1

When to Use This Guide
- AP Board Cover is damaged
- LED Light -Left is either not illuminating or damaged
Required Tools and Materials
- New AP Board Cover/LED Light – Left
- H1.5 Allen key
- Tweezers
Aviso de Segurança
IMPORTANT!
Always power off and disconnect power on the printer before performing maintenance work. Not doing so means there is a risk of electric shock, short circuit, and damage to the printer or surrounding area.
When a maintenance task necessitates the printer being powered on, use insulated gloves for safety and pay special care not to pinch, damage, or put pressure on any exposed wires, connectors, or circuit boards. Additionally, the nozzle can be extremely hot so never touch it with exposed skin.
If you have any questions or concerns related to the above or the steps in this guide, please open a new ticket in our Support Page for assistance.
Removing the AP Board Cover
Passo 1: Remove the PTFE Tube Bracket
Refer to the instructions for Replacing the PTFE Tube Bracket to remove the PTFE tube bracket.

Passo 2: Unlock the AP Board Cover
Open the access end of the AP Board Cover and disconnect the LED Light – left cable from the AP board.
 |
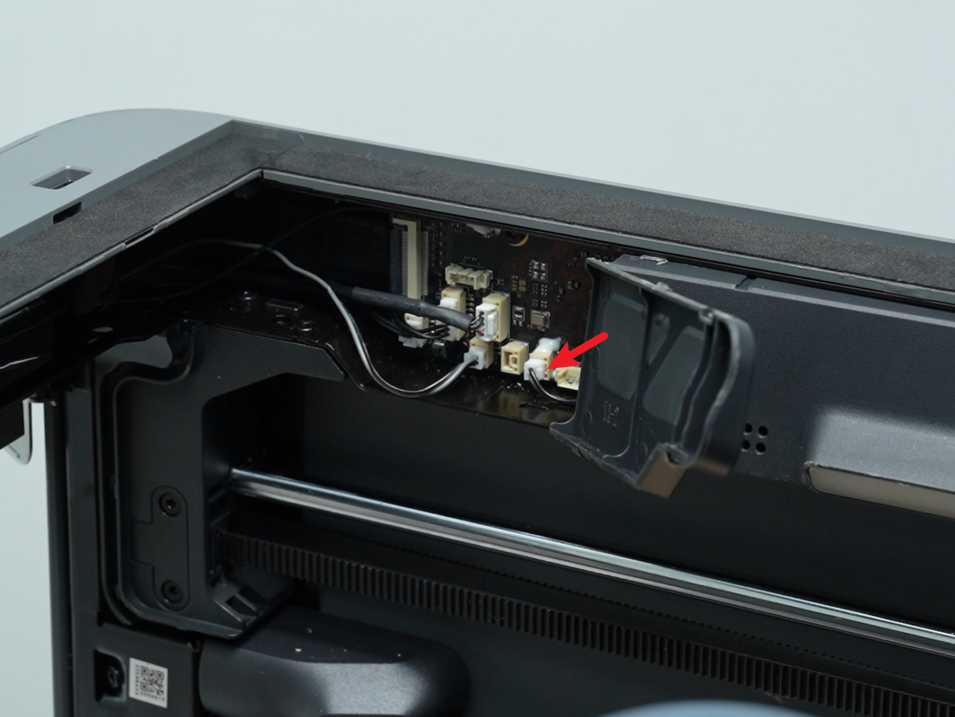 |
Use an H1.5 Allen key to remove the two AP board cover fixing screws (BT2x8).

Passo 3: Remove the AP Board Cover
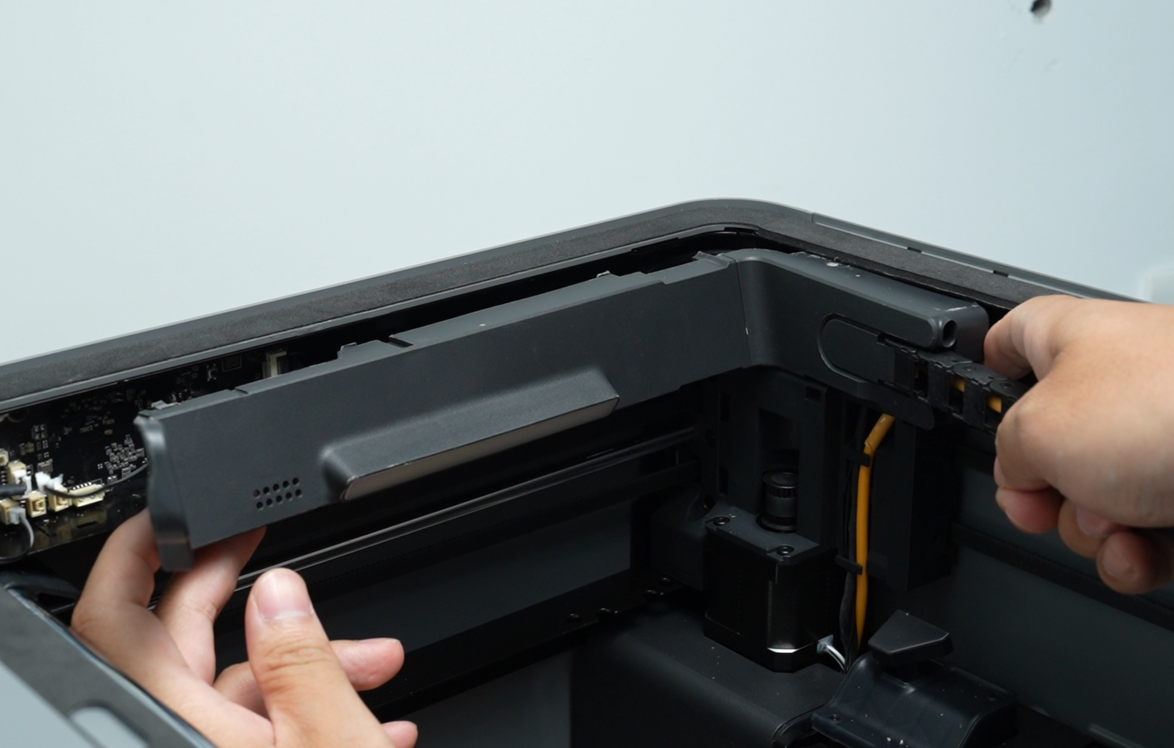
Hold the AP board cover connected to the cable chain and pull it to the right. Support the left side of the AP board cover with your left hand while pulling. As you pull out the right cable chain, continue holding the AP board cover with your left hand to prevent it from falling.
 |
 |
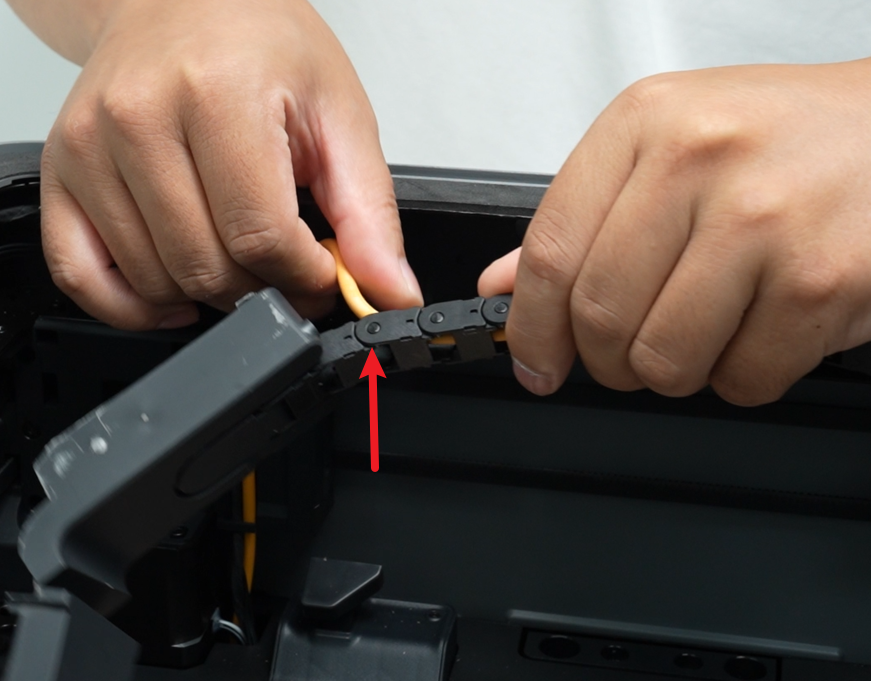
Starting from the AP board cover side, disconnect the cable chain at the second section, loosen the toolhead cable, and then remove the AP board cover.
Passo 4: Remove the LED Light – Left
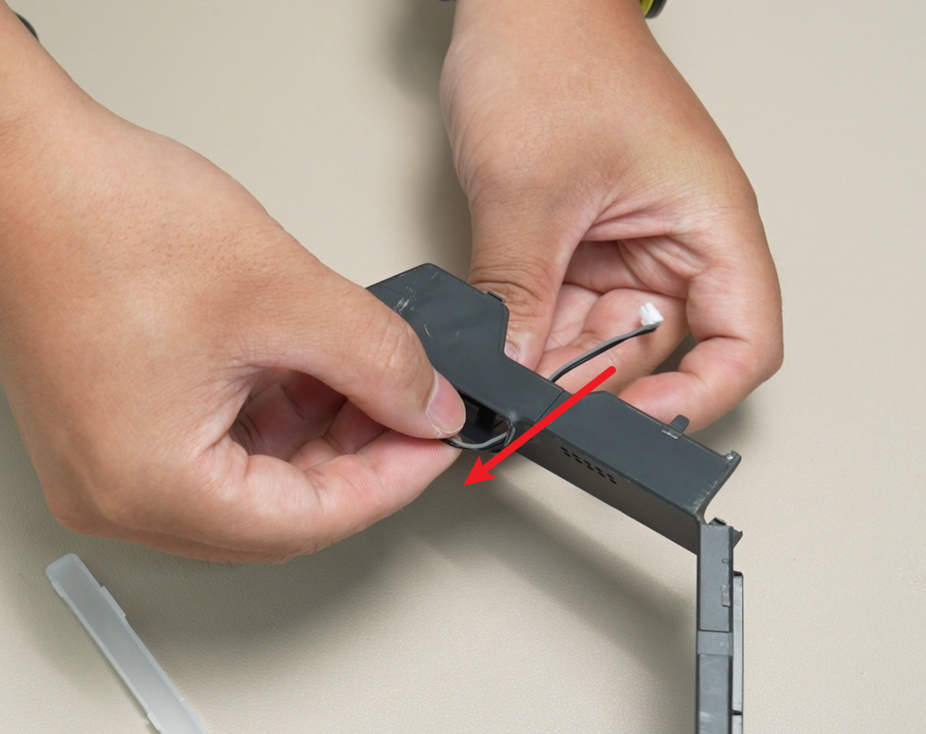
Use your hands to release the two buckles of the LED Light cover and remove the light cover from the AP Board Cover.
 |
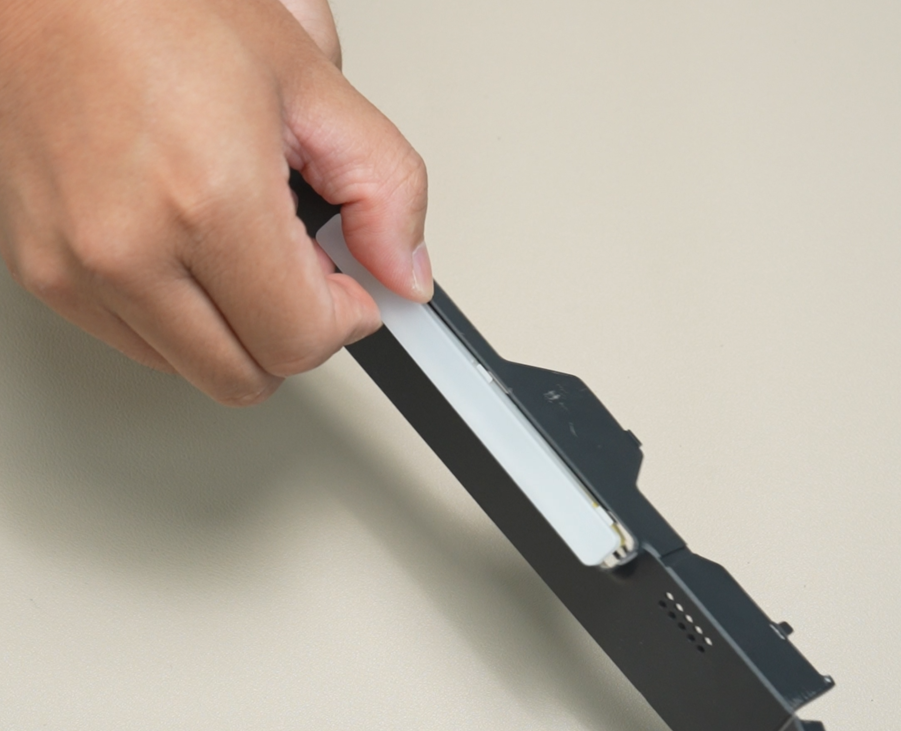 |
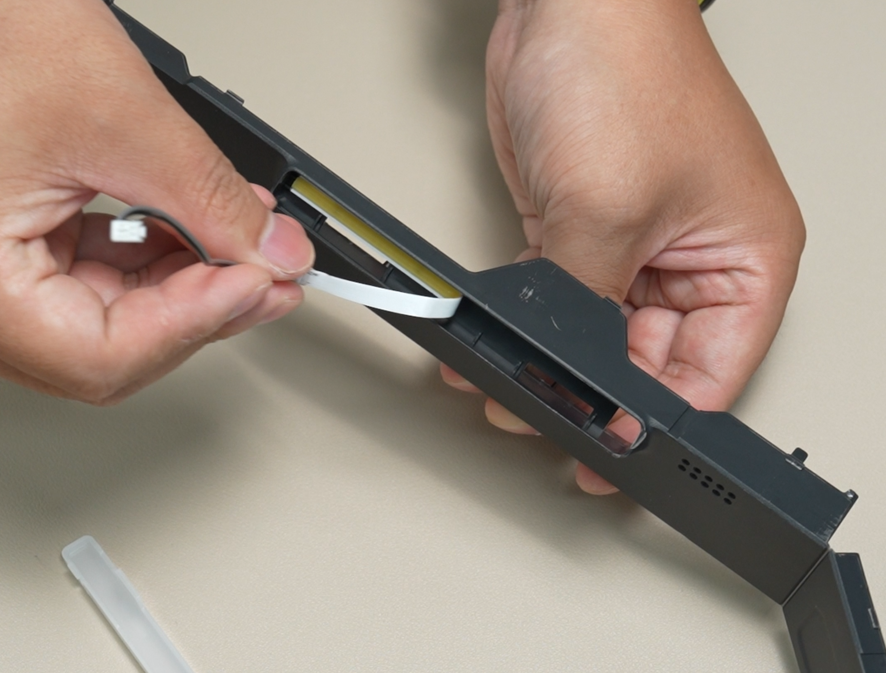
Loosen the connecting wires and remove the LED Light -Left from the AP board cover.
 |
 |
Installing the AP Board Cover
Passo 1: Install the LED Light – Left
Remove the adhesive backing from the new LED Light. Place half of the light strip into the slot, pass the cable through the AP Board Cover, and press the strip firmly to complete the installation.
 |
 |
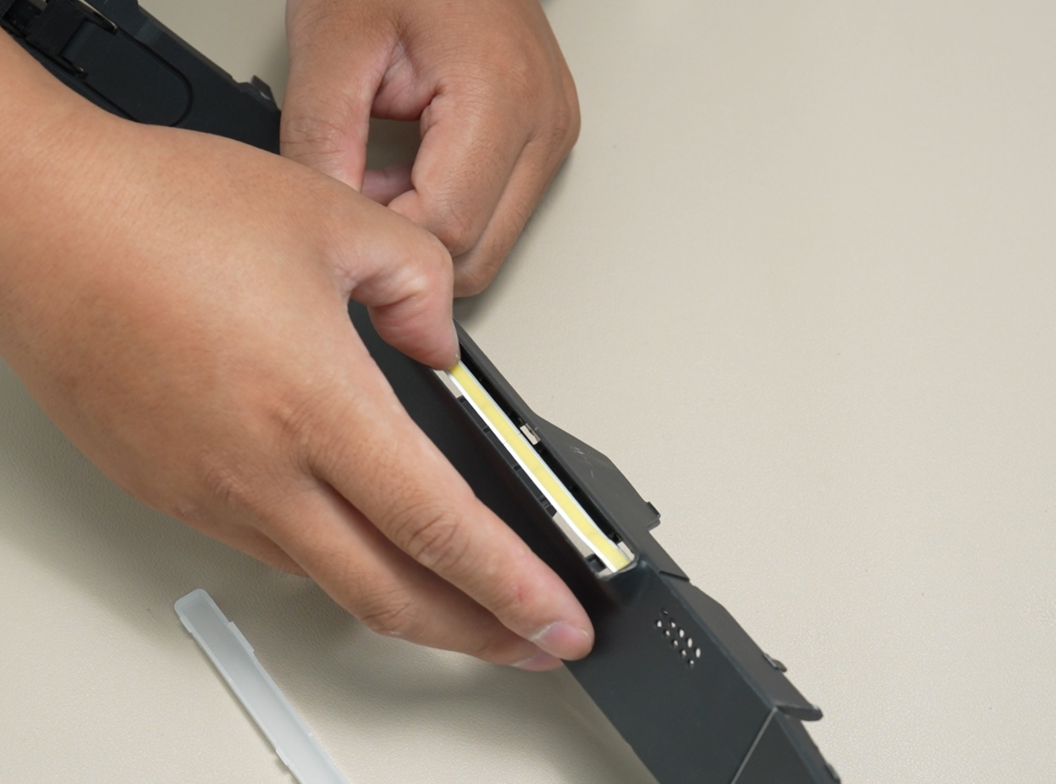
Install the LED light cover onto the AP board cover and ensure the buckles are fully fastened.
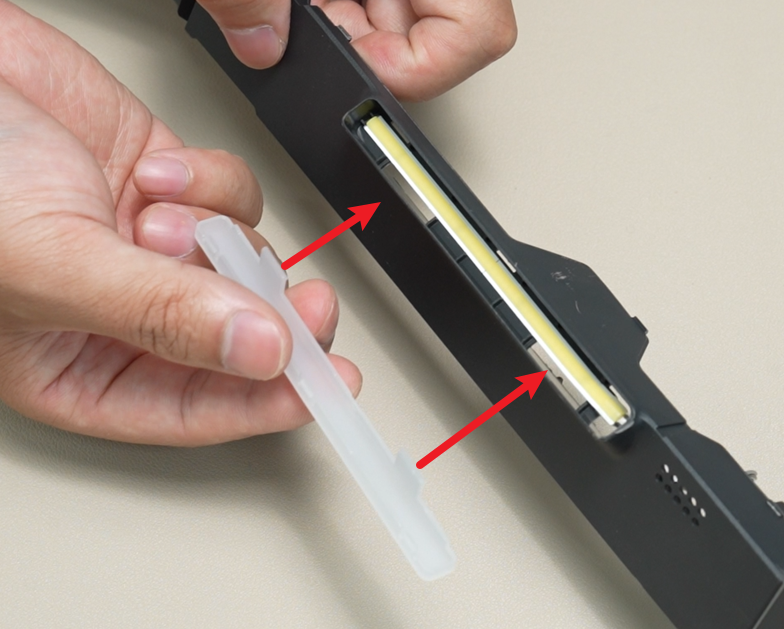
Passo 2: Install the AP Board Cover
Install the toolhead cable into the AP board cover and connect the cable chain.

Push the rear side of the AP board cover along the mounting slot until it is in place (use an Allen key to confirm that the screw holes are aligned). While pushing the AP board cover, hold the access end with your hand and secure the clip into the frame.
 |
 |
Connect the left cable of the LED Light to the AP board cover and close the inspection terminal.
|
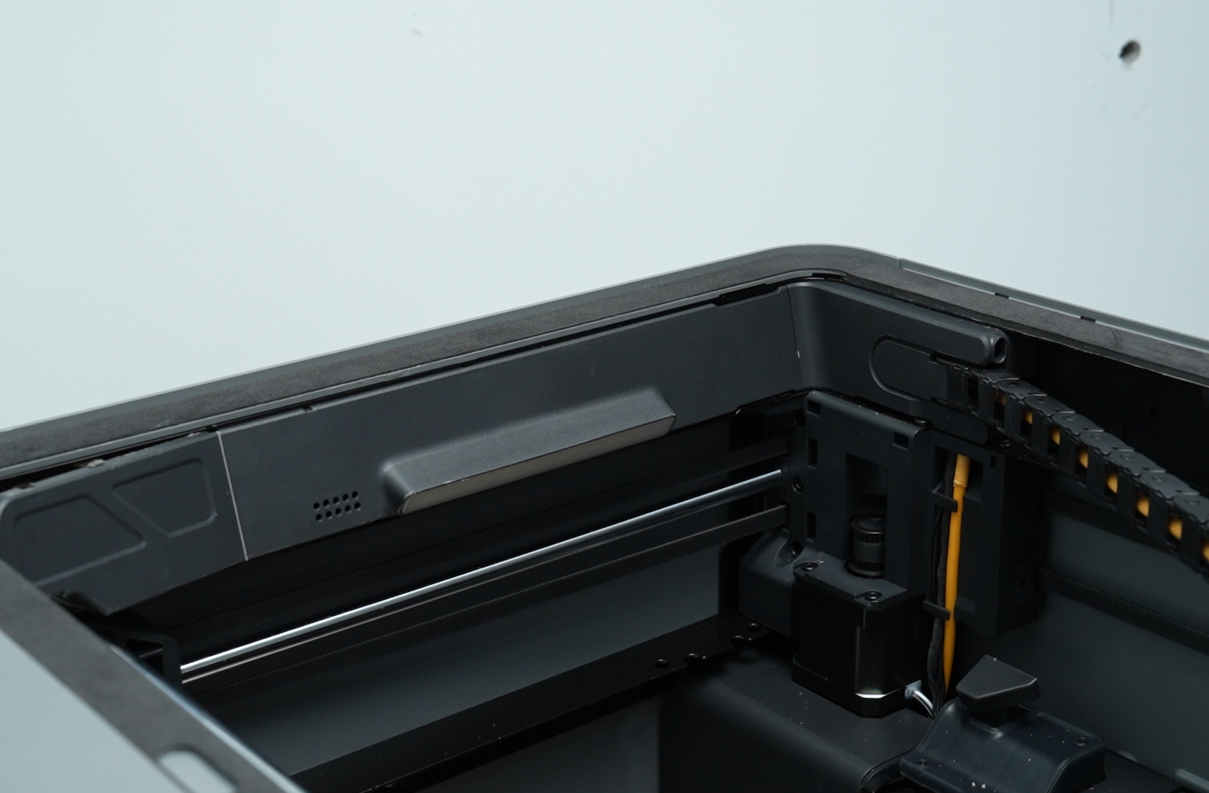 |
Use an H1.5 Allen key to tighten the two BT2x8 screws and secure the AP board cover.
Passo 3: Install the PTFE Tube Bracket
Please refer to the instructions for Replacing the PTFE Tube Bracket and reinstall the PTFE tube bracket.
Verifying Functionality
Connect the power cord, turn on the printer, and toggle the LED light on and off from the screen to confirm it functions properly.
If you encounter any issues, retrace your steps and ensure that the LED Light – Left cable is securely connected, then test it again. If the problem persists, contact the Bambu Lab technical support team for further assistance.
Notas Finais
We hope this guide has provided clear and practical support.
If the issue remains unresolved, please submit a support ticket and include your recent printer logs and additional pictures or other details. Our technical team will review your request and provide detailed assistance.
You can also visit Bambu AI, which can instantly answer common questions and provide you with operational guidance.


