
WiFi Antenna Replacement Guide for the P2S/X2D
Bambu Lab X2D • Série Avançada X2
WiFi Antenna Replacement Guide for the P2S/X2D
WiFi Antenna
The WiFi antenna is an electronic component that provides wireless signal reception. On the P2S printer, it is installed on the inside of the front cover and connected to the AP board.
When to Use This Guide
- Damage to the wifi antenna cable or connector
- An unstable or weak wifi signal (which was confirmed through analysis of logs by the Bambu Lab customer service team)
Required Tools and Materials
- New WiFi antenna
- H2.0 hex wrench
WiFi antennas are best tested before disassembly. It’s recommended to connect them directly to the AP board first to verify they work, and only proceed with removing or replacing them once you’ve confirmed the issue can be resolved.
Aviso de Segurança
IMPORTANT!
Always power off and disconnect power on the printer before performing maintenance work. Not doing so means there is a risk of electric shock, short circuit, and damage to the printer or surrounding area.
When a maintenance task necessitates the printer being powered on, use insulated gloves for safety and pay special care not to pinch, damage, or put pressure on any exposed wires, connectors, or circuit boards. Additionally, the nozzle can be extremely hot so never touch it with exposed skin.
If you have any questions or concerns related to the above or the steps in this guide, please open a new ticket in our Support Page for assistance.
Removing the Old WiFi Antenna
Passo 1: Remove the Screen
Refer to the instructions for replacing the screen to remove the screen.

Loosen the black tape that secures the screen cable.
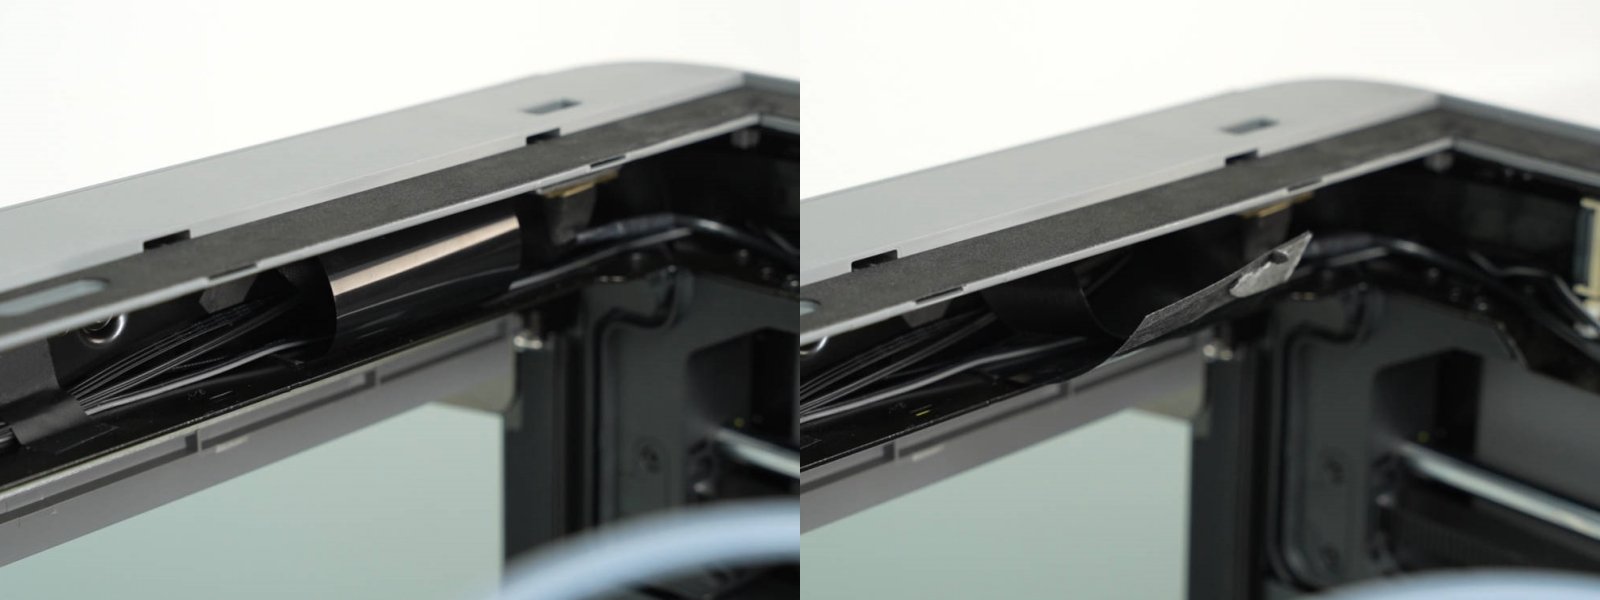
Next, pass the screen cable through the square hole.

Passo 2: Disconnect the Wi-Fi Antenna and LED Light – Front
Open the AP board cover.

Remove the front cover LED light bar and Wi-Fi antenna connector from the AP board. Use tweezers to clear the silicone from the socket to make it easier to remove the connector.

Passo 3: Remove the Front Cover
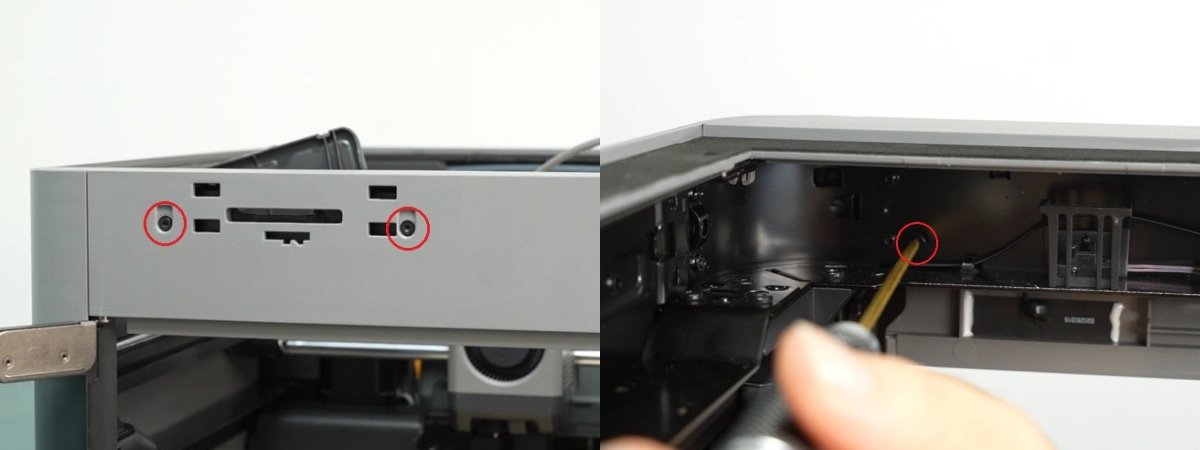
Remove the two screws securing the front cover and the single screw securing the back of the front cover using an H2.0 Allen key.

Push the sides of the front cover slightly upward to release the latches, then loosen the entire front cover from the frame.

Unthread the Wi-Fi antenna cable from the hole in the frame and remove the front cover.

Passo 4: Remove the Wi-Fi Antenna
Peel the Wi-Fi antenna off the front cover.

Installing the New Wi-Fi Antenna
Passo 1: Install the Wi-Fi Antenna
Remove the backing adhesive from the Wi-Fi antenna and stick it onto the front cover as shown below.
Passo 2: Install the Front Cover
Route the LED light bar and Wi-Fi antenna cables through the small hole in the frame.

Install the front cover onto the printer, ensuring that the raised sections on both sides fit into the grooves of the left and right panels. Then, press down on both sides of the front cover simultaneously to lock the clips into place.
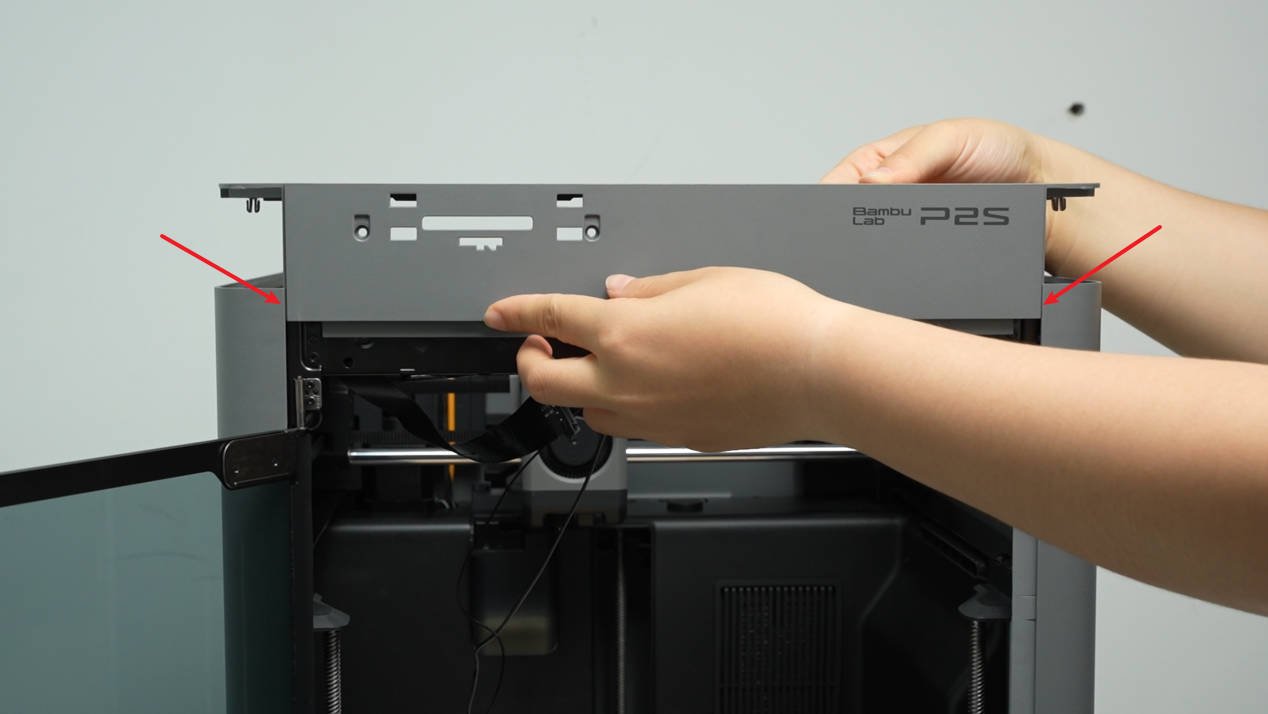
Secure the front cover with two screws at the front and one screw at the back using an H2.0 Allen key.
Passo 3: Connect Wi-Fi Antenna and LED Light – Front
Connect the cable connectors of the LED Light and Wi-Fi antenna to the AP board, cover the AP board cover, and then secure the cables with acetate tape on the frame.

Passo 4: Install the Screen
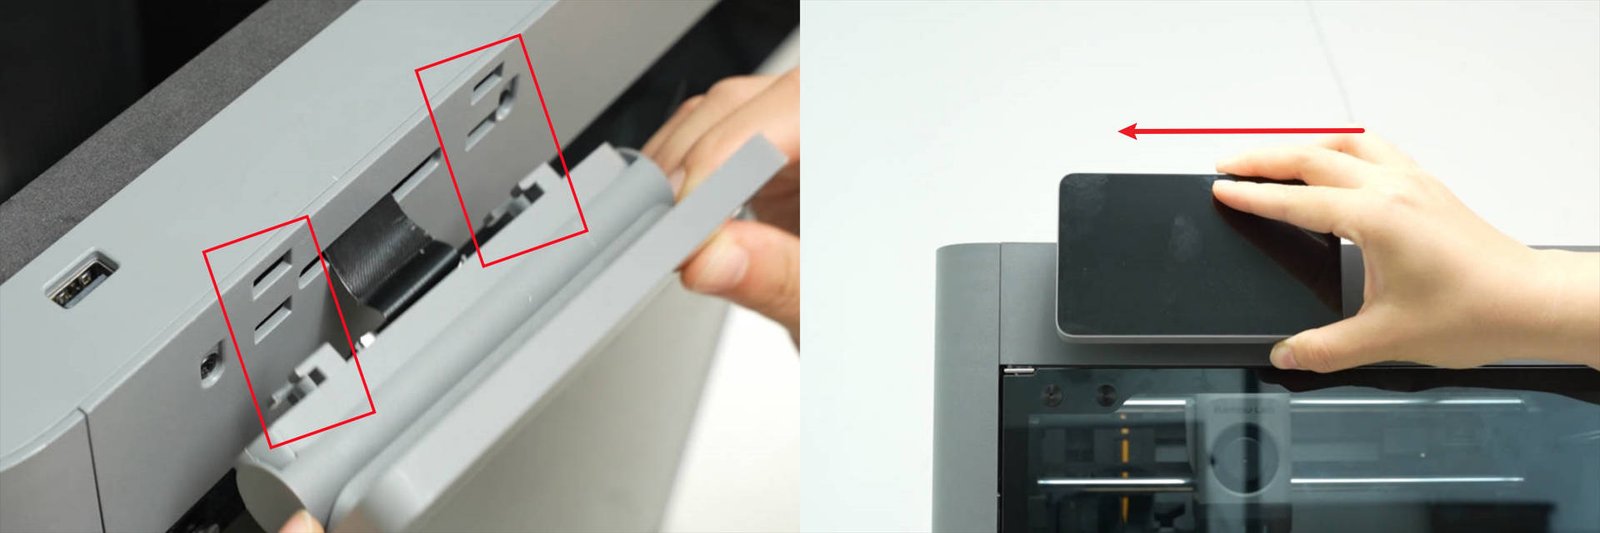
Pass the screen cable through the square hole and apply the black tape to secure it.

Install the screen by referring to the instructions for replacing the screen.
Verifying Success
Connect the printer’s power and turn on the printer. Check that the printer can connect to either Bambu Handy or Bambu Studio via the wifi connection.
Notas Finais
We hope this guide has provided clear and practical support.
If the issue remains unresolved, please submit a support ticket and include your recent printer logs and additional pictures or other details. Our technical team will review your request and provide detailed assistance.
You can also visit Bambu AI, which can instantly answer common questions and provide you with operational guidance.


