
Printer Circuit Failure Troubleshooting – X2D
Bambu Lab X2D • Série Avançada X2
Printer Circuit Failure Troubleshooting – X2D
When to Use
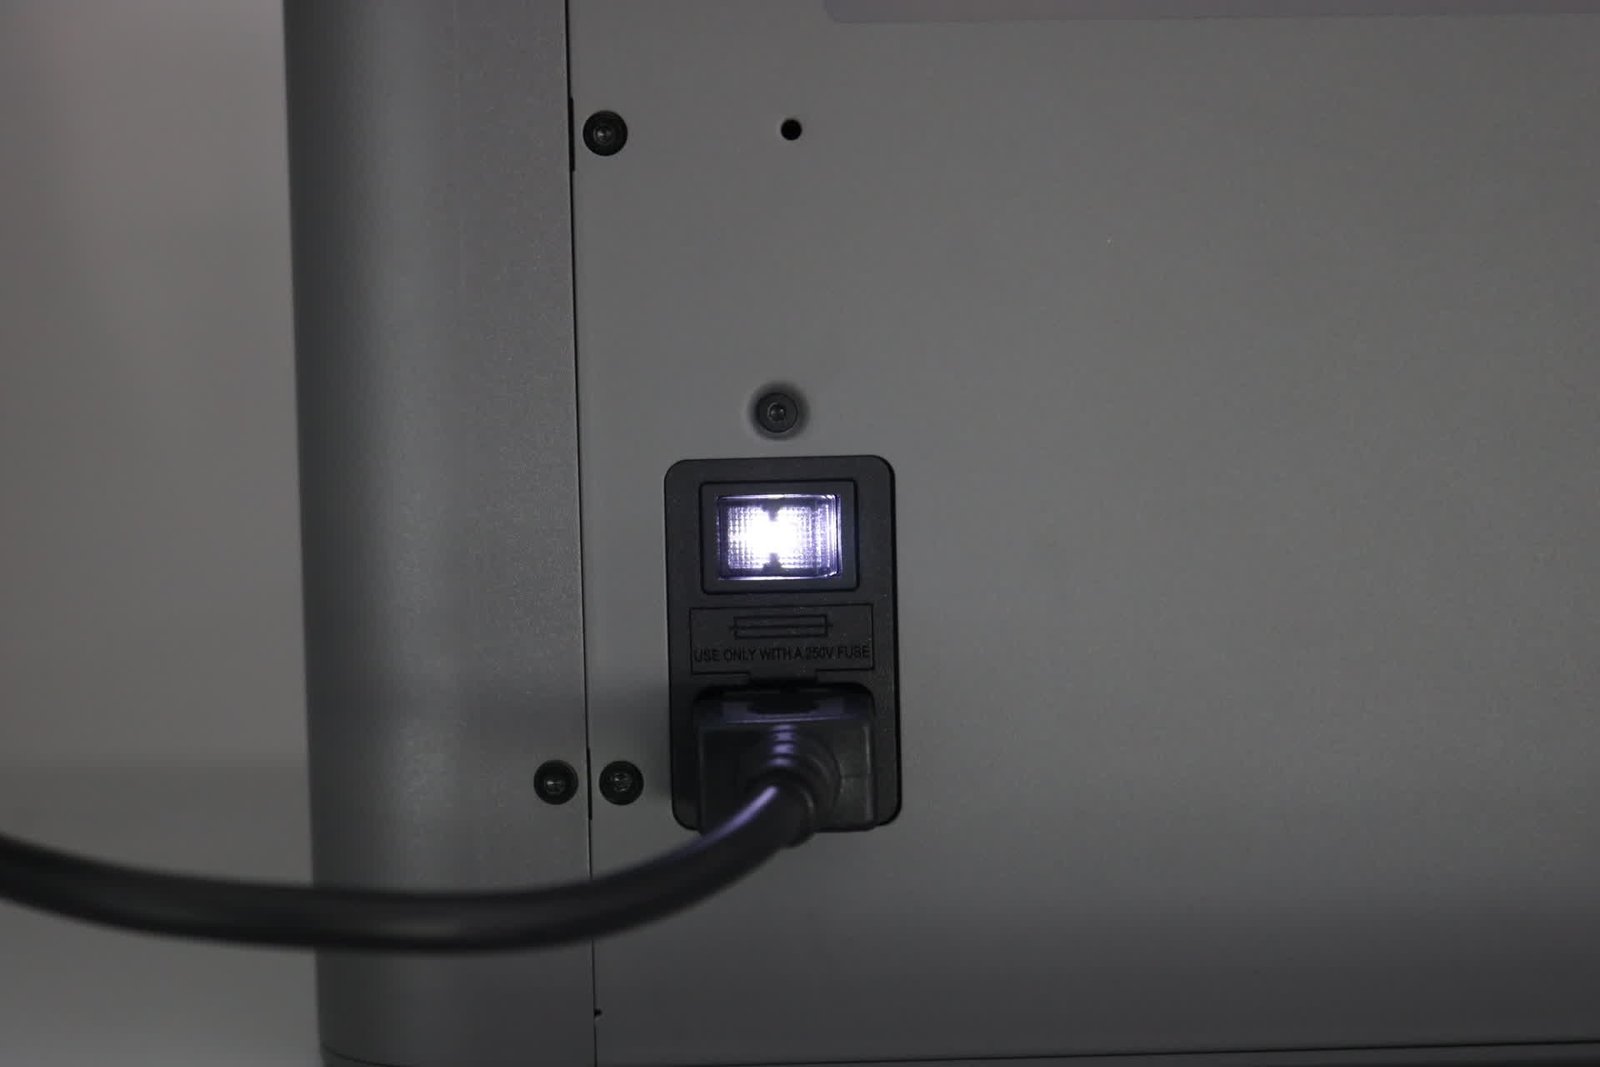
When the white indicator light on the power switch fails to illuminate after the device is powered on, or when the white indicator light on the switch lights up normally, but the screen and full light do not work.
Required Tools
- Hex key
- Phillips screwdriver
- Multimeter (optional)
Troubleshooting Notes
During troubleshooting, observe the status of indicator lights on various parts of the printer. By observing the blinking patterns of the printer’s status indicator lights, you can quickly identify the printer’s current working state, providing intuitive feedback without needing to check the screen. During the troubleshooting process, whether the mainboard is normal is determined by whether the indicator light pattern belongs to a normal state.
Before performing any maintenance work on the printer and its electronic components (including the toolhead cable), turn off the printer power and disconnect the power supply to avoid accidental screen touches or circuit shorts that could cause additional electronic component damage and safety hazards.
When observing indicator light patterns, components on the mainboard will be exposed. Do not directly touch the components or plug/unplug any connectors while the power is on.
Symptom 1: Switch Light Off
The phenomenon of the white indicator light failing to illuminate may be caused by a power cord fault, switch fault, or a blown fuse inside the switch. Troubleshooting is needed to determine the cause.
Passo 1: Power Cord Fault
The printer’s power cord uses a standard plug. Please use a power cord of the same type for a power-on test. Power on and observe if the white indicator light illuminates. If the indicator light returns to normal, it indicates a power cord fault, and a new power cord needs to be replaced.
Passo 2: Blown Fuse or Switch Fault
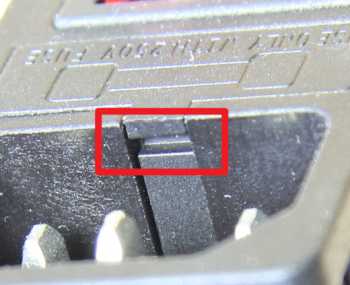
The switch contains an internal fuse. You can use tweezers to pry out the fuse holder. Since some fuse casings are opaque, making it impossible to directly observe the fuse element’s state, you can use a multimeter or other methods for detection.
 |
 |
|---|
Method 1:
Set the multimeter to the continuity test (buzzer) mode (or resistance mode). Touch the probes to the metal caps at both ends of the fuse: if there is a buzzer sound or the resistance value is close to 0 Ω, it indicates the fuse is normal; if there is no buzzer sound, it displays “OL” (open circuit), or the resistance value is very high, it means the fuse has blown, and a new switch socket needs to be replaced. You can refer to How to Use a Multimeter to Check if a Circuit is Normal to understand the basic usage of a multimeter.
If you don’t have a multimeter for measurement, you can try the method 2.
Method 2:
If your phone supports multi-touch, then the screen type is “capacitive screen.” You can pinch one end of the fuse with your fingers and touch the other end to your phone screen, observing if the screen can be clicked. If it can, then the fuse is normal.

If the fuse is blown, it is necessary to replace the new power switch socket, and refer to this Wiki to check if there are any burn marks on the AC board’s appearance and whether the power supply wires are in contact with each other causing a short circuit.
Scenario 2: Power Switch Illuminated
The white indicator light is on normally, indicating that the fuse, power cord, and power switch are all functioning correctly. The device’s inability to work may be due to a power supply module failure or a mainboard abnormality. You can refer to the Status Indicator to determine the working state of each module.
1. Troubleshoot the Power Supply Module
Refer to Replacing the X2D Rear Panel to pre-remove the printer’s rear panel. After completion, plug in the power cord and turn on the printer. Observe whether the LED light on the power supply module lights up normally.
If the LED is off, please power off the printer and reconnect the power supply cable shown in the image below. If the LED still fails to light up after restarting, a new power supply module needs to be replaced. All the above steps can be referred to in Replacing the Power Supply Module.

If the LED is solidly lit or flashing, it indicates the power supply module is working normally. Please proceed to the next steps.
2. Troubleshoot the MC Board Module
MC board indicator light
The MC board indicator light stays solidly lit (top) and flashes slowly (bottom).
Please refer to Replacing the X2D Rear Panel to remove the printer’s rear panel and observe the MC board indicator light.

MC Board Indicator Light Normal
Please proceed to check the working status of the AP board and TH board.
MC Board Indicator Light Abnormal
Please power off the printer, disconnect the MC-AP communication cable (No. 1) and power cable (No. 2), then power on and observe if the MC board indicator light remains abnormal.
MC board returns to normal: This indicates the fault lies with the AP board or TH board. Please power off, install the MC-AP communication cable (No. 1) and power cable (No. 2), and proceed with further troubleshooting.

| No. | Interface Description | No. | Interface Description | No. | Interface Description | No. | Interface Description |
|---|---|---|---|---|---|---|---|
| 1 | AP board (Com.) | 5 | Chamber temperature sensor | 9 | XY Motor (A) | 13 | Auxiliary extruder (Motor) |
| 2 | AP board (Power) | 6 | Chamber heater unit NTC | 10 | XY Motor (B) | 14 | Z-Axis Motor |
| 3 | Adaptive airflow switching unit | 7 | Chamber heater unit | 11 | Power Supply | 15 | AC board |
| 4 | Filament buffer | 8 | Heatbed (NTC) | 12 | Auxiliary extruder (com.) | 16 | MC Board Fan |
MC board Still Abnormal: This indicates a fault with the MC board itself or with a module connected to it. Please unplug all connectors except the MC power cable (No. 11), then power on the printer to see if the MC board returns to normal.
-
If it returns to normal, power off, then reinstall the unplugged connectors one by one, powering on each time to observe if the indicator light pattern becomes abnormal again. Once the specific faulty component is identified, replace it.
-
If it remains faulty, the MC board needs to be replaced. You can refer to this Wiki.
For cases where the MC board itself is damaged, if you can use a multimeter to check the fuse status, switch to the resistance measurement mode and check if the resistance value of the component shown in the image below is nearly 0Ω.
 |
 |
If the resistance is very high, it means the fuse on the MC board is blown. Please open the AP cover to also check if the insulation of the MC to AP Cable is crushed, and adjust the cable to avoid contact with the cover latches.
If you do not have a multimeter, we also recommend you additionally inspect the MC to AP Cable.
 |
 |
 |
 |
3. Troubleshooting the AP board Module
AP board indicator light
The AP board indicator light flashes rapidly (left) and stays solidly lit (right).
Open the AP board cover from the side near the front door, disconnect the left LED light, and observe the AP board indicator light.
|
|

AP board Indicator Normal
Please proceed to check the TH board’s working status.
AP board Indicator Abnormal
Power off the printer, then refer to Replacing the X2D AP board to disconnect all connectors on the AP board, keeping only connectors No. 8 and No. 9. Then power on and observe if the MC board indicator remains abnormal.

| No. | Interface Description | No. | Interface Description | No. | Interface Description | No. | Interface Description |
|---|---|---|---|---|---|---|---|
| 1 | Screen Cable | 4 | Live Camera | 7 | hotend LED indicator -left | 10 | Bambu USB-C cable |
| 2 | Wi-Fi Antenna | 5 | USB Port Module | 8 | MC board (Comm) | ||
| 3 | Door Detection Switch | 6 | front LED light | 9 | MC board (Power) |
-
AP board and MC board return to normal: This indicates the fault lies in one of the other unplugged connectors. First, reconnect the No. 10 cable, power on, and observe the MC/AP indicator lights. If the light code is abnormal, proceed to further troubleshoot the TH board module. If the light code is normal after powering on at this point, power off, then install the connectors for other components one by one in sequence, powering on each time to observe if the light code becomes abnormal again. Once the specific faulty component is identified, replace it.
-
AP board and MC board remain abnormal: This may indicate a fault with the MC to AP Cable. Unplug connectors No. 8 and No. 9 on the AP board, power on, and observe if the MC board returns to normal. If the MC board remains abnormal, then replace the MC to AP Cable. If it returns to normal, then replace the AP board.
Normal MC Board Status
The MC board indicator light stays solidly lit (top) and flashes slowly (bottom).
Please refer to Replacing the X2D Rear Panel to remove the printer’s rear panel and observe the MC board indicator light.
4. Troubleshooting the TH Board Module
TH board indicator light
The TH board indicator light flashes rapidly.
Please refer to Replacing the X2D Toolhead Housing to remove the toolhead rear cover and observe the TH board indicator light.

Procedure
Power off the machine, disconnect the connectors shown in the image below, then power on and observe if the MC/AP board indicator lights remain abnormal.

| No. | Interface Description | No. | Interface Description | No. | Interface Description |
|---|---|---|---|---|---|
| 1 | Hotend Heater Assembly Interface Board | 4 | Toolhead Camera | 7 | Left Hotend Fan Cable |
| 2 | Toolhead Interface Board | 5 | Auxiliary Hotend Fan Cable | ||
| 3 | Extruder Motor | 6 | Nozzle Wiper Assembly |
- MC/AP boards return to normal: This indicates the fault lies in one of the other unplugged connectors. Power off, then install the connectors for other components one by one, powering on each time to observe if the light code becomes abnormal again. Once the specific faulty component is identified, replace it.
- MC/AP boards remain abnormal: This may indicate a fault with the toolhead cable. Unplug the Bambu USB-C cable, power on, and observe the MC/AP board indicator lights. If the light code remains abnormal, then replace the X2D Bambu USB-C cable. If the light code returns to normal, then replace the TH board.
End Note
We hope this guide provides you with clear and practical assistance.
If the issue persists, please submit a Service Ticket and attach your recent printer logs, along with relevant photos or other detailed information. Our customer support team is ready to answer your questions and provide support.
You can also visit Bambu AI, which can instantly answer common questions and provide operational guidance.


